Author: Jordan

  • Ancient Grain Halloumi Salad

    Ancient Grain Halloumi Salad

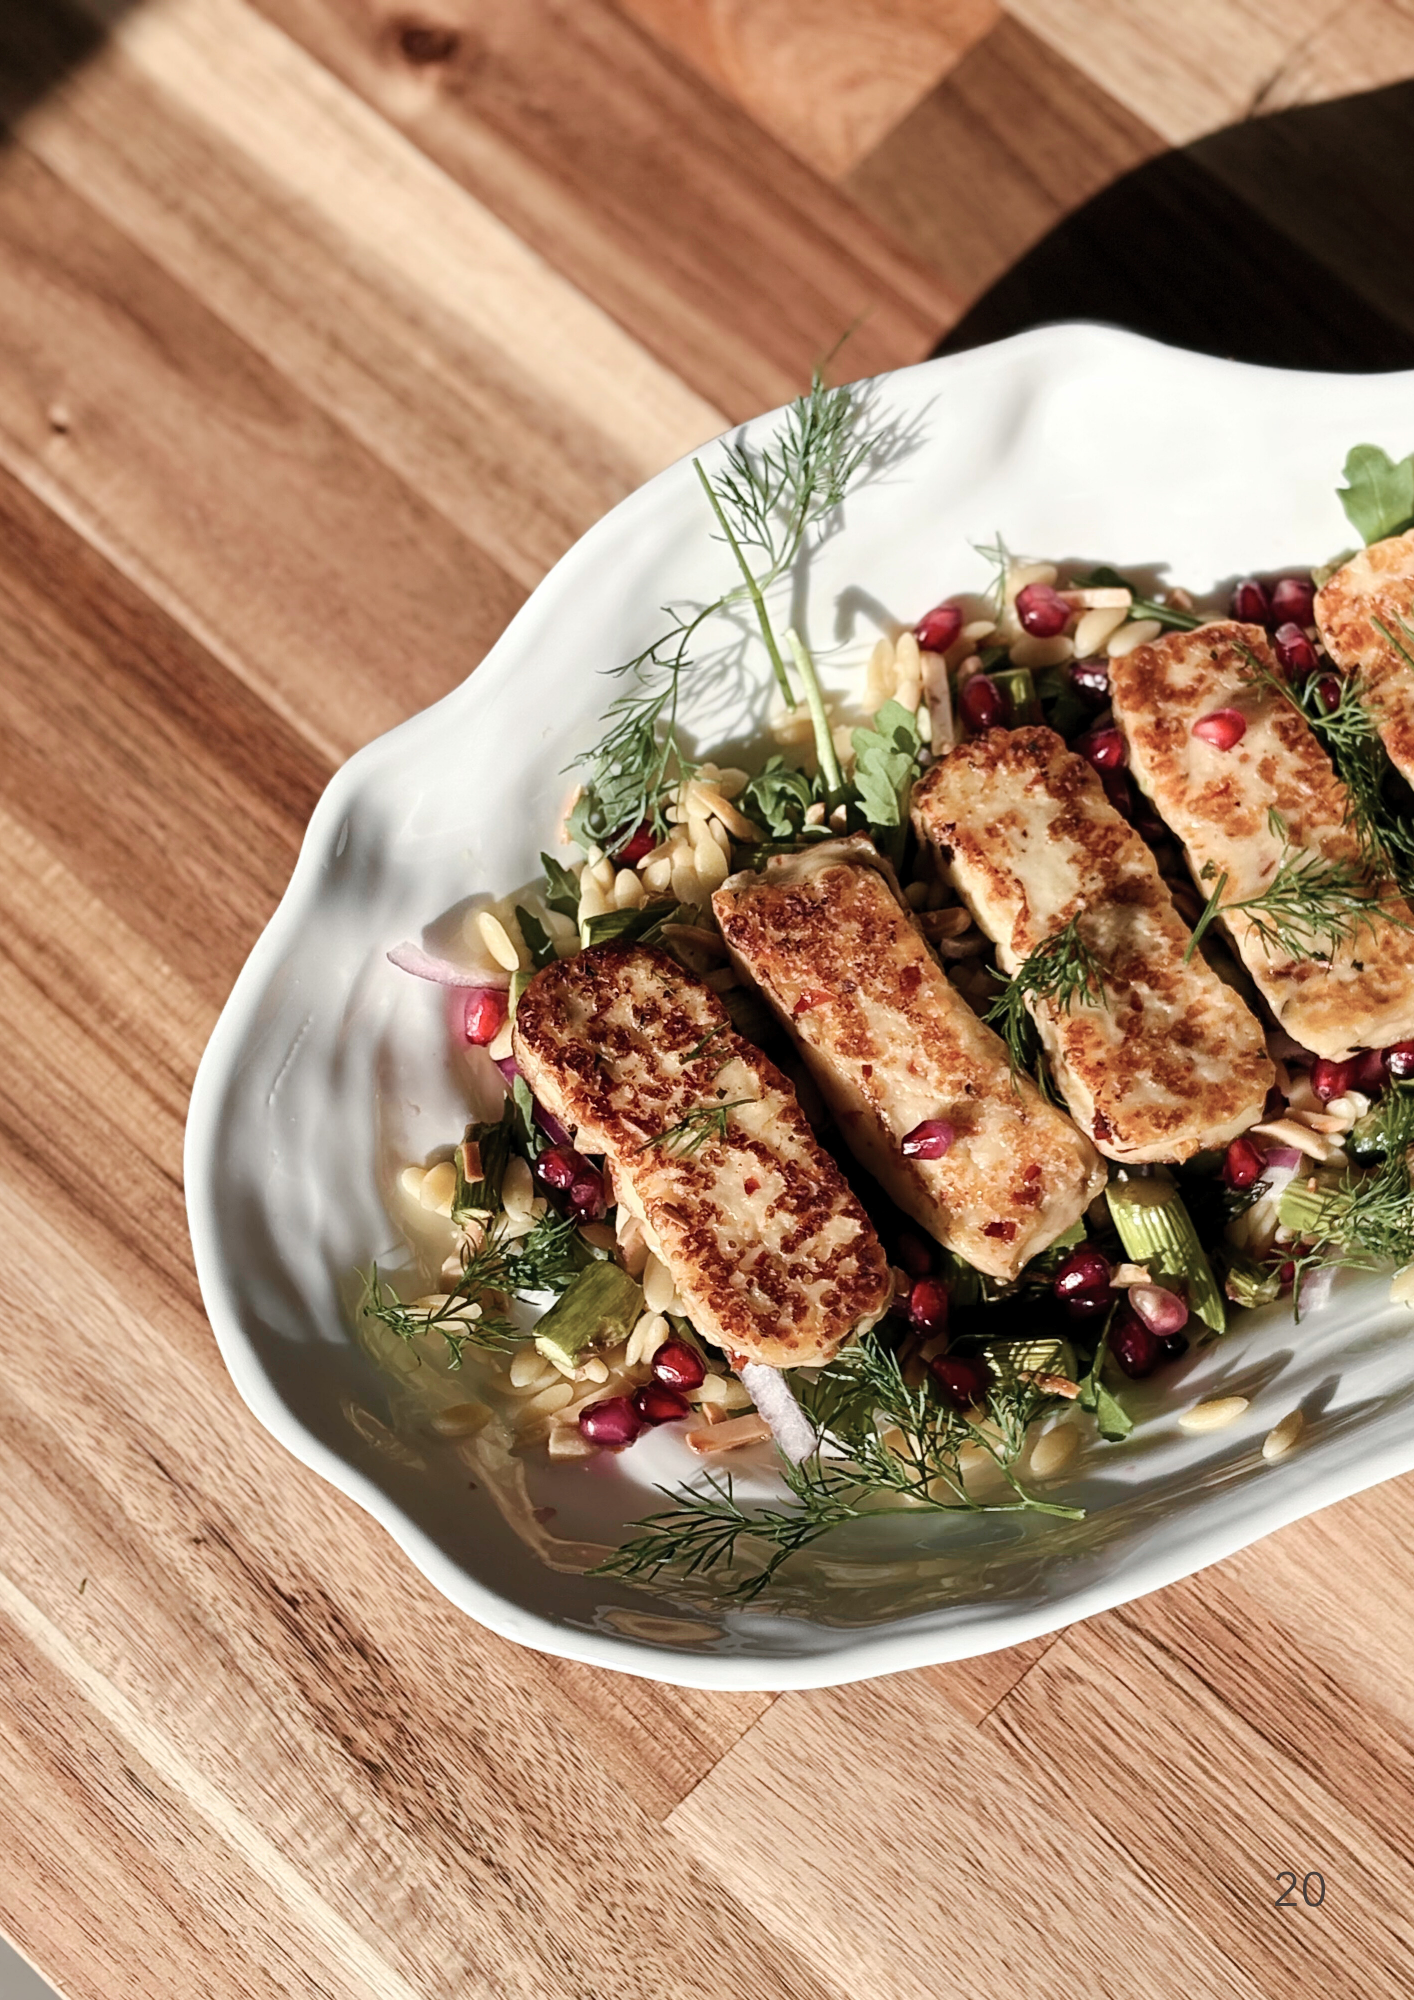
    A bright asparagus and risoni salad with golden halloumi, toasted almonds, fresh herbs, lemon, shallots and pomegranate — fresh, salty, crunchy and perfect as a colourful side or light lunch.

    Why This Ancient Grain Halloumi Salad Works

    This ancient grain halloumi salad works because every ingredient earns its place. Golden, salty seared halloumi contrasts with nutty risoni, crisp asparagus and toasted almonds, while pomegranate seeds add little bursts of sweetness and a lemony dressing ties it all together. It’s substantial enough for a light lunch on its own, yet colourful and quick enough to serve as a stand-out side dish.

    SERVES 4

    TIME: 15 MINUTES

    ~ 375 calories per serve

    ~ 18g protein per serve

    Ingredients

    1 bunch asparagus

    1 tbsp olive oil

    1 cup cooked risoni (orzo)

    Juice of half a lemon

    1 garlic clove, minced

    ¼ cup fresh parsley

    ¼ cup toasted almonds

    Fresh dill, to taste

    1–2 shallots, thinly sliced

    ¼ red onion, thinly sliced

    Pomegranate seeds

    180–200g halloumi, sliced

    ½ tbsp olive oil

    Optional: pinch of chilli flakes or ½ fresh red chilli

    Method

    Prepare the asparagus

    Toss the asparagus with 1 tbsp olive oil, salt.

    Grill or pan-fry over medium-high heat for 3-5 minutes or until visibly charred.

    Make the base salad

    In a large bowl, combine the cooked risoni, lemon juice, garlic, parsley, dill, shallots, and red onion.

    Add the chopped grilled asparagus and toasted almonds. Season lightly with salt and pepper.

    Cook the halloumi

    Pan-fry the halloumi slices and sprinkle with chilli flakes or fresh red chilli. Cook 1–2 minutes per side until golden and crispy.

    Assemble the salad

    Plate the risoni salad and top with halloumi.

    Drizzle with ½ tbsp olive oil and scatter over pomegranate seeds.
    You Might Also Like

    Tips for the Best Ancient Grain Halloumi Salad

    • Pat the halloumi dry before searing so it develops a deep golden crust instead of steaming.
    • Cook the risoni until just al dente, then rinse briefly in cold water so it doesn’t turn mushy in the salad.
    • Toast the almonds in a dry pan until fragrant for extra crunch and a deeper, nuttier flavour.
    • Dress the salad just before serving so the risoni and asparagus stay fresh rather than soggy.

    Storage and Make-Ahead Tips

    Store leftover ancient grain halloumi salad in an airtight container in the fridge for up to 2 days. Keep in mind that halloumi firms up when chilled, so let the salad sit at room temperature for 10-15 minutes before serving again. For the best texture, cook the risoni and toast the almonds ahead of time, then assemble the salad with freshly seared halloumi just before you plan to eat.

    Serving Suggestions

    This ancient grain halloumi salad is hearty enough to serve as a light lunch on its own, or pair it with grilled chicken or lamb for a more substantial dinner. If you love bright, herby salads like this one, our Panzanella Salad is another great option to add to your rotation. The jewel-like pomegranate seeds scattered through the salad add colour as well as little pops of tart sweetness in every bite. A scattering of extra fresh herbs and a final squeeze of lemon just before the table makes this ancient grain halloumi salad look and taste even more vibrant. It’s a wonderful dish to bring to a potluck or barbecue, since it holds up well at room temperature and travels easily without wilting. It also pairs beautifully with crusty bread and a glass of chilled white wine for an easy summer lunch outdoors. Leftovers make a great packed lunch the next day too. Enjoy it however suits your table best.
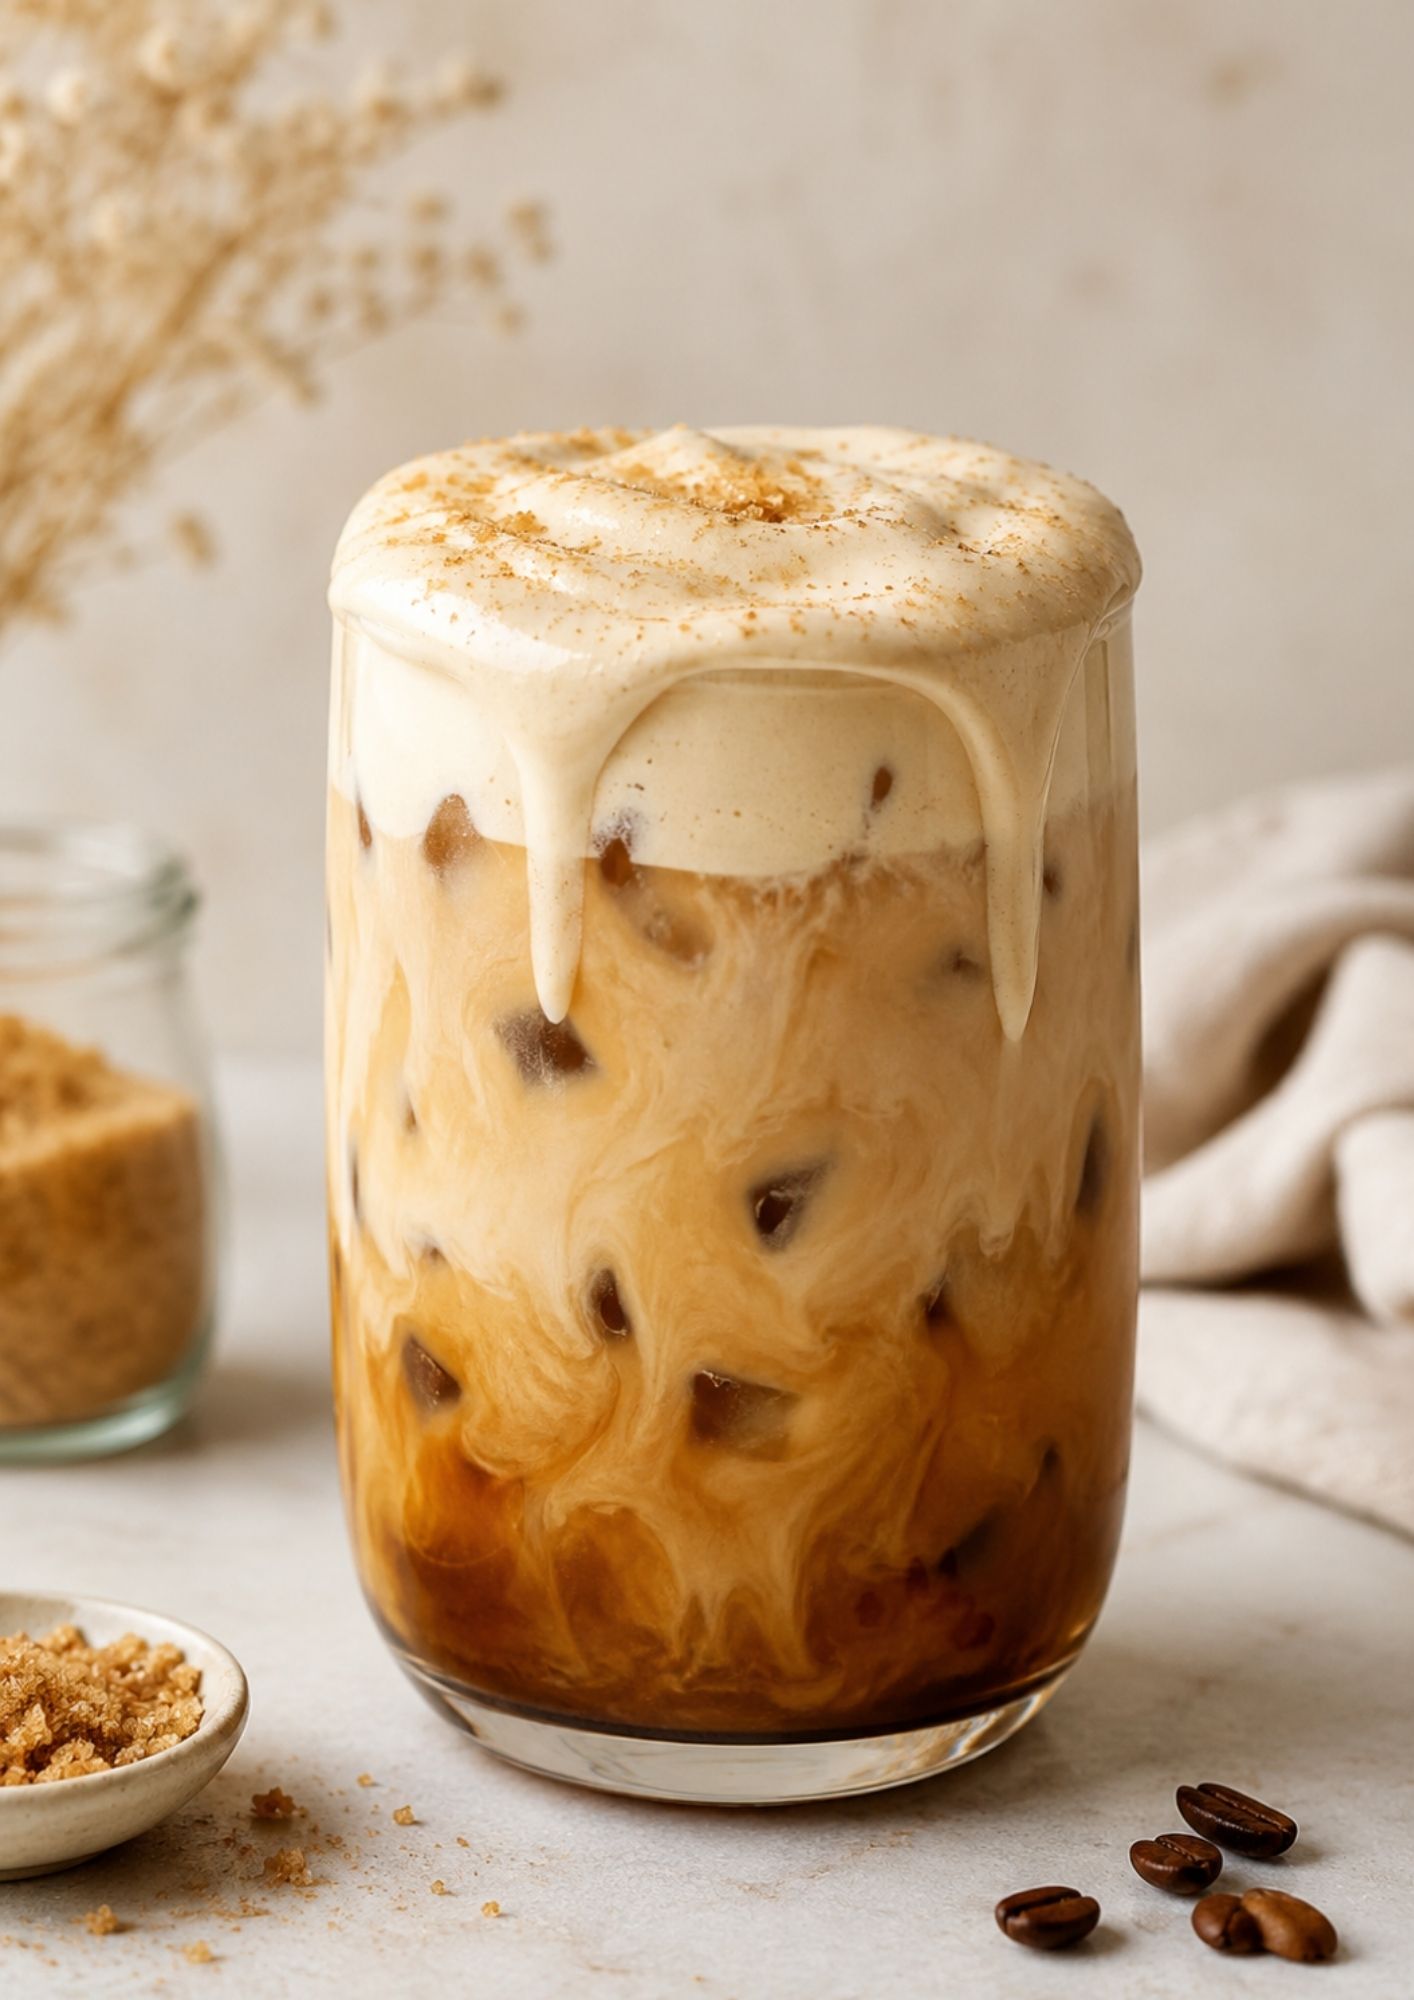
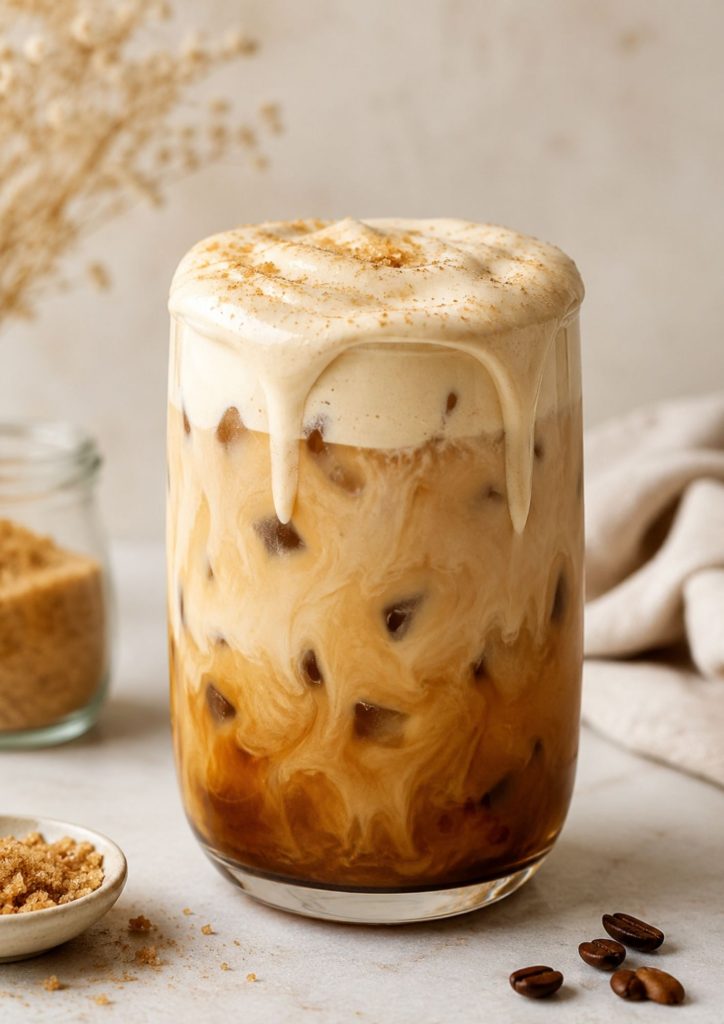
  • Brown Sugar Iced Latte

    Brown Sugar Iced Latte

    A creamy iced coffee with rich brown sugar syrup, espresso and milk, finished with a soft vanilla foam on top. Sweet, smooth and café-worthy, but easy enough to make at home in minutes.

    Ingredients

    Brown sugar syrup

    • 2 tbsp brown sugar
    • 2 tbsp water
    • ¼ tsp vanilla extract
    • Pinch of cinnamon
    • Pinch of sea salt

    Iced latte

    • 1–2 shots espresso, or ⅓ cup strong brewed coffee
    • ¾ cup milk of choice
    • Ice

    Brown sugar cream

    • ¼ cup thickened cream, pouring cream or barista oat milk
    • 1–2 tsp brown sugar syrup
    • ¼ tsp vanilla extract

    Method

    • Add the brown sugar and water to a small saucepan over low heat. Stir for 2–3 minutes, until the sugar dissolves and the syrup looks glossy. Stir in the vanilla, cinnamon if using, and a tiny pinch of salt. Set aside to cool slightly.
    • For the brown sugar cream, whisk or froth the cream with 1–2 teaspoons of the syrup and vanilla until thickened but still pourable.
    • Fill a glass with ice. Add 1–2 tablespoons of brown sugar syrup, then pour in the espresso or strong coffee. Add the milk and stir gently.
    • Spoon or pour the brown sugar cream over the top so it floats like a soft cold foam.
    • Serve immediately.

    You Might Also Like

  • Watermelon, Feta & Halloumi Salad

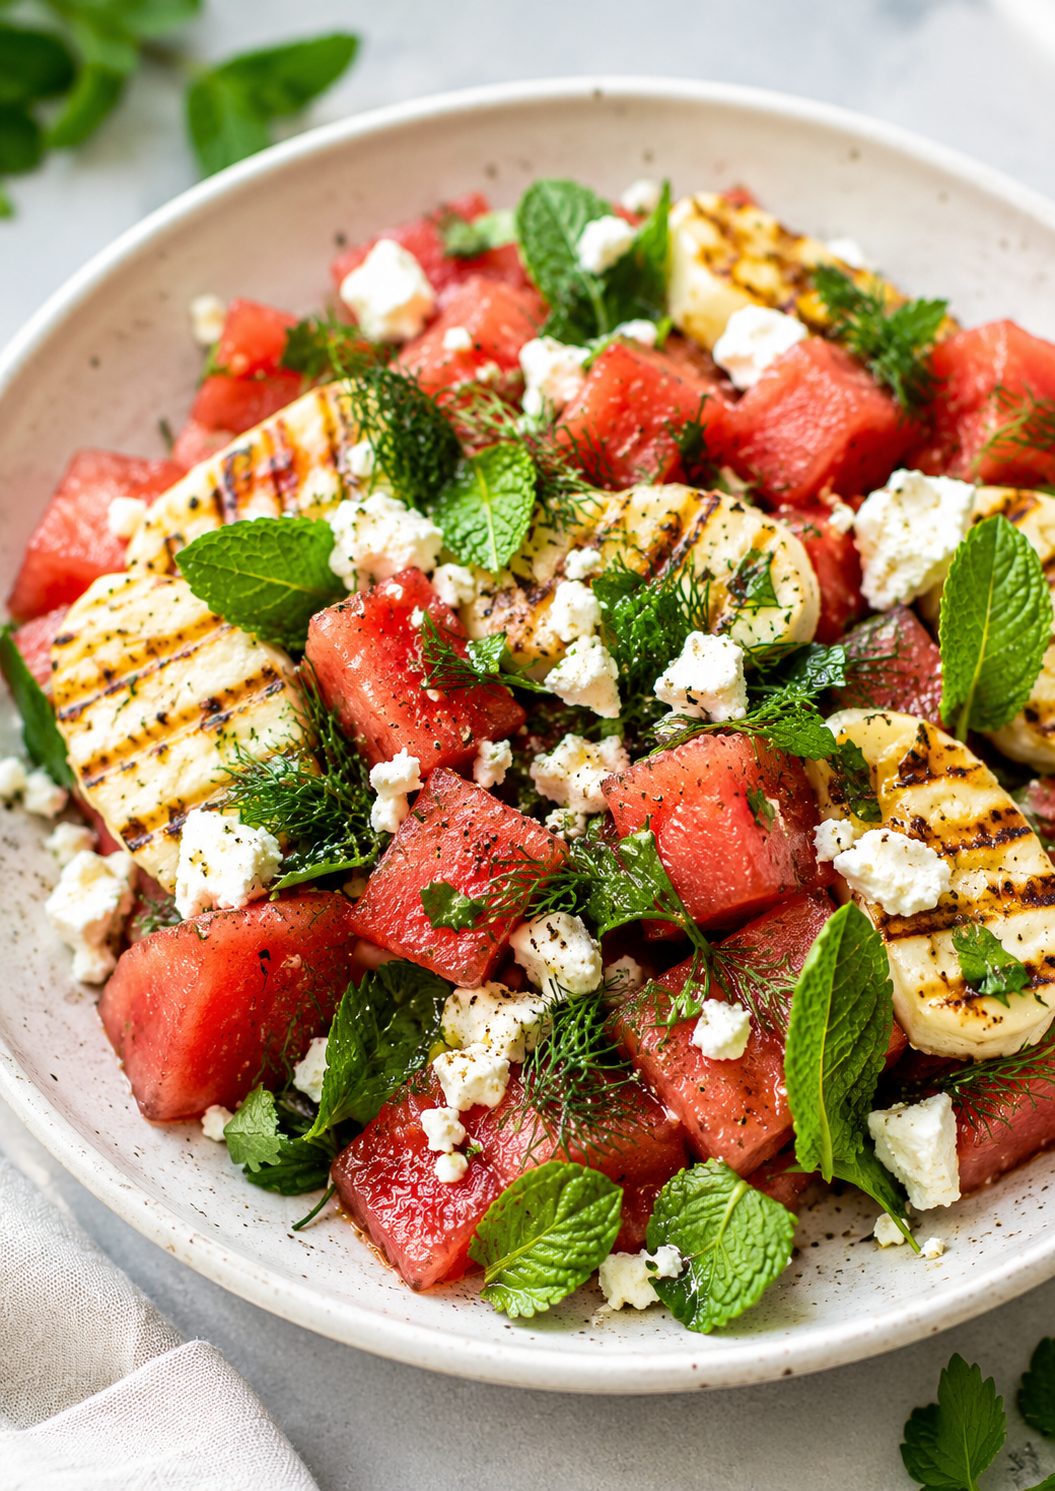
    Watermelon, Feta & Halloumi Salad

    This watermelon feta and halloumi salad is a fresh summer salad with juicy watermelon, salty feta and golden grilled halloumi, finished with mint, dill and a bright lemon-honey dressing. Sweet, savoury, herby and a little unexpected — but it really works.

    Ingredients

    • 1 kg watermelon, rind removed and cut into cubes
    • 200 g halloumi, sliced
    • 100 g feta, crumbled
    • ½ cup fresh mint leaves
    • ¼ cup fresh dill, roughly torn
    • ¼ cup fresh parsley or coriander, roughly chopped
    • 2 tbsp olive oil, plus extra for grilling
    • 1 tbsp lemon juice
    • 1 tsp honey
    • ½ tsp lemon zest
    • Cracked black pepper
    • Pinch of sea salt

    Method

    • Heat a grill pan over medium-high heat. Brush halloumi with a little olive oil and grill for 1–2 minutes each side, until golden with char marks.
    • Whisk olive oil, lemon juice, honey, lemon zest, pepper and a small pinch of salt.
    • Add watermelon to a large serving bowl. Scatter over grilled halloumi, feta, mint, dill and parsley.
    • Drizzle with the dressing and toss gently just before serving.
    • Finish with extra herbs, cracked pepper and a little more lemon zest.
    Watermelon, Feta & Halloumi Salad — Everyday Nourished recipe

    You Might Also Like

    Why This Watermelon Feta and Halloumi Salad Works

    Watermelon feta and halloumi salad is the kind of dish that sounds unusual until you taste it. The juicy sweetness of the watermelon plays perfectly against salty feta and warm, golden halloumi, while fresh mint and dill keep it light and herby. If you love a good salad for warm weather entertaining, our Panzanella Salad is another crowd-pleasing option worth trying.

    Tips for the Best Watermelon Feta and Halloumi Salad

    • Chill the watermelon well before serving — a cold, crisp salad is much more refreshing on a hot day.
    • Pat the halloumi dry before grilling so it browns nicely instead of steaming in the pan.
    • Assemble the salad just before serving, as watermelon releases juice and can make the salad watery if it sits too long.
    • Use good-quality feta for the best briny, salty contrast against the sweet watermelon.

    Storage and Make-Ahead Tips

    Watermelon feta and halloumi salad is best enjoyed the day it’s made, since the watermelon softens and releases liquid on standing. If you want to prep ahead, cut the watermelon and grill the halloumi separately, storing each in the fridge, then toss everything together with the dressing just before serving. The lemon-honey dressing can be made up to 3 days in advance and kept in an airtight jar in the fridge.

    Serving Suggestions

    This watermelon feta and halloumi salad works well as a light lunch on its own, or as a side dish alongside grilled meats or fish for a summer barbecue. It also makes a lovely starter for a dinner party, served in small bowls or piled onto a platter for guests to help themselves. A drizzle of extra virgin olive oil and a crack of black pepper just before serving rounds out the flavours nicely.

    Ingredient Swaps

    No halloumi on hand? Grilled paneer or a firm feta can work in a pinch, though the texture will be slightly different. Basil or coriander can stand in for mint or dill if that’s what you have, and a splash of balsamic glaze makes a lovely alternative to the lemon-honey dressing for a deeper, tangier finish. Feel free to experiment with whatever fresh herbs and cheeses you have on hand — this salad is forgiving and easy to adapt to what’s in season. Whatever combination you choose, this salad is a reliable way to make the most of summer produce. It’s simple, colourful and always a hit at the table.

  • Hot Honey Sweet Potato Beef Bowl

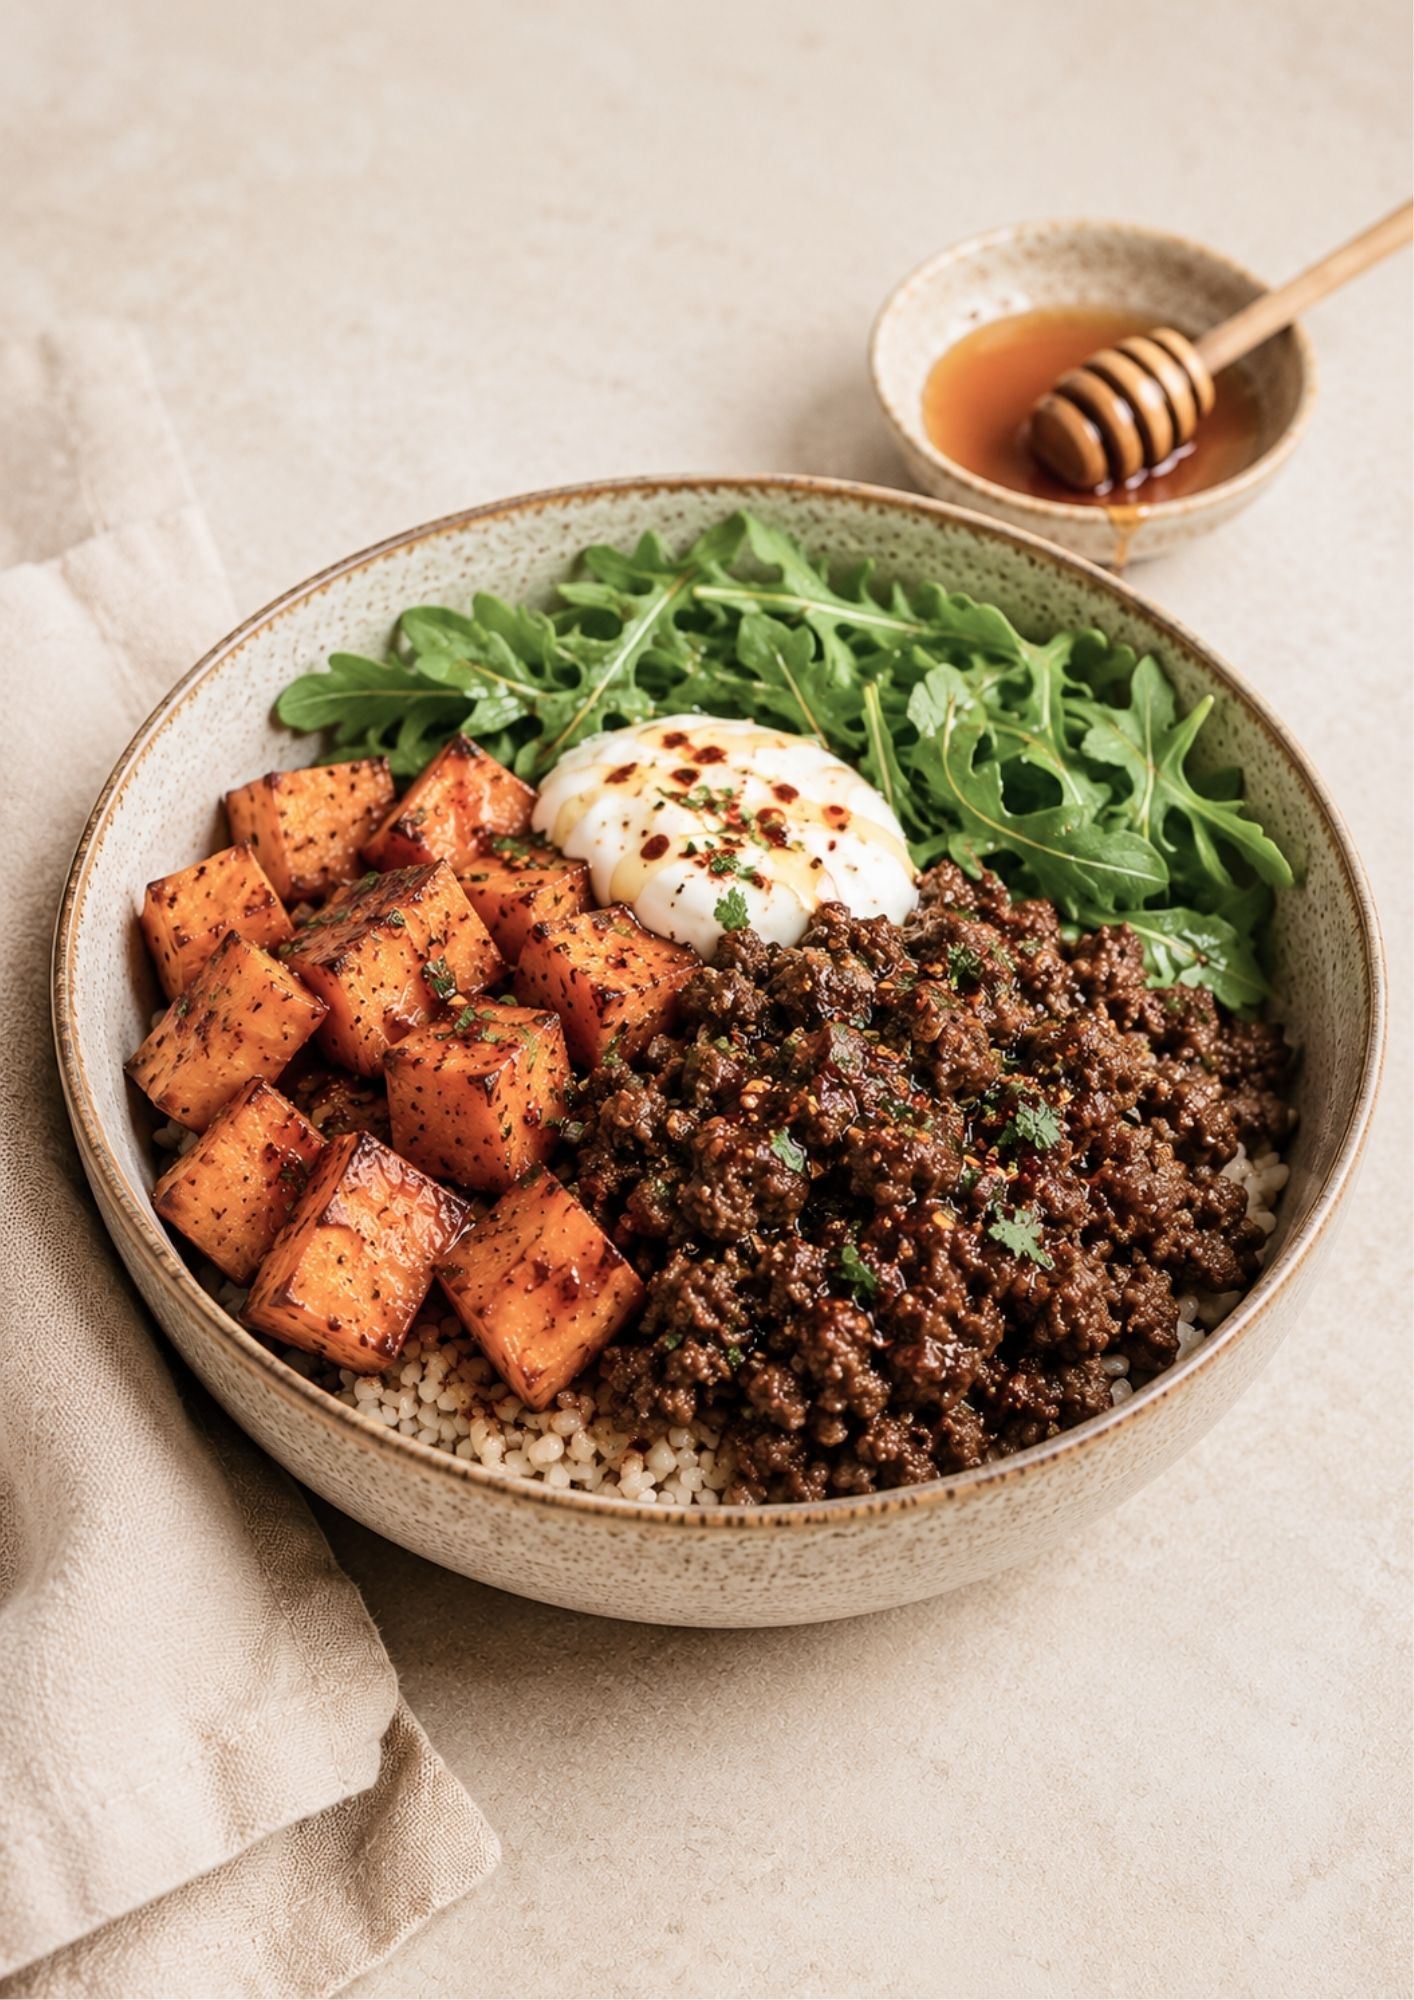
    Hot Honey Sweet Potato Beef Bowl

    This bowl has been popping up all over the internet, so I had to try it — and I completely understand the hype. The mix of sweet roasted potato, savoury beef, creamy yoghurt and spicy hot honey is ridiculously good, and it’s become one of those easy throw-together meals I keep coming back to.

    Why This Hot Honey Sweet Potato Beef Bowl Works

    This hot honey sweet potato beef bowl works because every element pulls its weight. Sweet, caramelised roasted potato balances savoury, spiced beef, while a cooling spoonful of yoghurt tames the spicy hot honey drizzled over the top. It all comes together in one bowl with minimal cleanup, making this hot honey sweet potato beef bowl a genuine weeknight favourite rather than a one-off novelty.

    SERVES 3-4

    TIME: 25 MINUTES

    ~ 635 calories per serve

    ~ 28g protein per serve

    Ingredients

    For the bowl

    • 1 large sweet potato, cubed
    • 1 tbsp olive oil
    • 1 tsp smoked paprika
    • ½ tsp garlic powder
    • Salt and pepper
    • 2 cups cooked brown rice, quinoa or pearl couscous
    • 250–300 g beef mince
    • 1 tsp olive oil, extra
    • 1 garlic clove, minced
    • 1 tbsp soy sauce or tamari
    • 1 tsp tomato paste
    • ½ tsp cumin
    • ½ tsp chilli flakes, optional
    • 2 large handfuls rocket
    • ¼ cup labneh
    • Fresh parsley or coriander

    Hot honey

    • 2 tbsp honey
    • ½–1 tsp chilli flakes
    • 1 tsp lemon juice or apple cider vinegar
    • Pinch of salt

    Method

    • Preheat the oven to 200°C. Toss the sweet potato with olive oil, smoked paprika, garlic powder, salt and pepper. Roast for 25–30 minutes, turning once, until golden and tender.
    • Meanwhile, heat a little olive oil in a pan over medium-high heat. Add the beef mince and cook until browned, breaking it up with a spoon. Stir in the garlic, soy sauce, tomato paste, cumin and chilli flakes. Cook for another 3–5 minutes, until glossy and deeply flavoured.
    • To make the hot honey, warm the honey, chilli flakes, lemon juice and salt in a small saucepan or microwave for a few seconds, just until runny.
    • Divide the rice, quinoa or couscous between bowls. Add the roasted sweet potato, beef mince and rocket. Spoon over the yoghurt, drizzle generously with hot honey and finish with fresh herbs, cracked pepper and extra chilli if you like.

    You Might Also Like

    Tips for the Best Hot Honey Sweet Potato Beef Bowl

    • Cut the sweet potato into even, bite-sized cubes so every piece roasts at the same rate.
    • Sear the beef in a hot pan first to build a deep, savoury crust before it finishes cooking.
    • Warm the yoghurt slightly or bring it to room temperature so it spoons over the bowl smoothly.
    • Drizzle the hot honey just before serving so it stays glossy and doesn’t get absorbed too quickly.

    Storage and Reheating

    Store leftover hot honey sweet potato beef bowl components in an airtight container in the fridge for up to 3 days. Keep the yoghurt and hot honey separate until serving if you can, then reheat the beef and sweet potato gently in a pan or microwave until warmed through before assembling the bowl again.

    Serving Suggestions

    This hot honey sweet potato beef bowl is a complete meal on its own, but it also pairs well with a simple side salad or some crusty bread for mopping up the sauce. For another weeknight favourite with a similar sweet-savoury balance, try our Smoked Honey Glazed Ham. The natural sweetness of the sweet potato is part of what makes this bowl so satisfying and easy to love. Whether it’s a busy Tuesday or a lazy Sunday, this bowl comes together quickly with minimal cleanup.

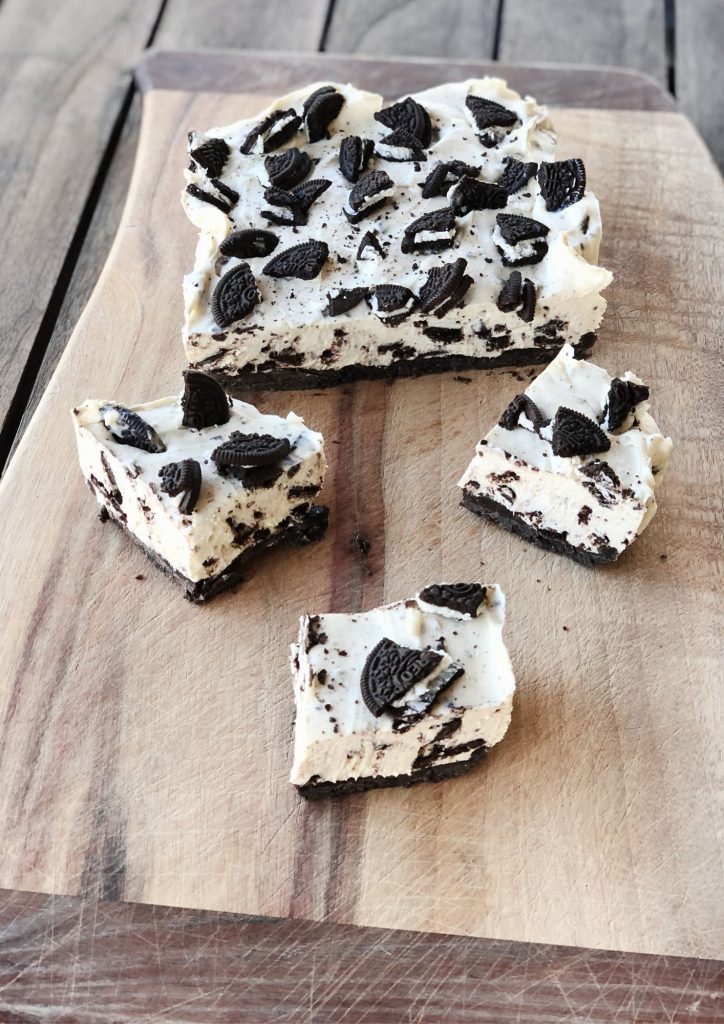
  • Oreo Cheesecake Slice

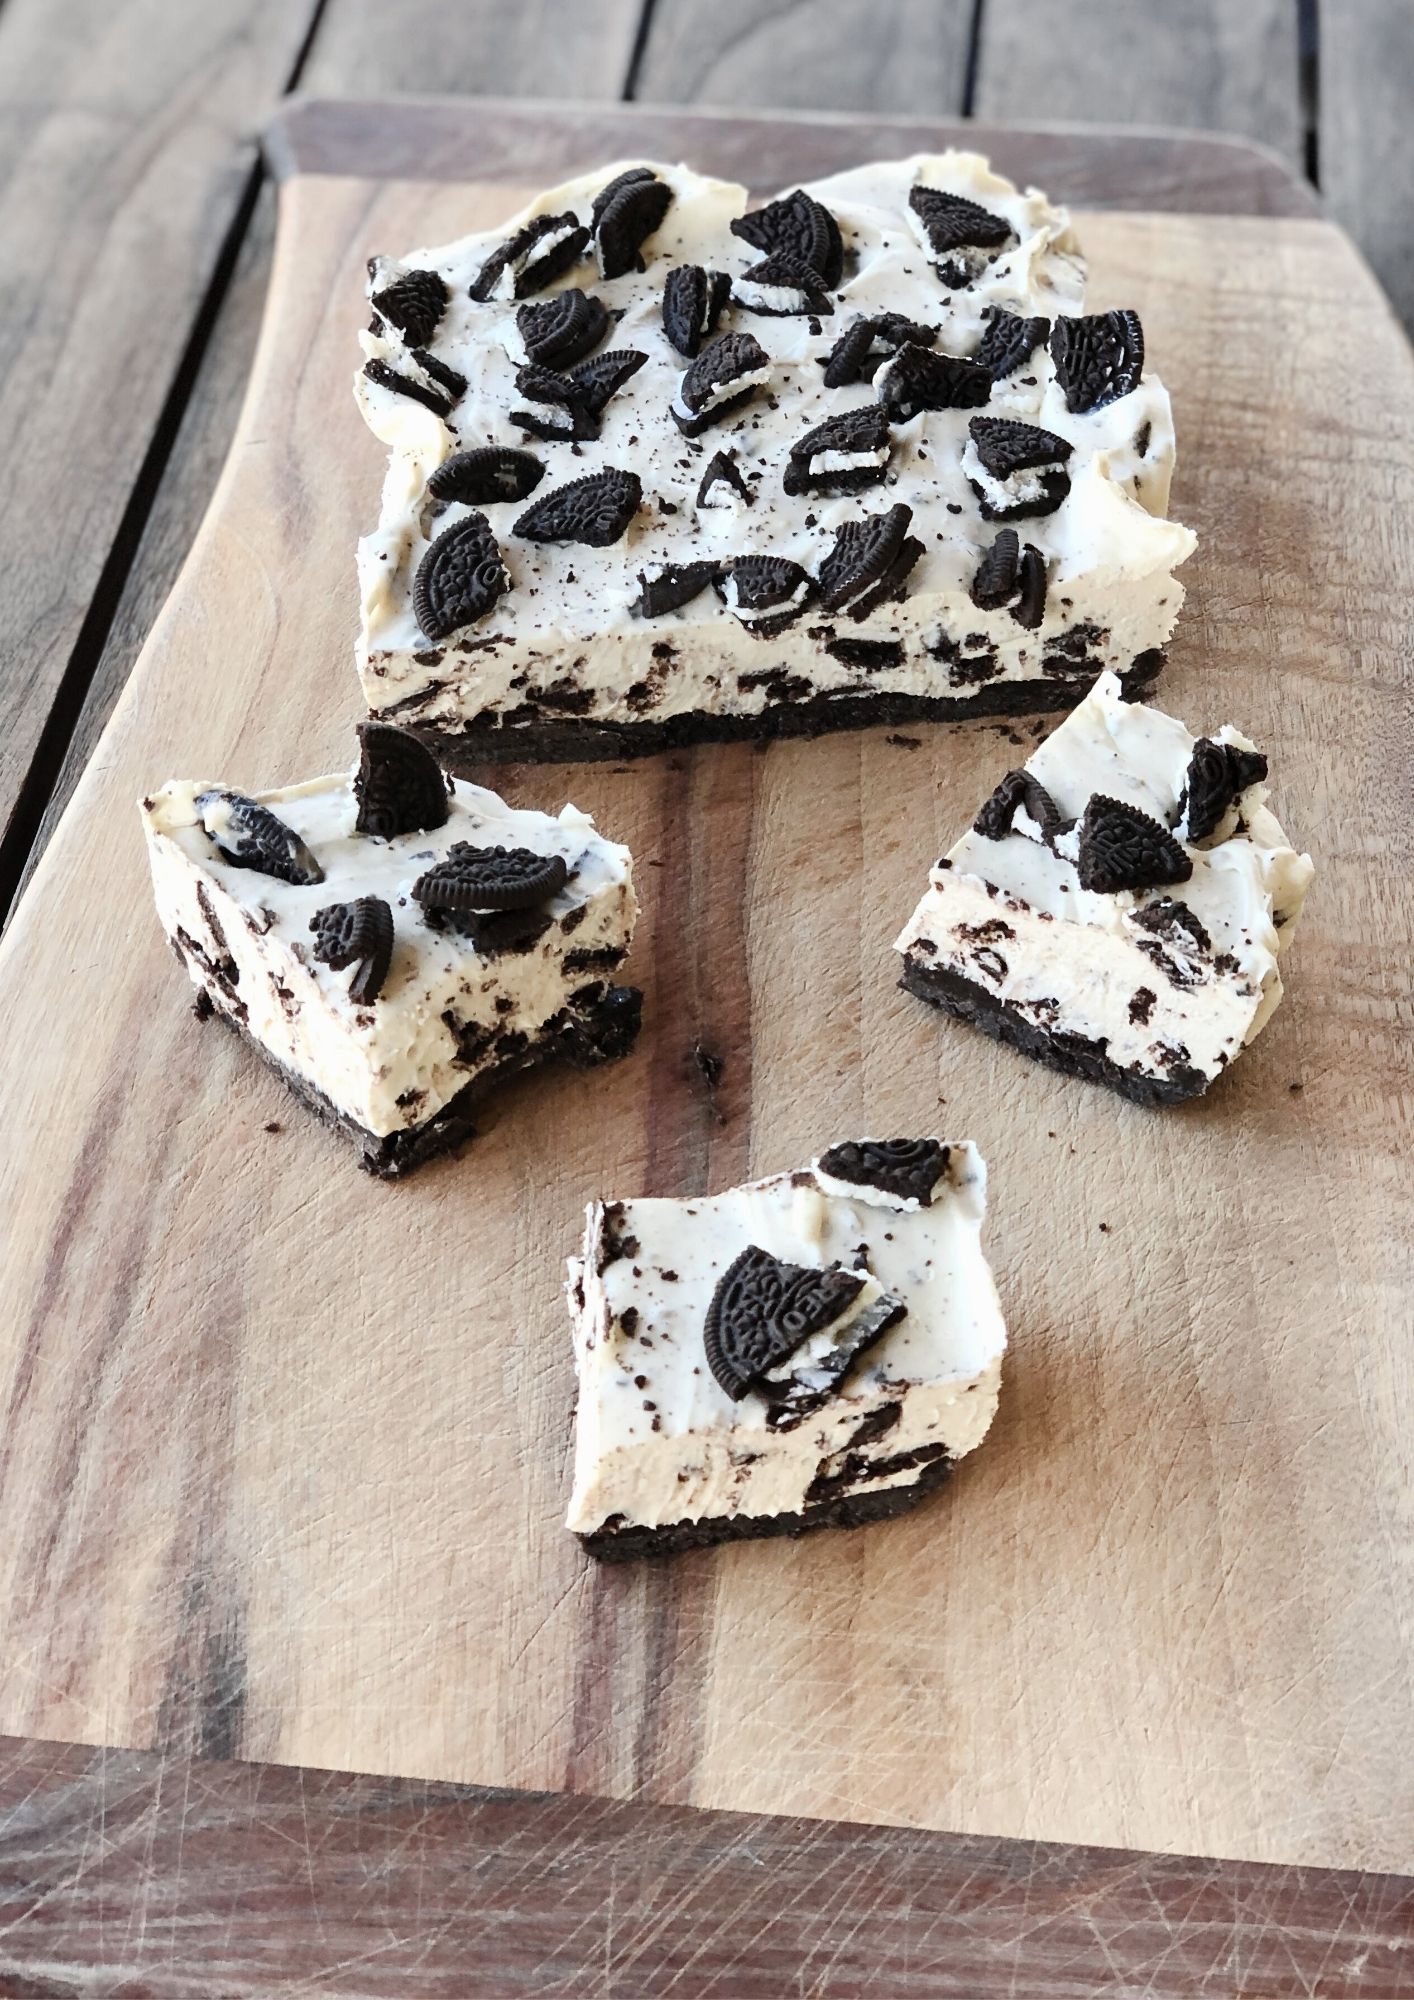
    Oreo Cheesecake Slice

    A creamy no-bake Oreo cheesecake slice with a buttery Oreo biscuit base, smooth vanilla cream cheese filling and chunks of crushed Oreo throughout. It is sweet, creamy and crunchy, with a cookies-and-cream flavour and an easy chilled finish.

    SERVES 16

    TIME: 30 MINUTES

    ~ 360 calories per serve

    ~ 6g protein per serve

    Ingredients

    Base

    250 g (about 24) Oreos

    100 g unsalted butter

    Filling

    500 g Philadelphia cream cheese, softened

    395 g can sweetened condensed milk

    1 tsp vanilla extract

    Juice of 1 lemon

    8–10 extra Oreo cookies, roughly chopped

    Topping

    Extra crushed Oreos

    Method

    Base: Line a 20×30 cm tin with baking paper. Crush Oreos, mix with butter, press into tin, chill.

    Filling: Beat cream cheese until smooth. Add condensed milk, vanilla, lemon juice. Fold in chopped Oreos.

    Assemble: Pour over base, smooth top, add toppings.

    Chill: Refrigerate or freeze 4 hrs or overnight. Slice to serve chilled or defrosted from frozen.

    You Might Also Like

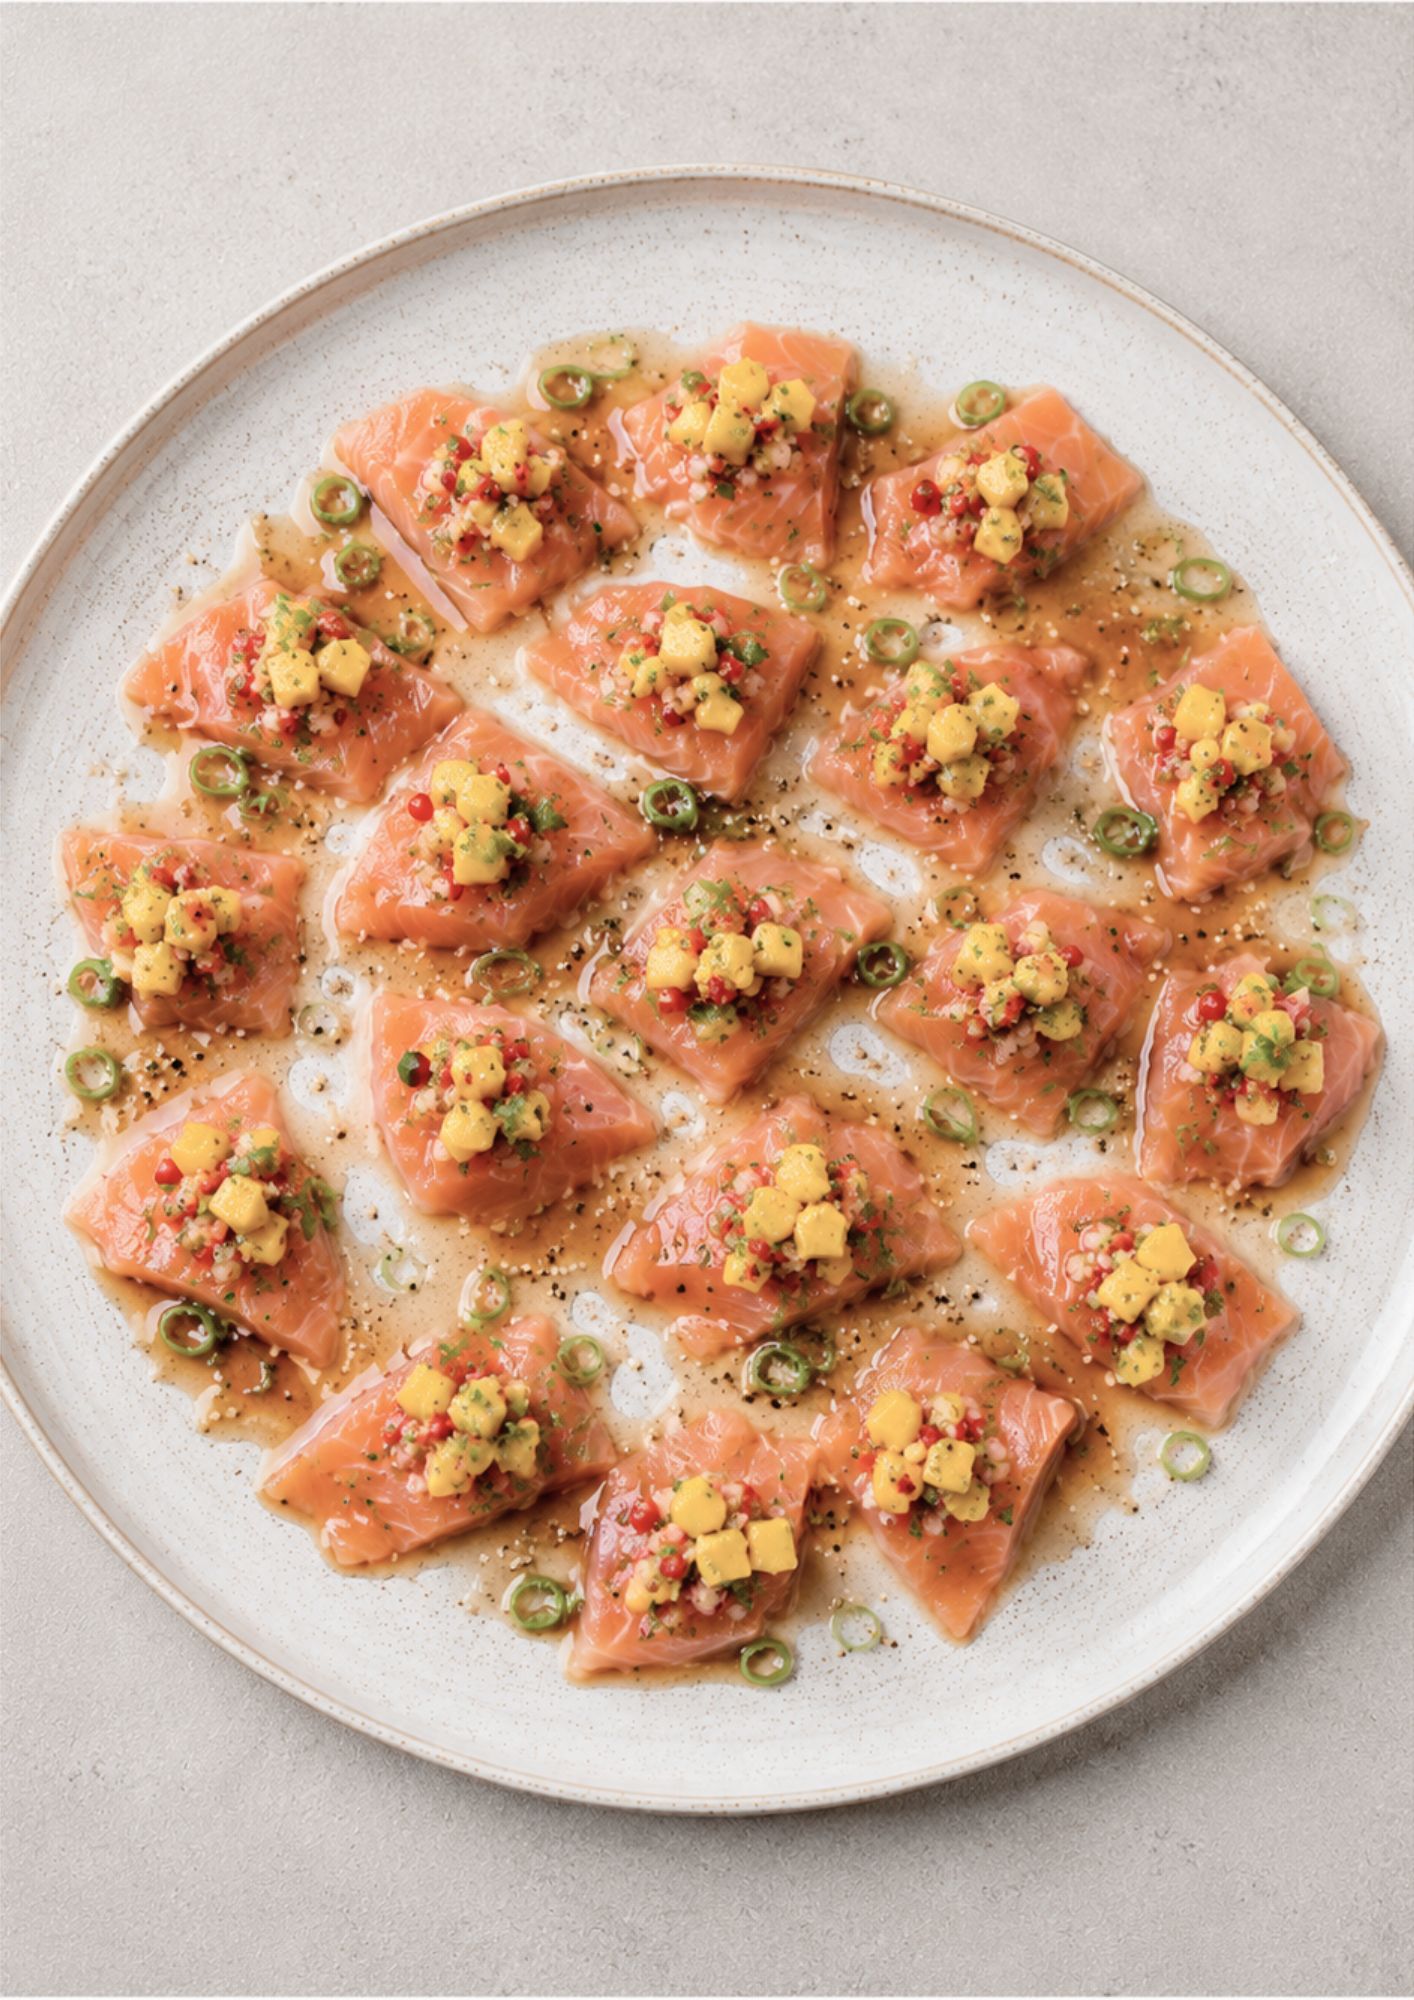
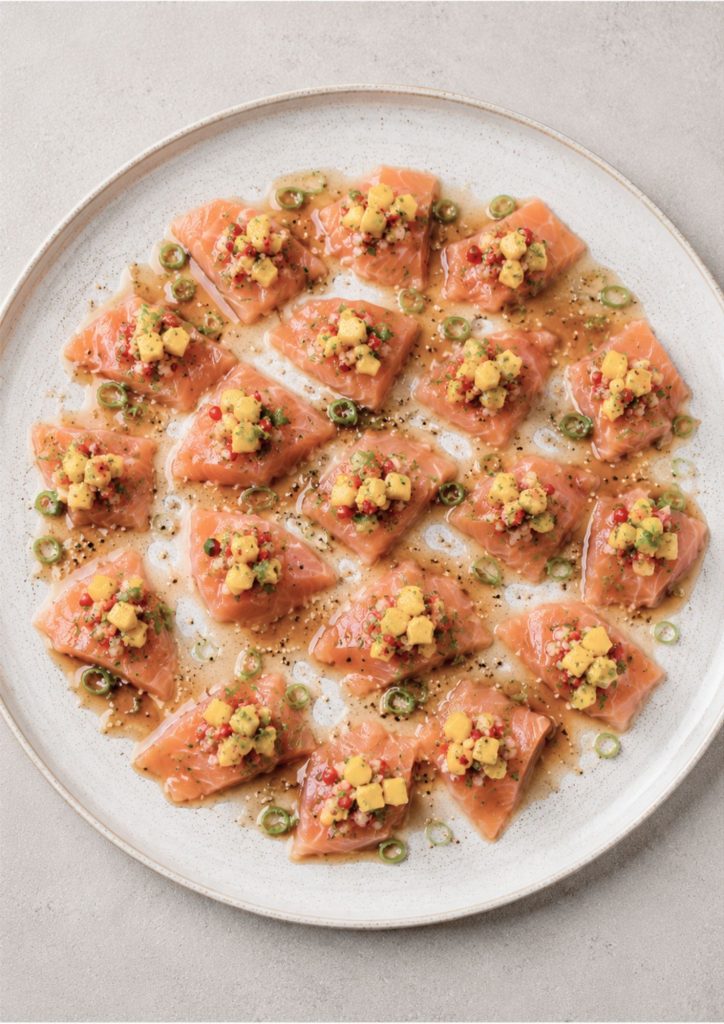
  • Ponzu Salmon Sashimi Bites

    Ponzu Salmon Sashimi Bites

    Fresh sashimi-grade salmon bites tossed with ponzu, mango, red onion, chilli, spring onion and sesame for a bright, zesty starter with a sweet-savoury finish.

    SERVES 2

    TIME: 15 mins

    ~ 375 calories per serve

    ~ 33g protein per serve

    Ingredients

    500 g sashimi-grade salmon, skin removed

    3–4 tablespoons ponzu sauce

    ½ small red onion, finely diced

    ½ mango, diced into small chunks

    1 spring onion, finely sliced

    1 fresh red chilli, finely sliced

    1 teaspoon sesame seeds, optional

    Fresh lime, optional, to serve

    Method

    Using a sharp knife, cut the salmon into even bite-sized squares or cubes.

    Arrange the salmon pieces on a serving plate in a single layer.

    Spoon the ponzu sauce over the salmon, making sure each piece gets a little coating.

    Scatter over the diced red onion, mango chunks, sliced spring onion and fresh chilli.

    Sprinkle with sesame seeds if using.

    Serve immediately, with a squeeze of fresh lime if desired.

    You Might Also Like

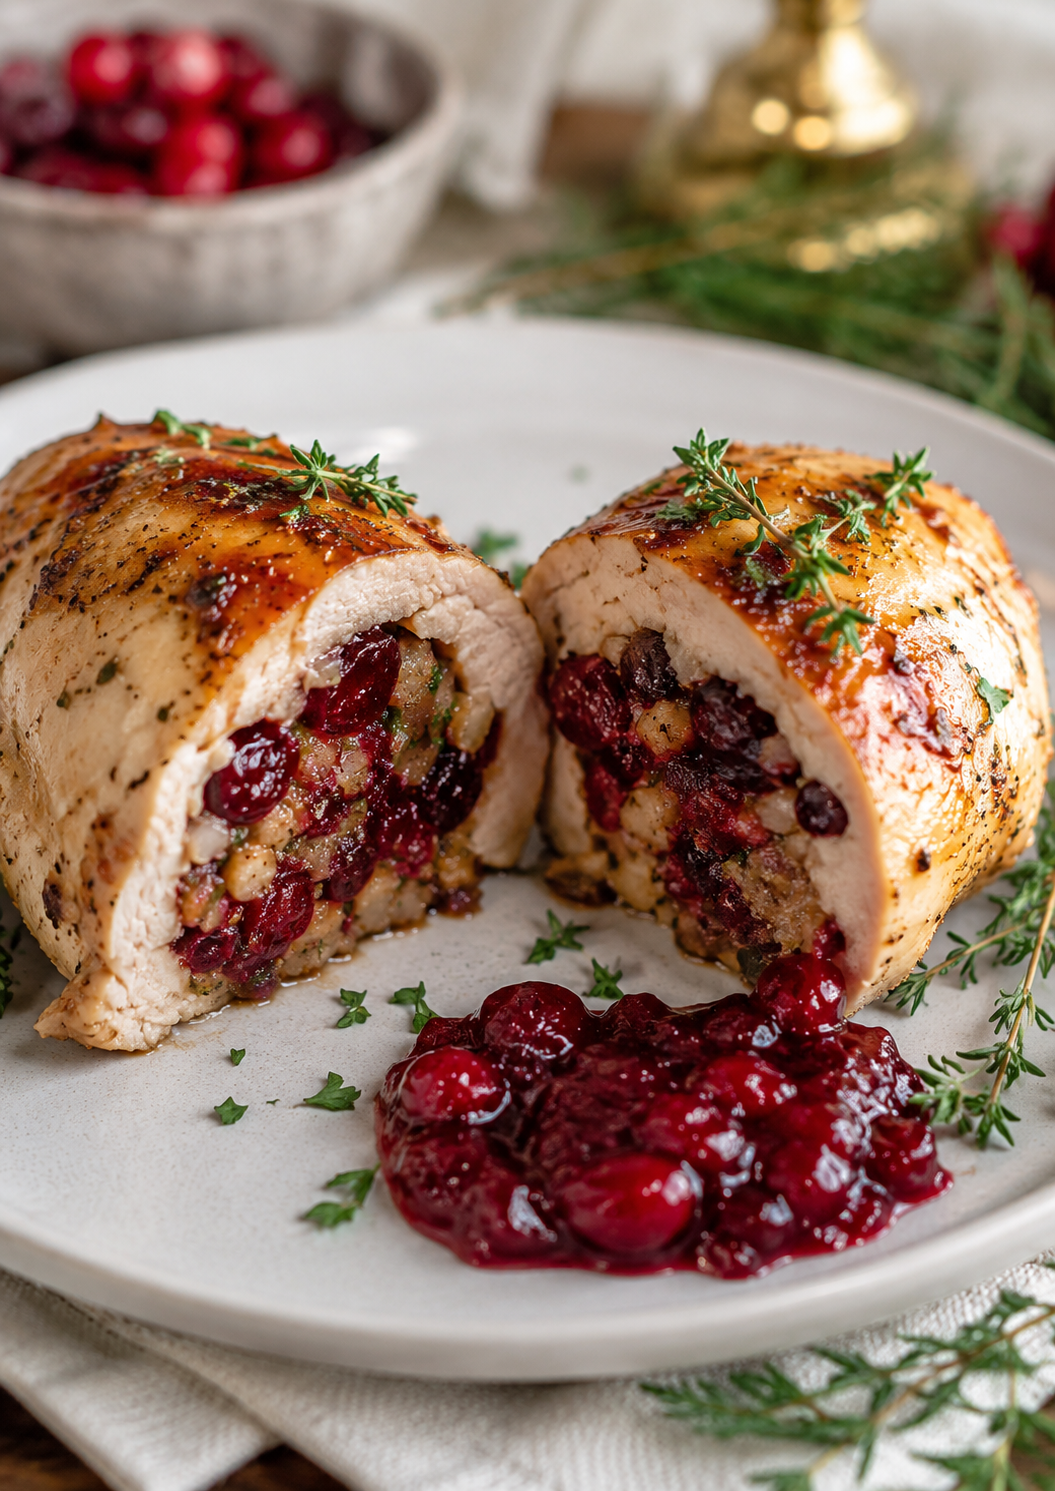
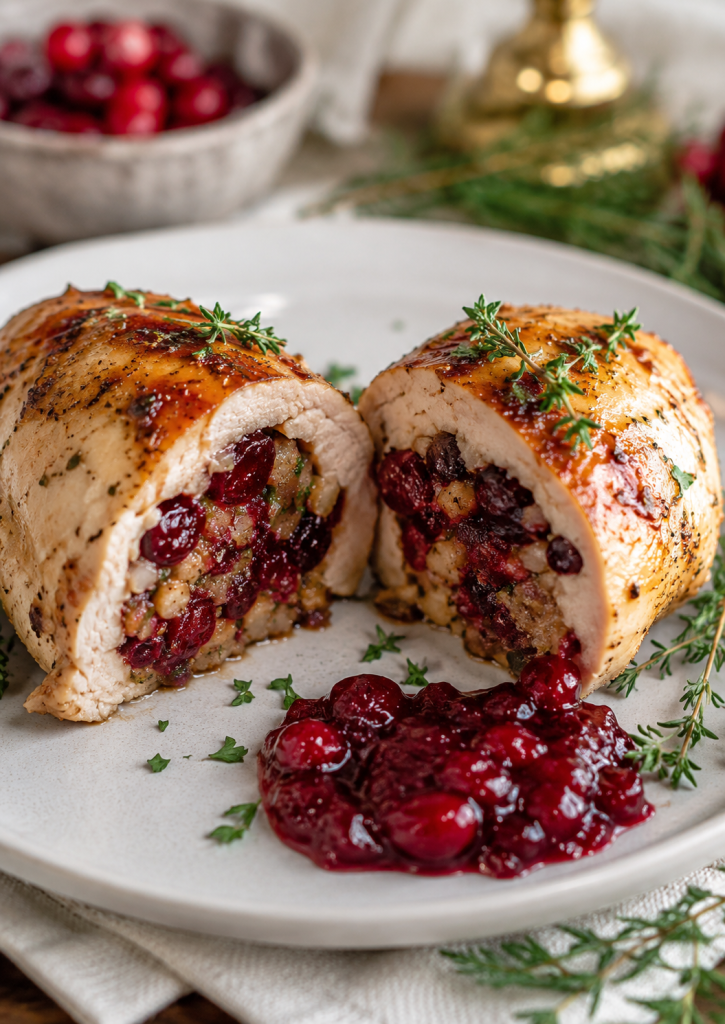
  • Cranberry Chicken Roulade

    Cranberry Chicken Roulade

    Golden roasted chicken wrapped around a savoury cranberry, herb and nut stuffing, finished with cranberry sauce for a sweet-tart contrast. Festive enough for entertaining, but still simple enough to make for a special dinner at home.

    Serves: 4–6
    Time: 1 hour

    Ingredients

    For the chicken

    • 4 large chicken breasts
    • 1 tbsp olive oil
    • Salt and freshly cracked black pepper

    For the cranberry & herb stuffing

    • 1 tbsp butter
    • 1 small onion, finely diced
    • 2 garlic cloves, finely chopped
    • 2 cups fresh breadcrumbs
    • ½ cup dried cranberries
    • ¼ cup walnuts or pecans, roughly chopped
    • 1 tbsp fresh parsley, finely chopped
    • 1 tsp fresh thyme leaves
    • ½ tsp salt
    • ½ tsp freshly cracked black pepper
    • Zest of ½ orange, optional

    To serve

    • ½ cup cranberry sauce
    • Extra fresh thyme or parsley

    Method

    1. Prepare the chicken. Preheat the oven to 190°C. Butterfly each chicken breast by slicing horizontally through the centre without cutting all the way through. Open out and gently pound between sheets of baking paper until evenly flattened.
    2. Make the stuffing. Melt the butter in a frying pan over medium heat. Add the onion and cook for 4–5 minutes until soft. Add the garlic and cook for another minute.
    3. Mix the filling. Transfer the onion mixture to a bowl and combine with the breadcrumbs, cranberries, nuts, parsley, thyme and orange zest. Season with salt and pepper. Add a small splash of water or chicken stock if the mixture feels too dry.
    4. Roll the chicken. Lay the flattened chicken breasts out on a board. Spoon the stuffing along the centre of each piece, leaving a small border around the edges. Roll tightly around the filling and secure with kitchen string or toothpicks.
    5. Sear. Rub the roulades with olive oil and season generously. Heat an oven-safe frying pan over medium-high heat and sear the chicken for 2–3 minutes on each side until lightly golden.
    6. Roast. Transfer to the oven and cook for 25–30 minutes, or until the chicken is cooked through and the centre reaches 75°C.
    7. Rest. Remove from the oven and rest for 10 minutes before removing the string and slicing into thick rounds.
    8. Serve. Arrange the roulade slices on a platter and serve with cranberry sauce, fresh thyme and a little cracked pepper.

    Tip: You can assemble the roulades earlier in the day and keep them covered in the fridge, then simply sear and roast when you’re ready to serve.

    You Might Also Like

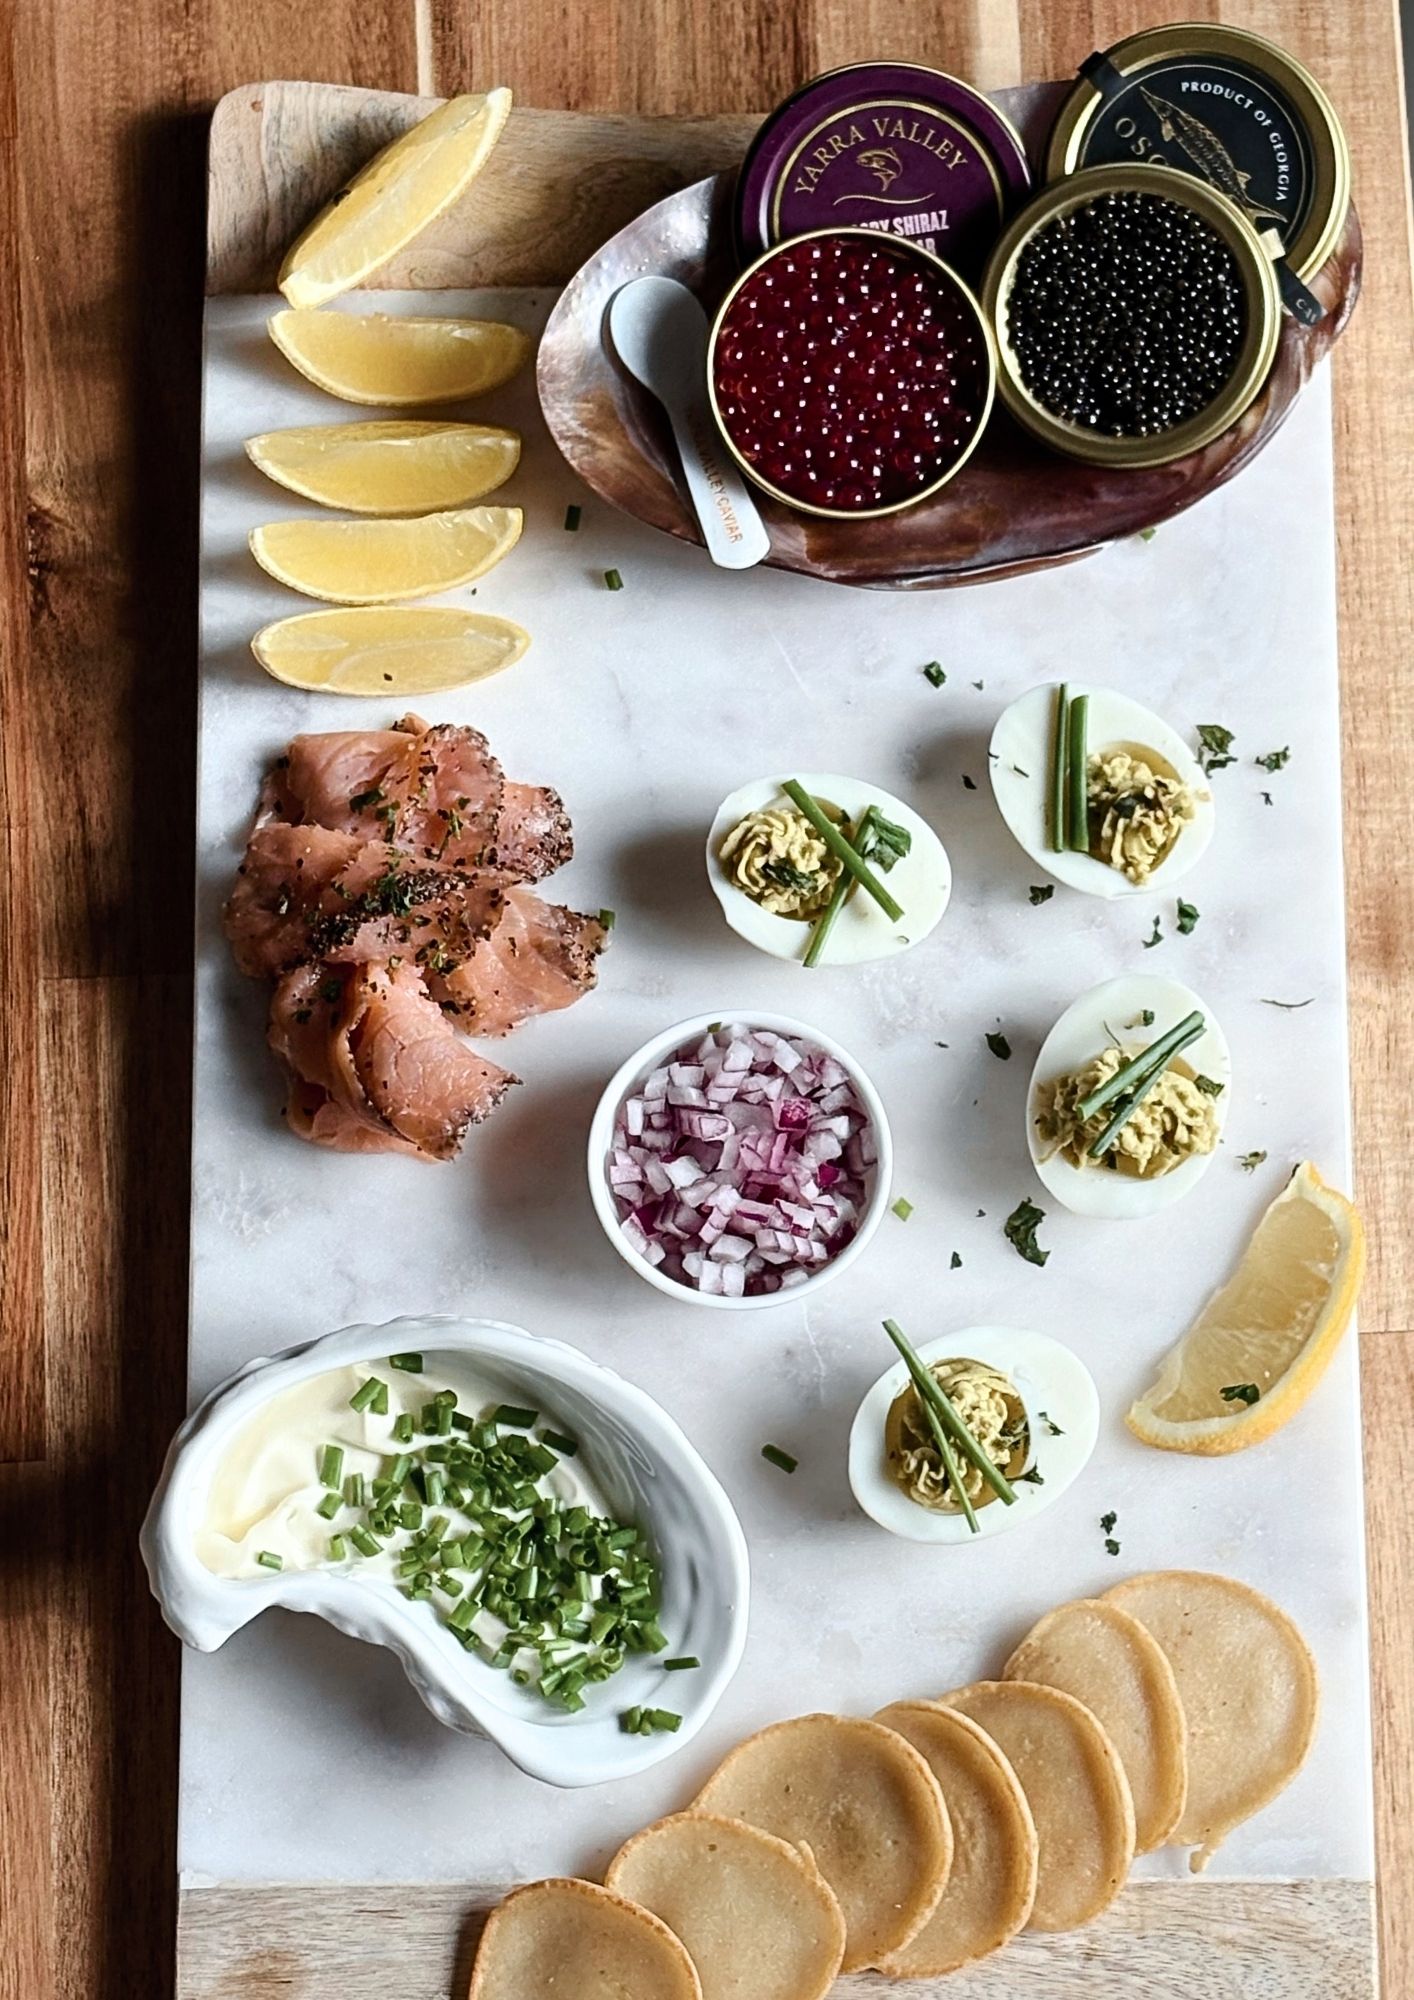
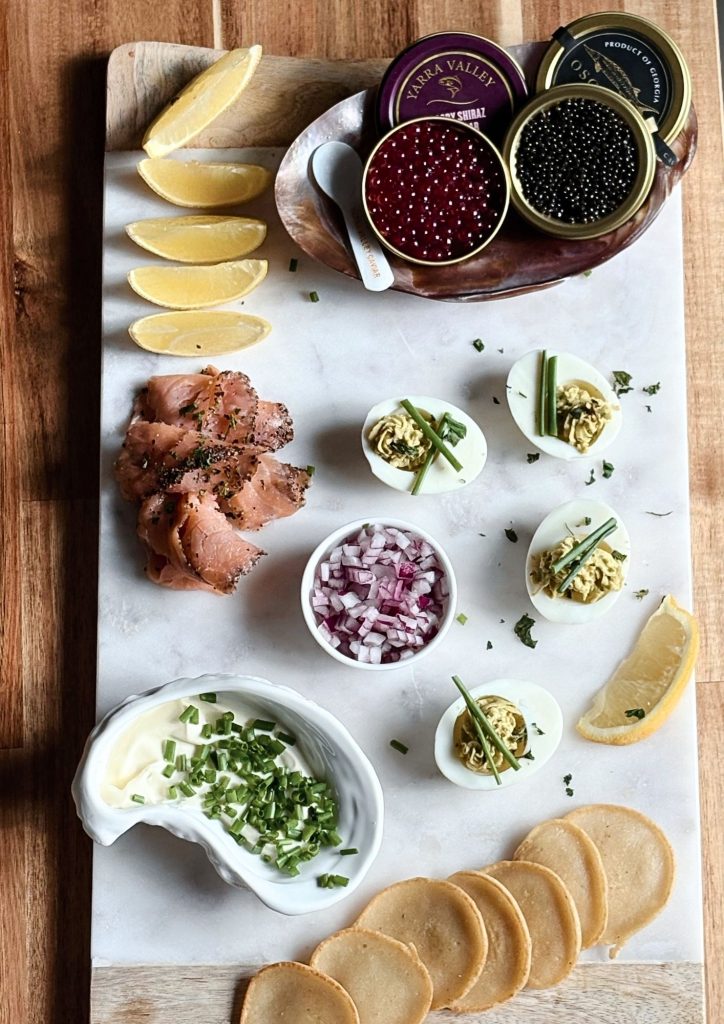
  • Pesto Devilled Eggs

    Pesto Devilled Eggs

    Creamy devilled eggs filled with crème fraîche and pine nut pesto, then finished with fresh chives for an elegant, bite-sized starter or grazing-board addition.

    MAKES 12 EGG HALVES

    TIME: 20 MINS

    ~ 50 calories per egg half

    Ingredients

    6 large eggs

    2 tbsp crème fraîche

    2 tbsp pine nut pesto (homemade or store-bought)

    Salt & black pepper

    Fresh chives, chopped

    Serving Suggestions

    Caviar

    Smoked Salmon

    Buckwheat Blinis

    Lemon Wedges

    Method

    Boil the eggs: Place eggs in a saucepan, cover with cold water. Bring to a boil, then simmer for 9–10 minutes. Transfer to ice water, peel once cool.

    Make the filling: Slice eggs in half. Scoop out yolks into a bowl. Mash with crème fraîche, pesto, salt, and pepper until smooth and creamy.

    Fill the eggs: Spoon or pipe the pesto mixture back into the egg whites.

    Garnish: Top each devilled egg with chopped chives and a crack of black pepper.

    You Might Also Like

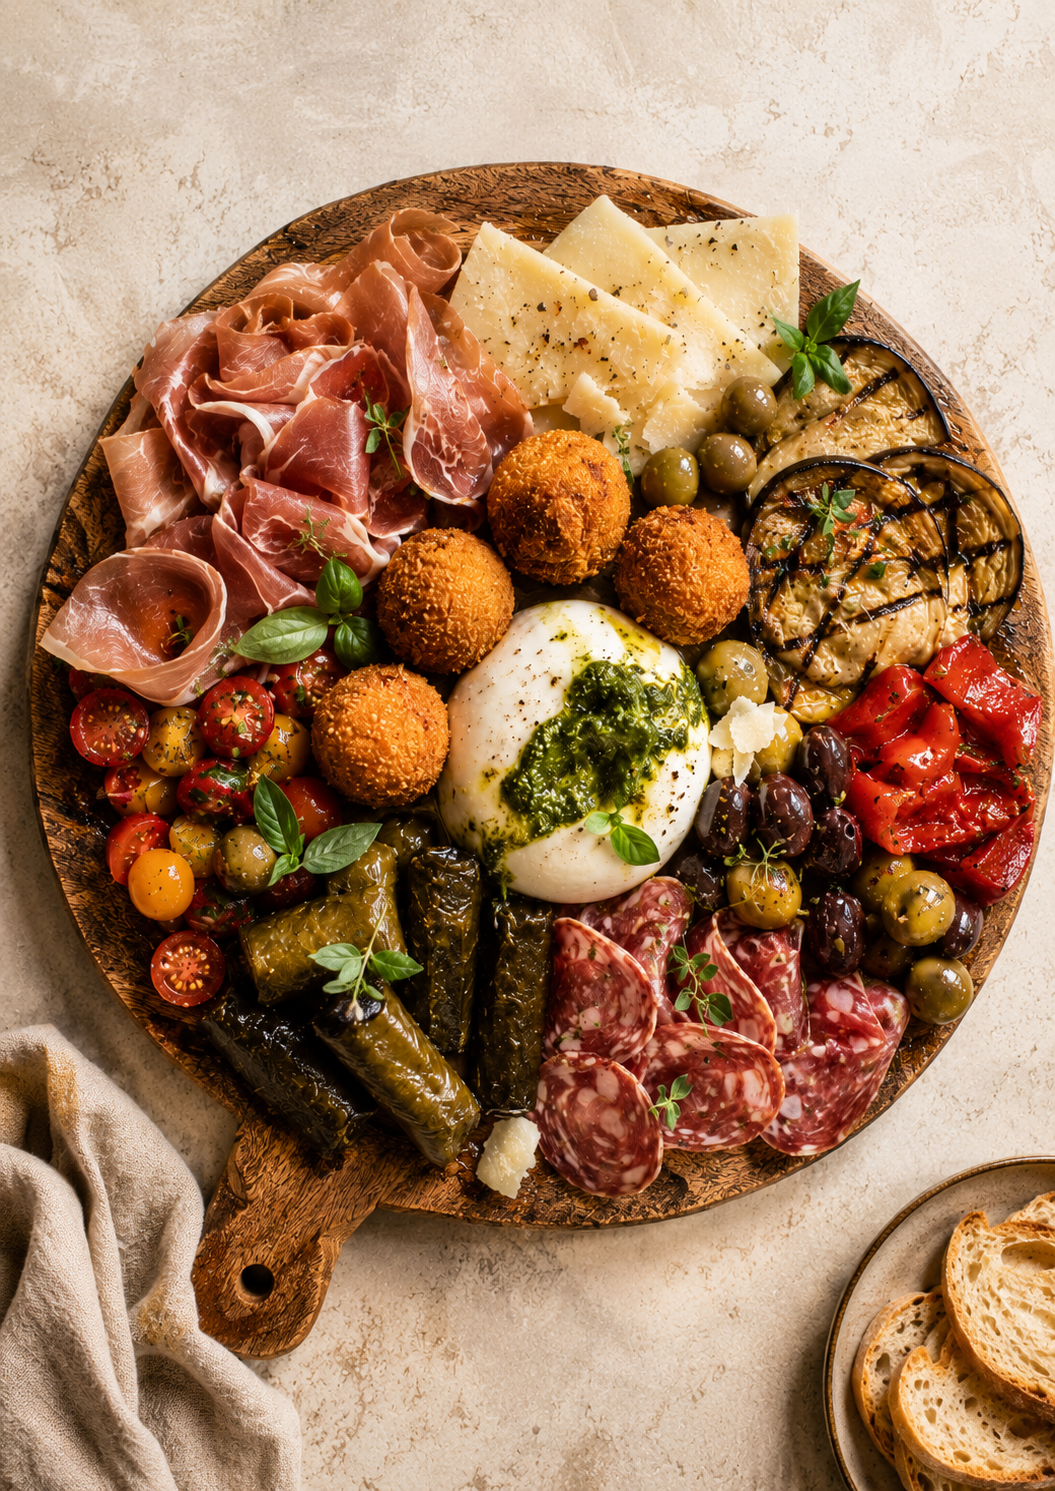
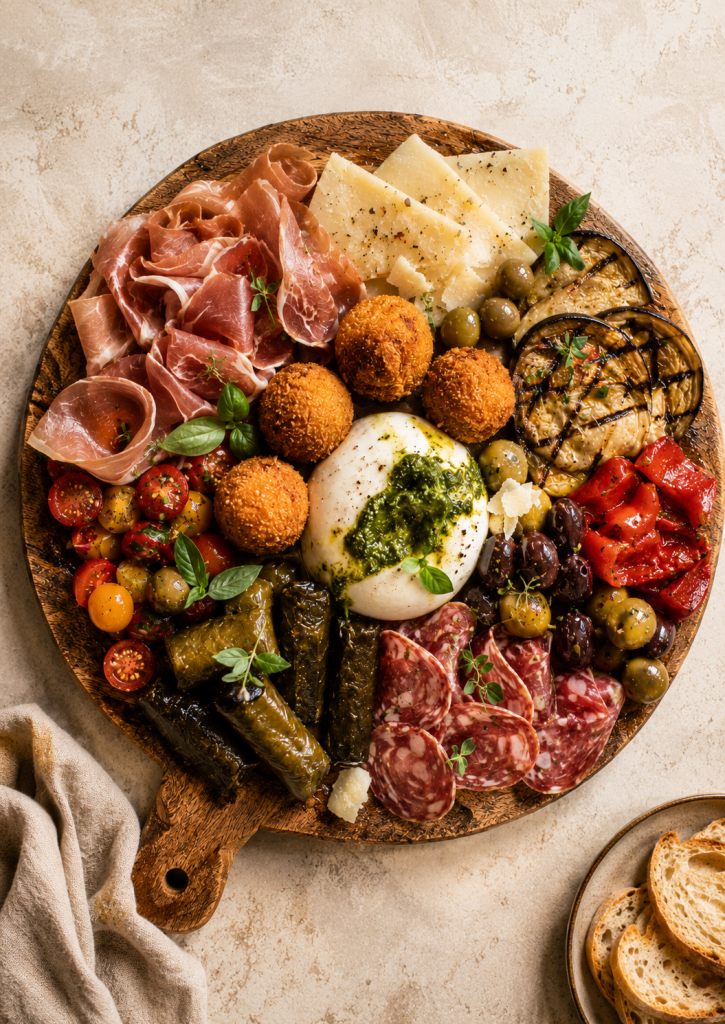
  • Rustic Antipasto Platter

    Rustic Antipasto Platter

    A generous Italian-style grazing platter with creamy burrata, warm arancini, cured meats, hard cheese, dolmades, marinated vegetables, olives and pesto, served with toasted bread or crackers for sharing.

    Ingredients

    1 large burrata

    4–6 arancini balls, warmed

    150 g prosciutto

    150 g salami or sopressa

    120 g hard cheese, such as parmesan, pecorino or aged cheddar, sliced or shaved

    1 cup dolmades

    1 cup grilled eggplant slices

    1 cup marinated olives

    1 cup roasted capsicum

    1 cup cherry tomatoes, halved

    2–3 tbsp pesto

    1 tbsp olive oil

    Cracked black pepper

    Fresh basil or oregano

    Toasted bread, crackers or crostini, to serve

    Method

    Choose a large rectangular wooden board or platter.

    Place the burrata in the centre and spoon pesto over the top. Drizzle with olive oil and finish with cracked pepper.

    Arrange the arancini around the burrata while still warm.

    Fold or loosely pile the prosciutto and salami in separate sections of the board.

    Add the cheese slices, dolmades, grilled eggplant, olives, roasted capsicum and cherry tomatoes in small grouped piles around the board.

    Fill any gaps with fresh basil or oregano, extra olives or tomatoes.

    Serve with toasted bread, crackers or crostini on the side.

    You Might Also Like

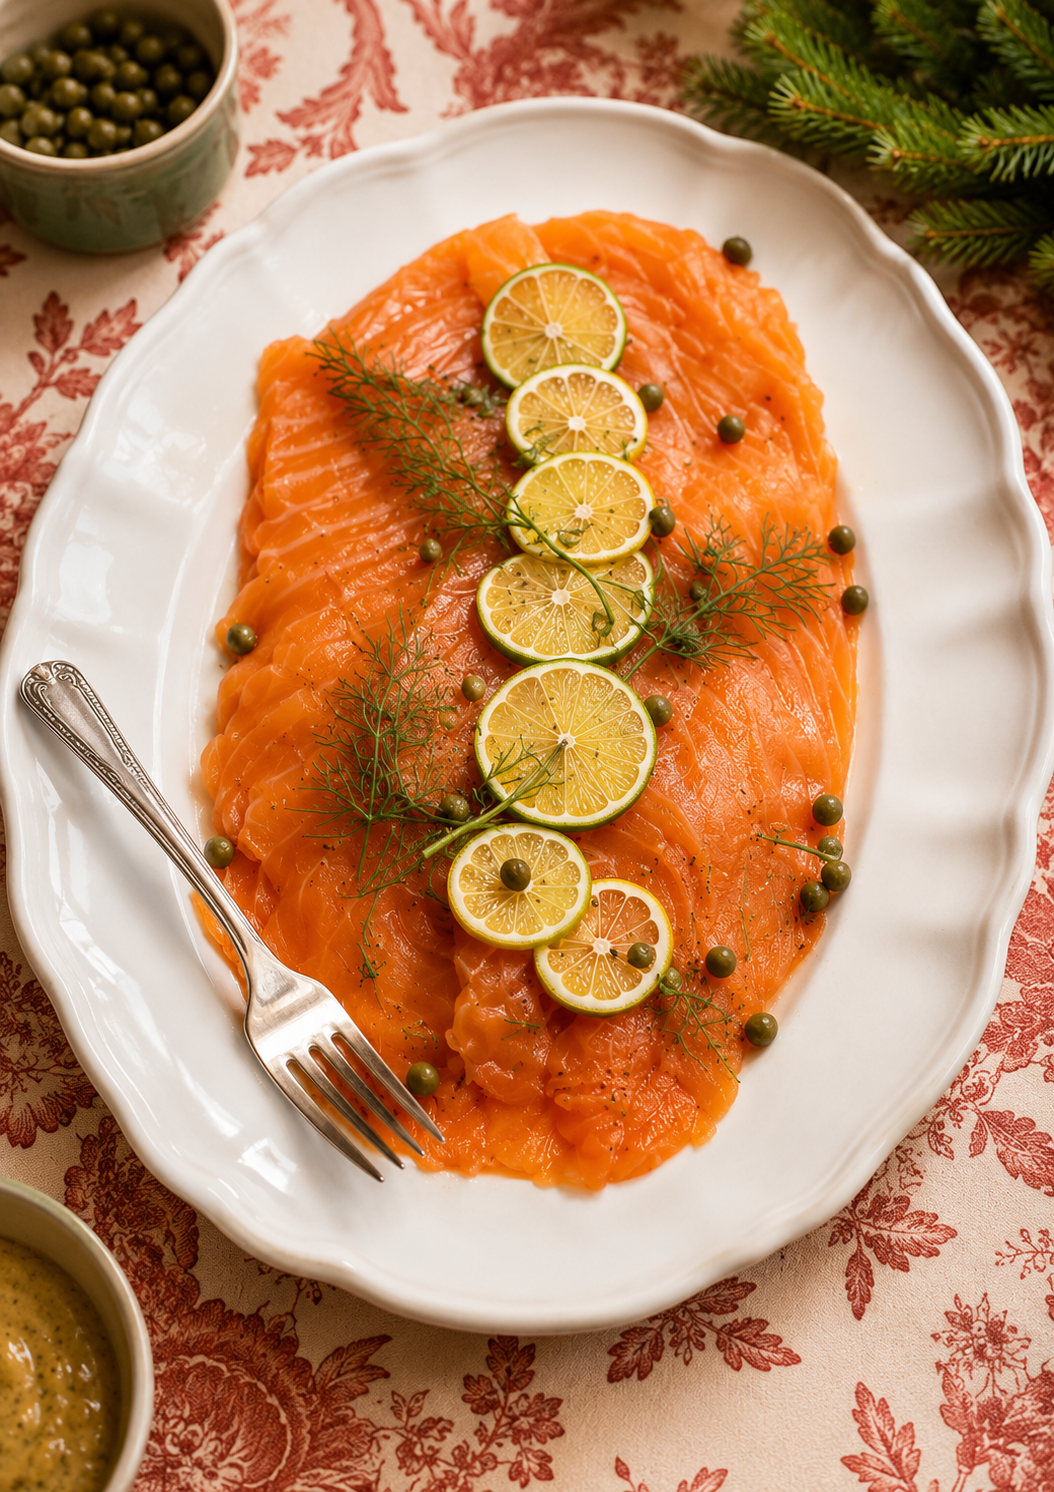
  • Gravadlax

    Gravadlax

    A fresh, elegant starter or brunch platter that works beautifully for Easter, long lunches or grazing tables. Always a staple with the Swedish side of my family.

    Why This Gravadlax Works

    This gravadlax works because the simple cure of salt, sugar, dill and citrus does all the work, no cooking required. The salmon slowly firms up and takes on bright, herby flavour over a day or two in the fridge, resulting in silky, delicately cured salmon that looks impressive but takes only minutes of hands-on effort.

    Ingredients

    • 700 g–1 kg fresh salmon fillet, skin on, pin-boned
    • ¼ cup sea salt
    • ¼ cup caster sugar
    • 1 tbsp cracked black pepper
    • 1 large bunch fresh dill, roughly chopped
    • Zest of 1 lemon
    • 1 lemon or lime, thinly sliced
    • 2 tbsp baby capers, drained
    • Extra dill sprigs, to serve
    • Optional mustard dressing
    • 2 tbsp Dijon mustard
    • 1 tbsp honey
    • 1 tbsp lemon juice
    • 2 tbsp olive oil
    • 1 tbsp finely chopped dill
    • Cracked black pepper
    • 1 tbsp gin, vodka or aquavit, optional.

    Method

    • Pat salmon dry and place it skin-side down on a large piece of baking paper or cling film.
    • Mix salt, sugar, pepper, chopped dill and lemon zest. Rub the mixture evenly over the flesh side of the salmon.
    • Drizzle over gin, vodka or aquavit if using.
    • Wrap tightly, place in a shallow dish and weigh down with a plate or small tray.
    • Refrigerate for 24–48 hours, turning once halfway through. The longer it cures, the firmer and saltier it becomes.
    • Unwrap the salmon and gently scrape off most of the cure and dill. Pat dry.
    • Slice thinly on an angle, leaving the skin behind.
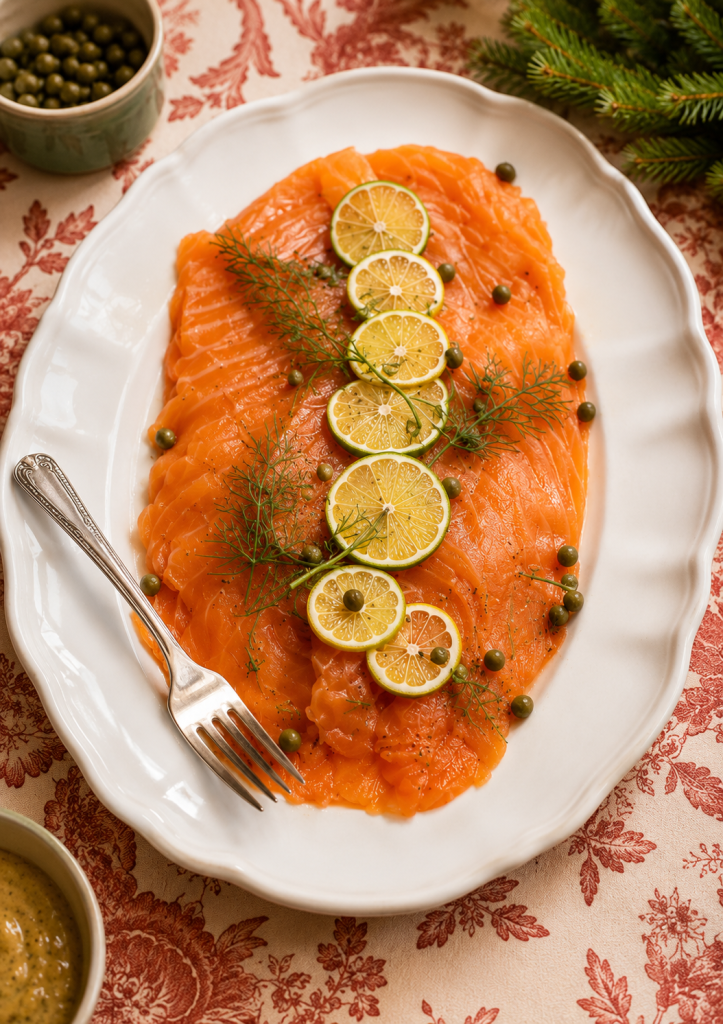
    • Arrange on a platter with lemon or lime slices, capers and fresh dill.
    • For the dressing, whisk Dijon, honey, lemon juice, olive oil, dill and pepper until smooth.
    • Serve chilled with mustard dressing, crackers, rye bread or sourdough.

    You Might Also Like

    Tips for the Best Gravadlax

    • Use the freshest, highest-quality salmon you can find since it’s not cooked, so quality really shows.
    • Weight the salmon down while it cures so it stays in even contact with the salt and sugar mixture.
    • Turn the salmon once or twice during curing so it cures evenly on both sides.
    • Slice the gravadlax very thinly on an angle, against the grain, for the best texture.

    Storage Tips

    Once cured, wrap the gravadlax tightly in plastic wrap or foil and store it in the fridge for up to 5 days. Sliced gravadlax is also fine to freeze for up to 2 months, wrapped well in an airtight container, then thawed overnight in the fridge before serving.

    Serving Suggestions

    Serve this gravadlax thinly sliced on rye bread or crackers with a dollop of mustard dill sauce, or add it to a grazing platter alongside our Smoked Salmon Starter for a seafood-forward spread. A squeeze of fresh lemon and extra dill just before serving keeps everything tasting bright. Gravadlax also works beautifully as part of a bigger brunch spread with soft scrambled eggs, capers and pickled red onion, or piled onto blinis for an elegant canapé. It’s a wonderful make-ahead option for entertaining since all the work happens a day or two before your guests arrive, leaving you free to focus on the rest of the table when it’s time to serve. It’s an easy way to impress a crowd without spending the morning in the kitchen. It’s a dish worth adding to your regular entertaining rotation. Give it a try for your next gathering. Everyone will be impressed. Truly a crowd favourite dish. Enjoy every bite.

  • Smoked Honey Glazed Ham

    Smoked Honey Glazed Ham

    A glossy, caramelised glazed ham with smoky edges and a bright orange, honey and Dijon finish. Sweet, savoury and a little tangy, it makes an impressive centrepiece without needing much hands-on work.

    Why This Smoked Honey Glazed Ham Recipe Works

    This smoked honey glazed ham is the kind of centrepiece that looks like it took hours of effort but is genuinely simple to pull off. A smoked, whole or half leg ham gets basted in a sticky orange, honey and Dijon glaze that caramelises into a deep, glossy crust in the oven. The result is a smoked honey glazed ham with sweet, savoury and tangy flavour in every slice, perfect for feeding a crowd at Christmas, Easter or any big family gathering.

    Serves: 10–12
    Time: 3½–4 hours

    Ingredients

    For the ham

    • 1 whole or half leg ham, about 4–5kg
    • 2 tbsp whole cloves, optional

    For the orange, honey & Dijon glaze

    • ½ cup brown sugar
    • ⅓ cup honey
    • ¼ cup Dijon mustard
    • ⅓ cup fresh orange juice
    • 1 tbsp finely grated orange zest
    • 2 tbsp apple cider vinegar
    • 1 tbsp Worcestershire sauce
    • ½ tsp ground cinnamon
    • ¼ tsp ground cloves or allspice
    • ½ tsp freshly cracked black pepper
    • Pinch of sea salt

    Method

    1. Prepare the ham. Preheat your smoker to 120°C. Remove the rind from the ham, leaving the layer of fat intact.
    2. Score the fat. Using a sharp knife, lightly score the fat in a diamond pattern without cutting deeply into the meat. Stud the intersections with whole cloves if using.
    3. Smoke the ham. Place the ham in the smoker and cook for 2½–3 hours, or until warmed through and lightly infused with smoke.
    4. Make the glaze. Add the brown sugar, honey, Dijon, orange juice, orange zest, apple cider vinegar, Worcestershire, cinnamon, cloves, pepper and salt to a saucepan. Simmer gently for 5–8 minutes, stirring, until glossy and slightly thickened.
    5. Glaze generously. Increase the heat to around 190–200°C or transfer the ham to a hot BBQ or oven. Brush all over with a generous layer of glaze.
    6. Caramelise. Cook for another 20–30 minutes, brushing with more glaze every 5–10 minutes, until deeply golden, sticky and caramelised around the edges.
    7. Rest. Remove from the heat and rest for 15–20 minutes before carving.
    8. Serve. Slice and spoon over any remaining warm glaze, with fresh orange wedges alongside if you like.

    Tip: Keep the final glaze stage fairly hot and short. You want the sugars to caramelise and become sticky without burning.

    You Might Also Like

    Tips for the Best Smoked Honey Glazed Ham

    • Score the fat in a diamond pattern before glazing, this helps the glaze cling and gives you that classic caramelised crust.
    • Baste every 20-30 minutes while it bakes, regular basting builds up layers of sticky glaze and stops the surface from drying out.
    • Cover loosely with foil for the first part of cooking, then remove it towards the end so the glaze can caramelise without burning.
    • Let the ham rest for 15-20 minutes before carving, this keeps the meat juicy and makes for much neater slices.

    Storage and Leftovers

    Leftover smoked honey glazed ham will keep well in an airtight container in the fridge for up to 5 days. Slice off what you need as you go, keeping the bone in with the remaining meat helps it stay moist for longer. Leftover ham is brilliant stirred through a pot of Chicken Noodle Soup, piled into sandwiches, or diced into a frittata for a quick, no-waste lunch.

    Serving Suggestions

    This smoked honey glazed ham is a natural centrepiece for a Christmas or Easter table, served alongside roast potatoes, greens and a big bowl of Homemade Baked Beans. It’s equally good cold the next day, thinly sliced onto sandwiches or added to a grazing platter with cheese, pickles and crusty bread. For a classic glaze that never fails, a mix of honey, Dijon mustard and orange juice is hard to beat.

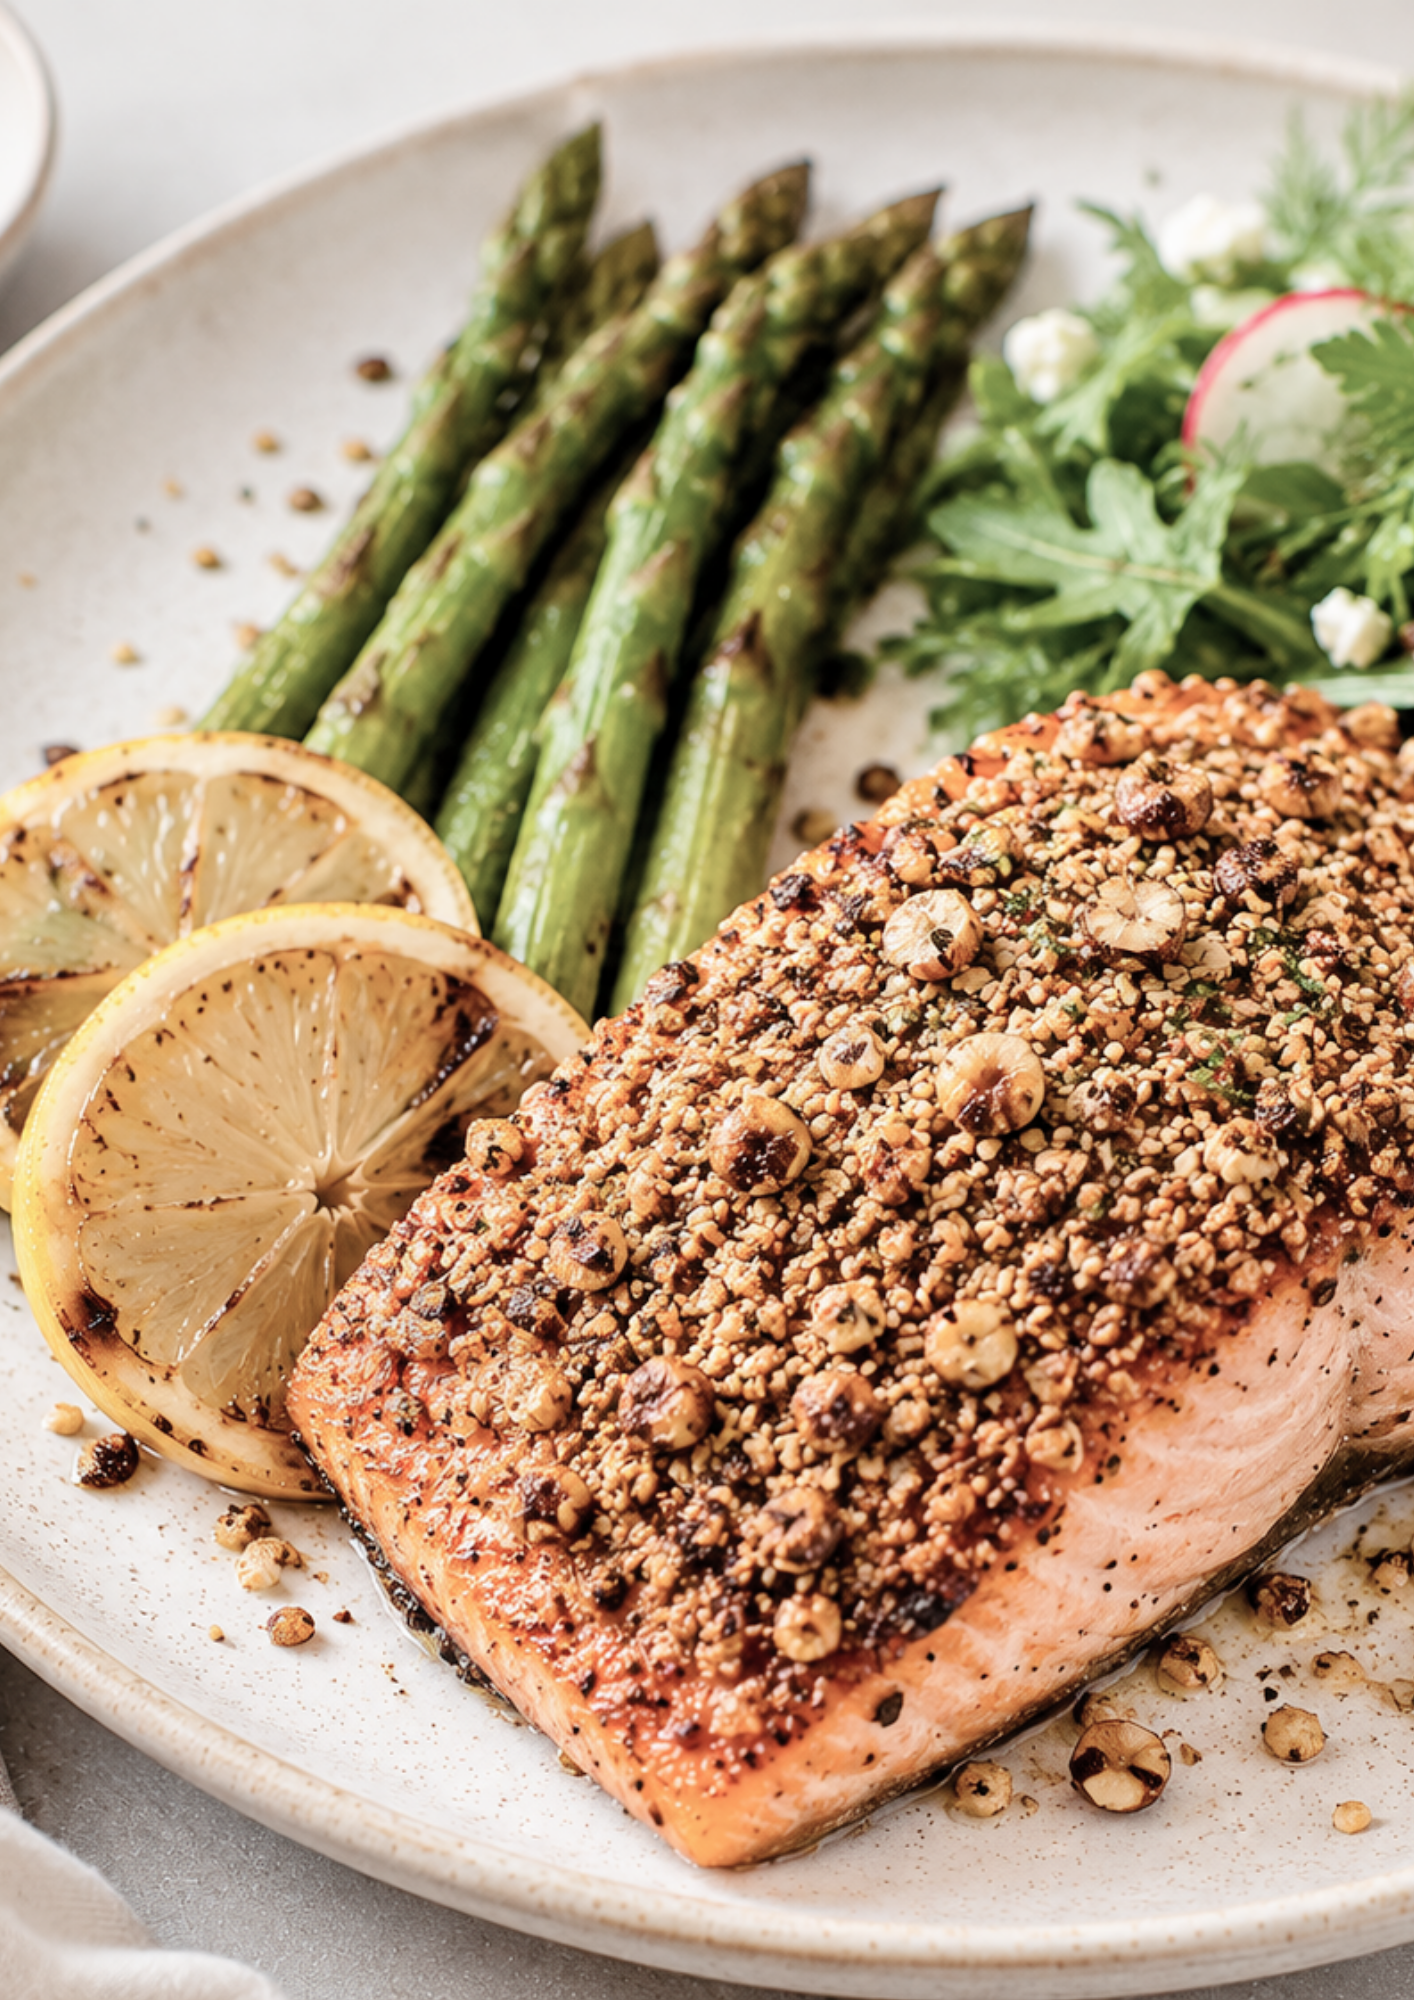
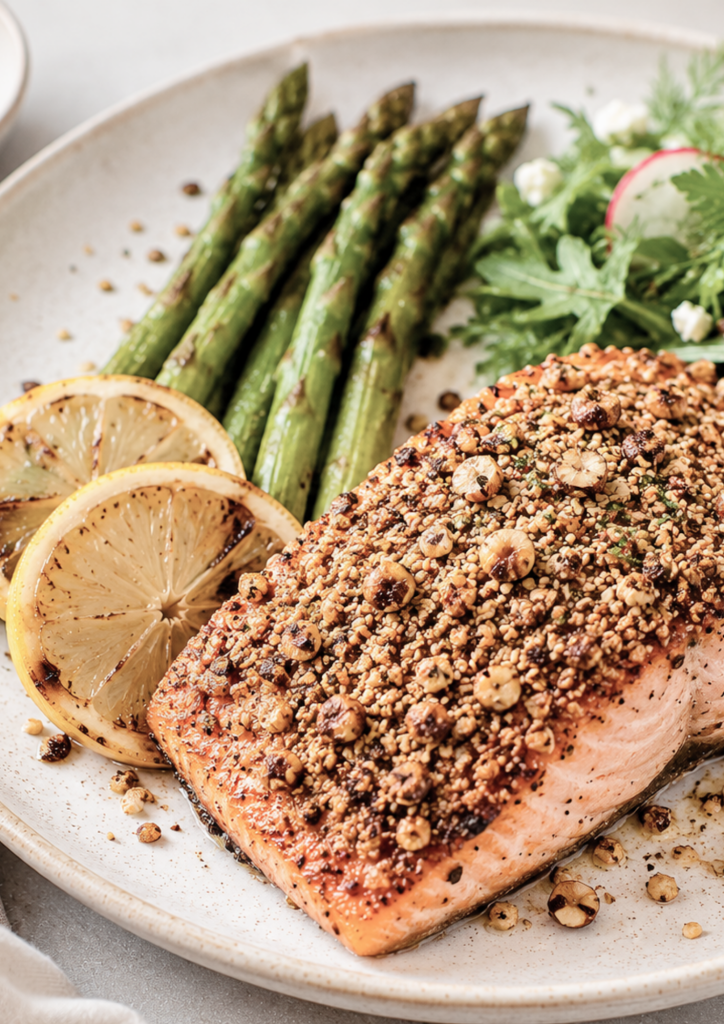
  • Hazelnut Dukkah Salmon

    Hazelnut Dukkah Salmon

    Salmon fillets baked with asparagus, lemon and olive oil, then topped with a crunchy hazelnut dukkah made with sesame, cumin, coriander, smoked paprika and sea salt.

    SERVES 2

    TIME: 35 MINS

    ~ 560 calories per serve

    ~ 38g protein per serve

    Ingredients

    2 salmon fillets

    1 bunch asparagus, trimmed

    1 lemon, sliced

    1 tbsp olive oil

    Salt and cracked pepper

    Hazelnut Dukkah

    ⅓ cup roasted hazelnuts, roughly chopped

    1 tbsp sesame seeds

    1 tsp coriander seeds

    1 tsp cumin seeds

    ½ tsp smoked paprika

    Pinch sea salt

    To Serve

    Rocket or mixed greens

    Radish slices

    Feta or goat’s cheese, optional

    Extra lemon wedges

    Method

    Toast sesame, coriander and cumin seeds in a dry pan until fragrant. Crush lightly, then mix with hazelnuts, paprika and salt.

    Brush salmon with olive oil and press the hazelnut dukkah over the top.

    Place salmon, asparagus and lemon slices on a lined tray. Drizzle asparagus with olive oil, salt and pepper.

    Bake at 200°C for 12–15 minutes, or until salmon is cooked to your liking.

    Serve with asparagus, charred lemon, greens and a little feta if using. Finish with extra cracked pepper.

    A crunchy, golden salmon dish with warm hazelnut dukkah, charred lemon and simple asparagus.

    You Might Also Like

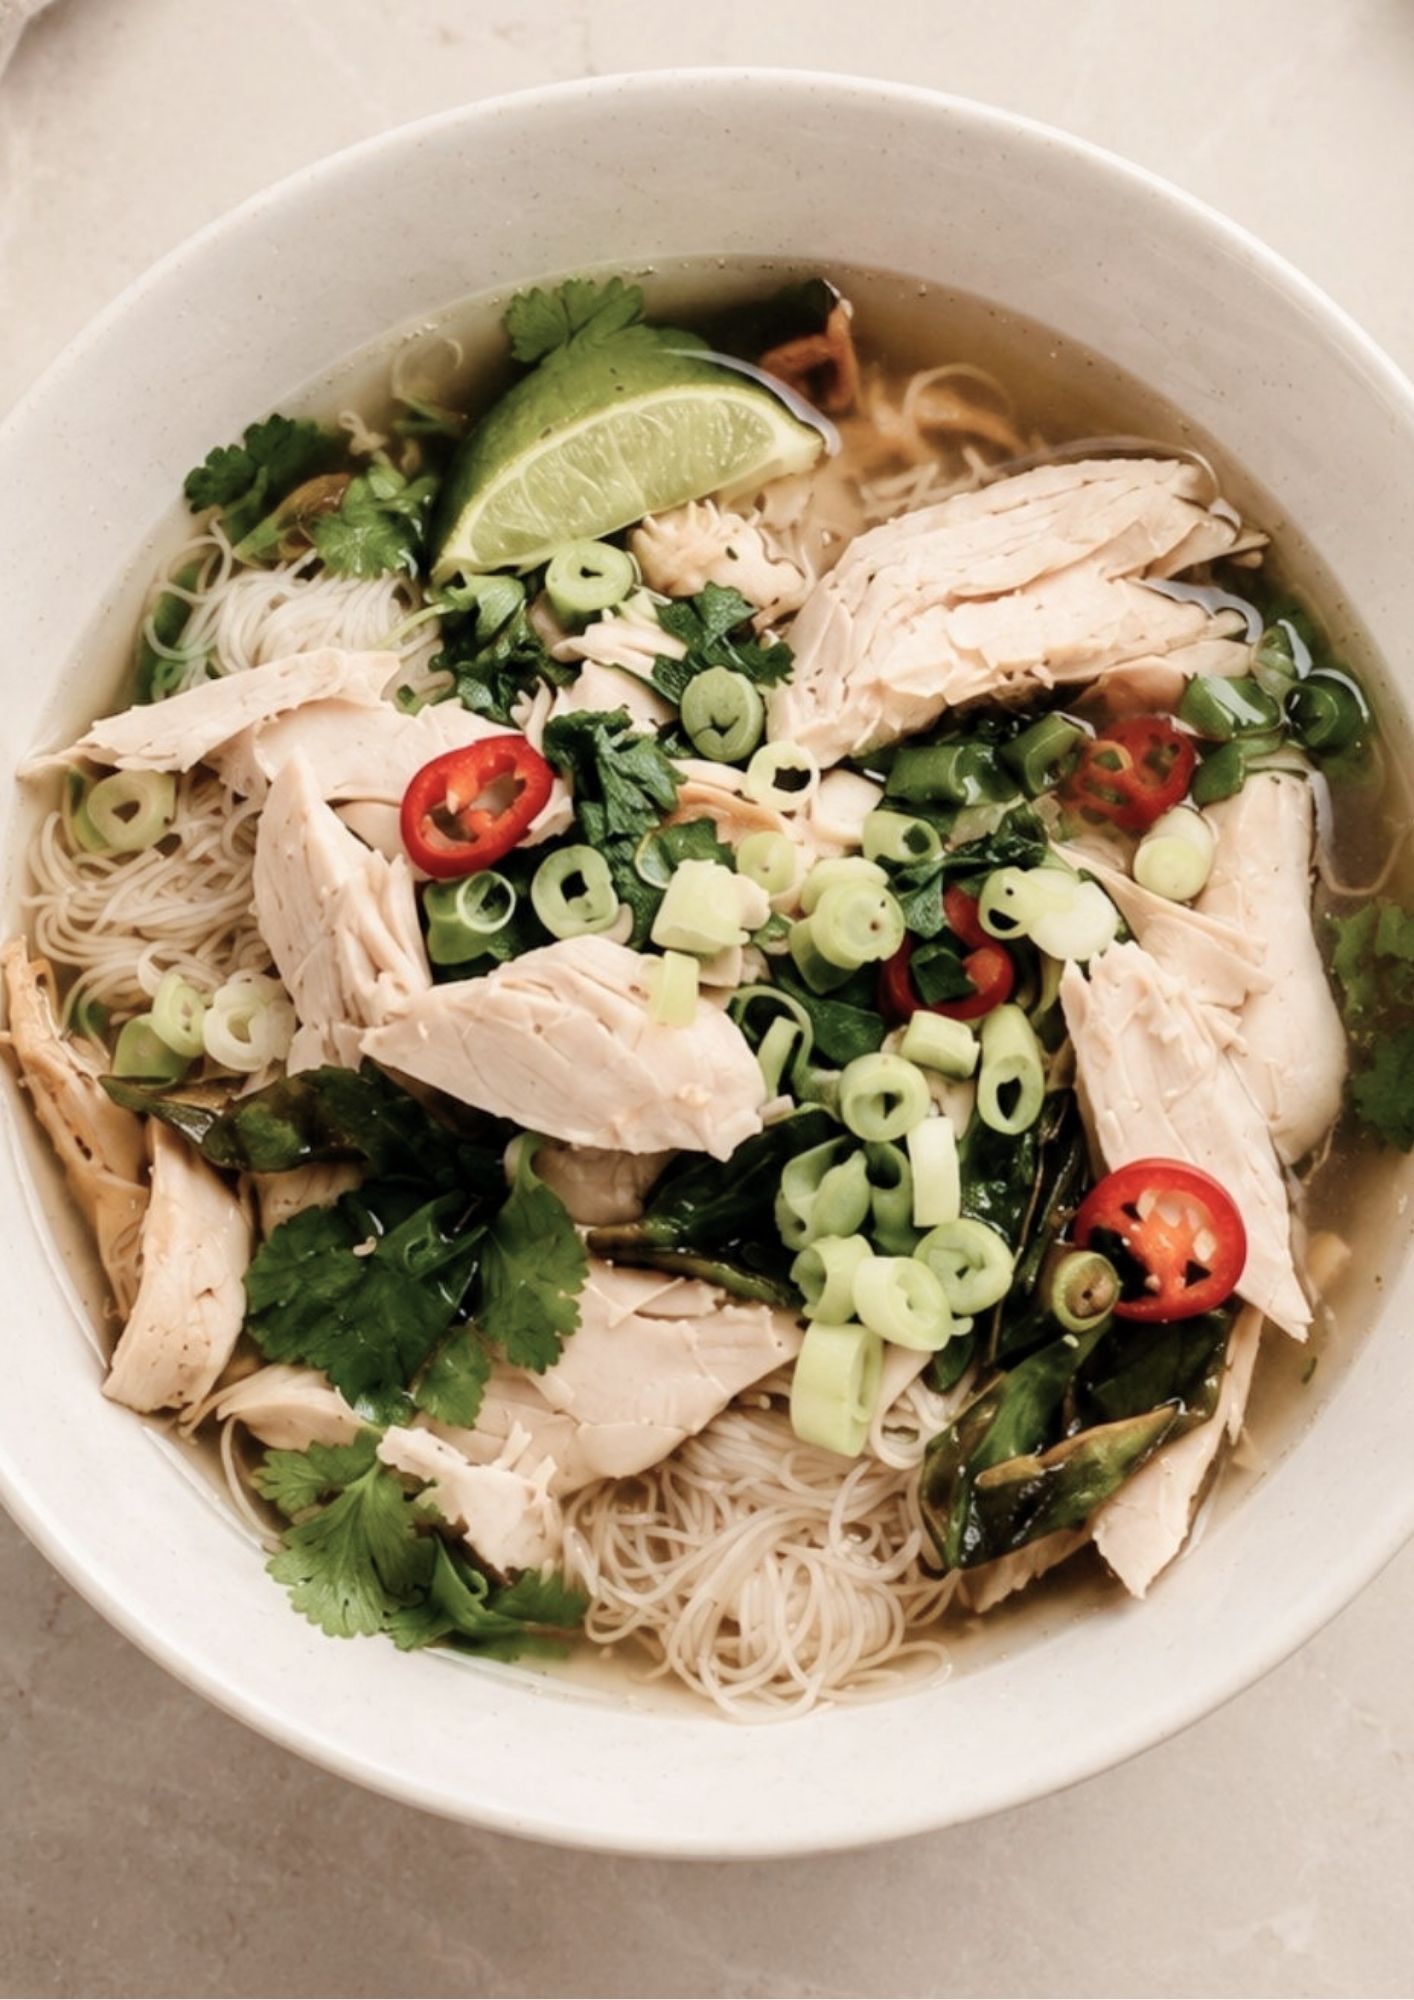
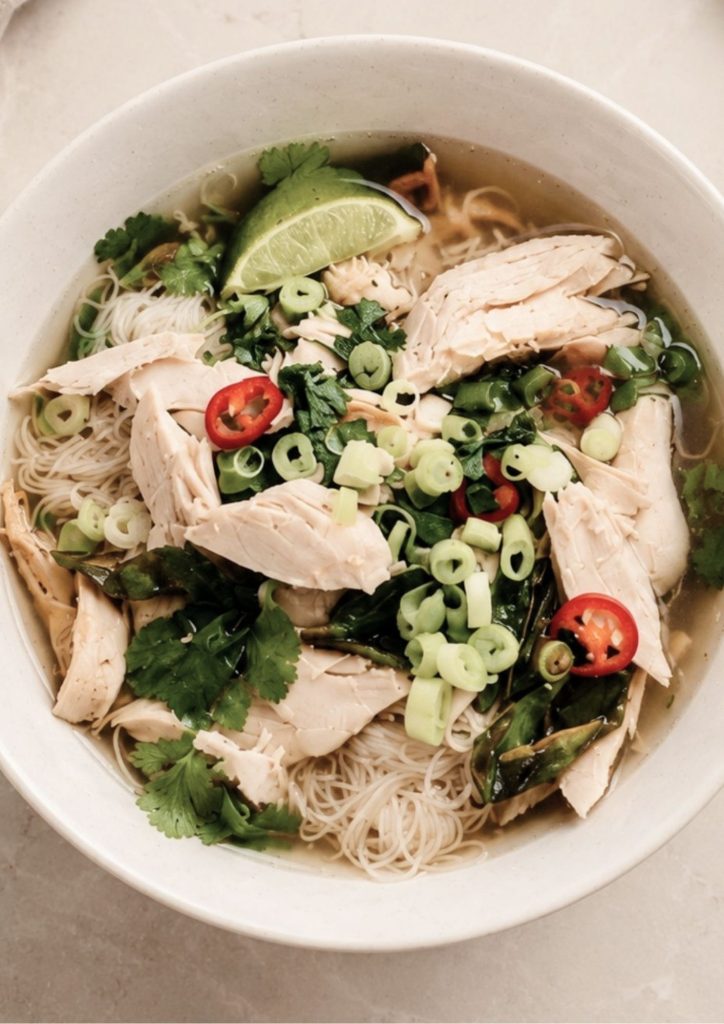
  • Chicken Noodle Soup

    Chicken Noodle Soup

    A cosy chicken pho-style noodle soup with fragrant broth, tender shredded chicken, rice noodles and fresh herbs. Packed full of protein, this is a truly nourishing meal.

    SERVES 4

    TIME: 55 MINUTES

    ~ 450 calories per serve

    ~ 36g protein per serve

    Ingredients

    Broth

    1 tbsp olive oil or sesame oil

    1 brown onion, halved

    4 garlic cloves, smashed

    1 large piece ginger, sliced

    2 star anise

    1 cinnamon stick

    3–4 whole cloves, optional

    1 tsp coriander seeds

    1.5L chicken stock

    1 tbsp fish sauce

    1 tbsp soy sauce or tamari

    1 tsp brown sugar

    Salt and pepper, to taste

    Soup

    2 cooked chicken breasts, shredded, or 500g cooked shredded chicken

    250g rice noodles

    1 cup bean sprouts

    2 spring onions, finely sliced

    1 fresh red chilli, sliced

    ½ cup fresh coriander

    ½ cup Thai basil or mint

    1 lime, cut into wedges

    To Serve

    Extra herbs

    Lime wedges

    Chilli oil or chilli crisp, optional

    Extra bean sprouts

    Method

    Heat the oil in a large pot over medium heat. Add the onion, garlic and ginger and cook for 3–5 minutes, or until lightly golden and fragrant.

    Add the star anise, cinnamon, cloves and coriander seeds, if using. Toast for 1–2 minutes to release the flavour, then pour in the chicken stock. Add the fish sauce, soy sauce or tamari, brown sugar, salt and pepper.

    Bring to a gentle simmer and cook for 30–40 minutes, allowing the broth to become fragrant. Strain the broth, discarding the aromatics, then return the clear broth to the pot.

    Cook the rice noodles according to packet instructions, then divide between serving bowls. Add the shredded chicken and ladle over the hot broth.

    Top with bean sprouts, spring onion, chilli, coriander, Thai basil or mint. Serve with lime wedges and chilli oil if desired.

    You Might Also Like

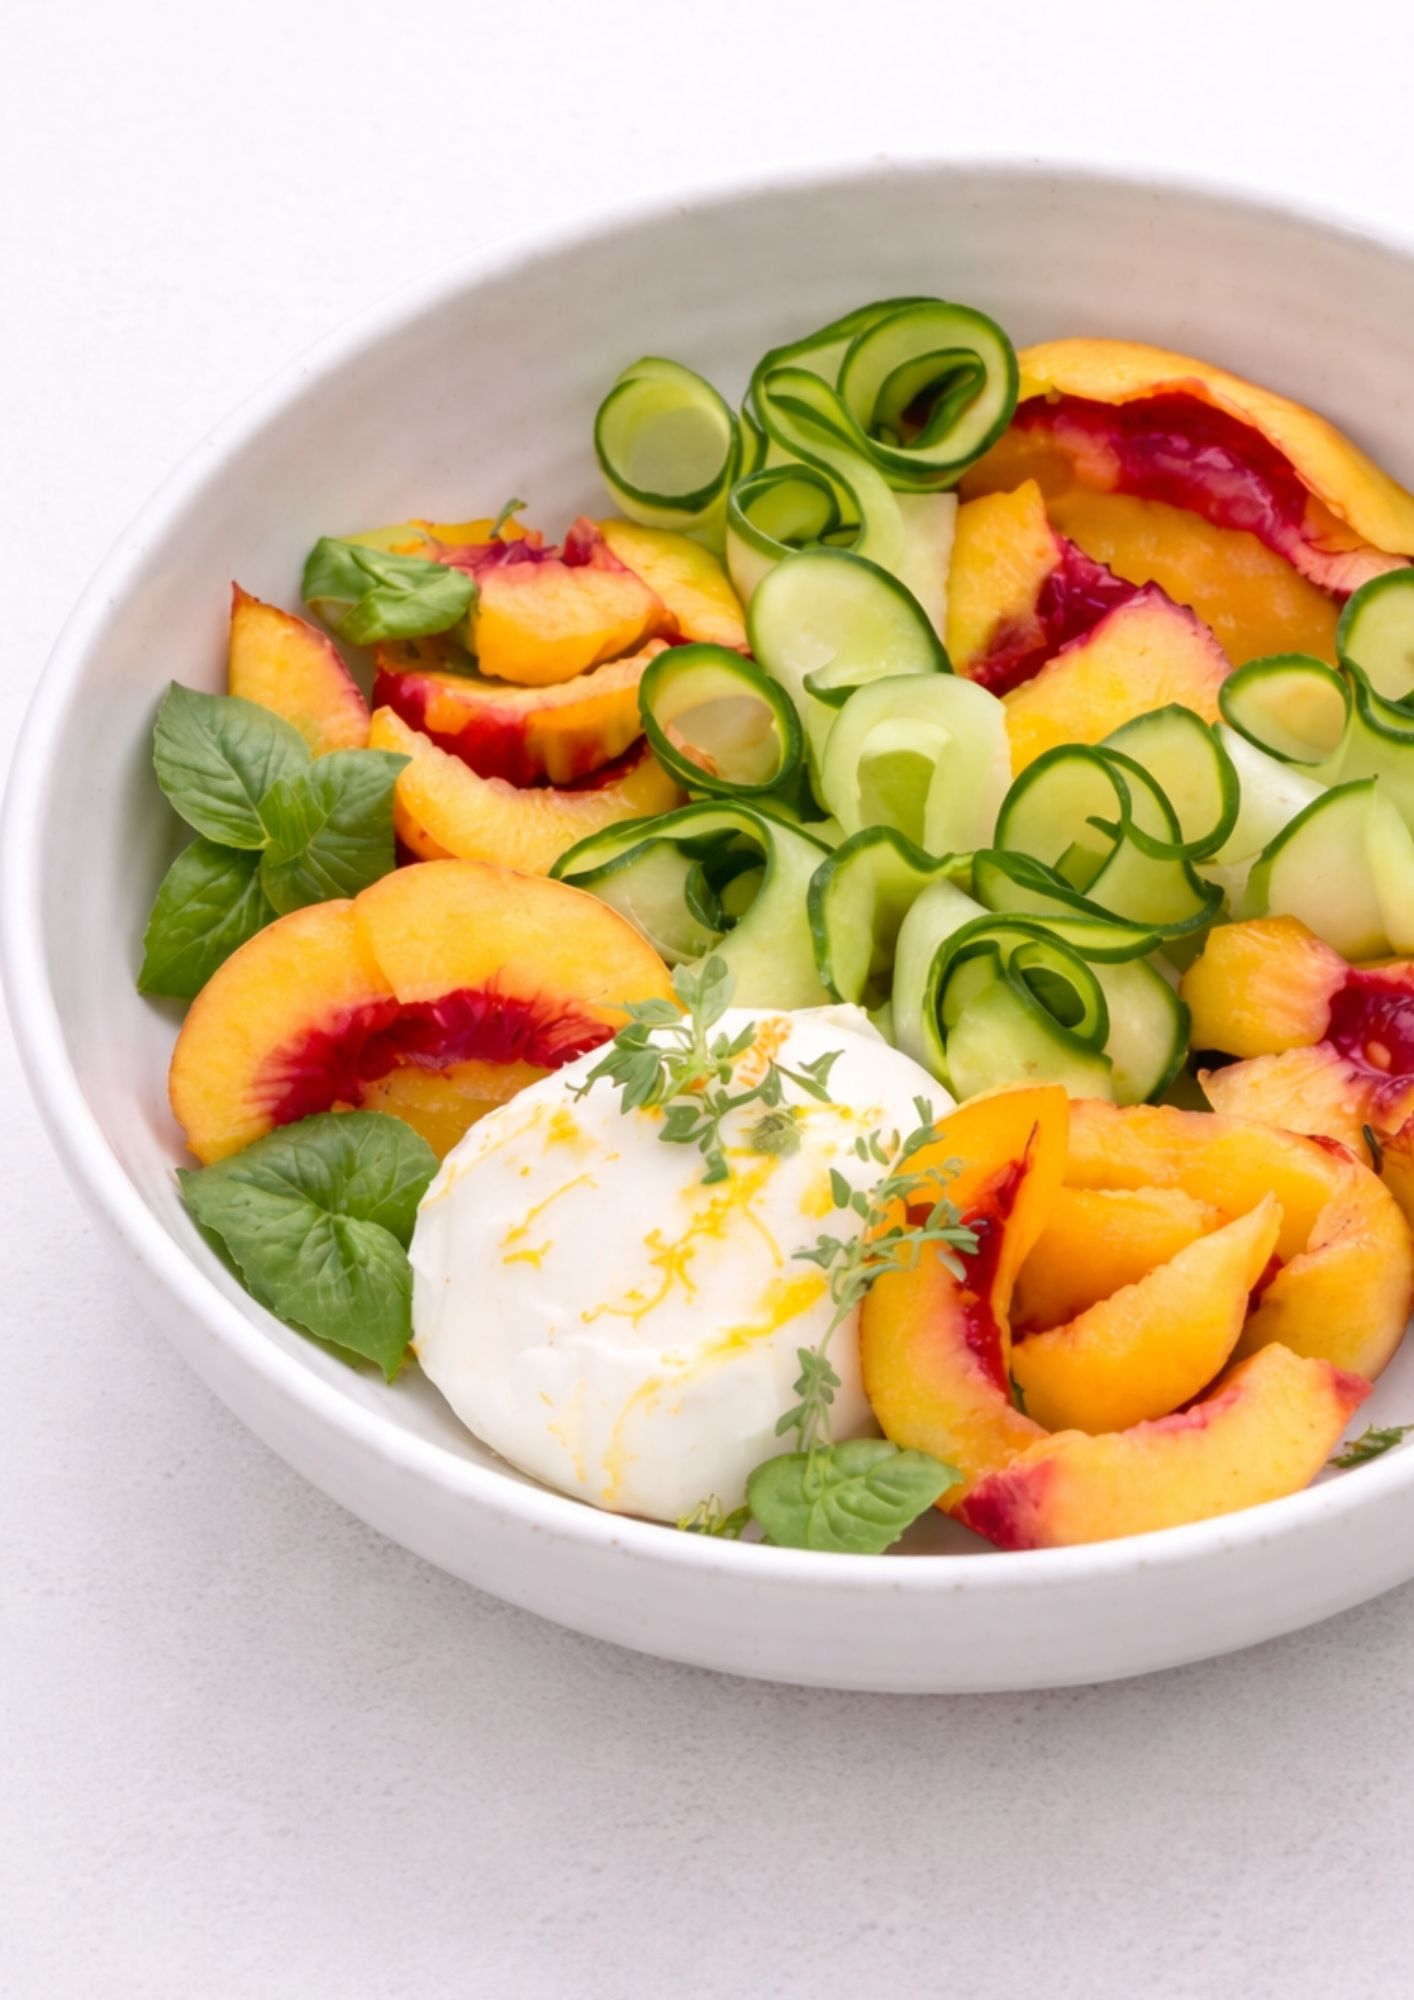
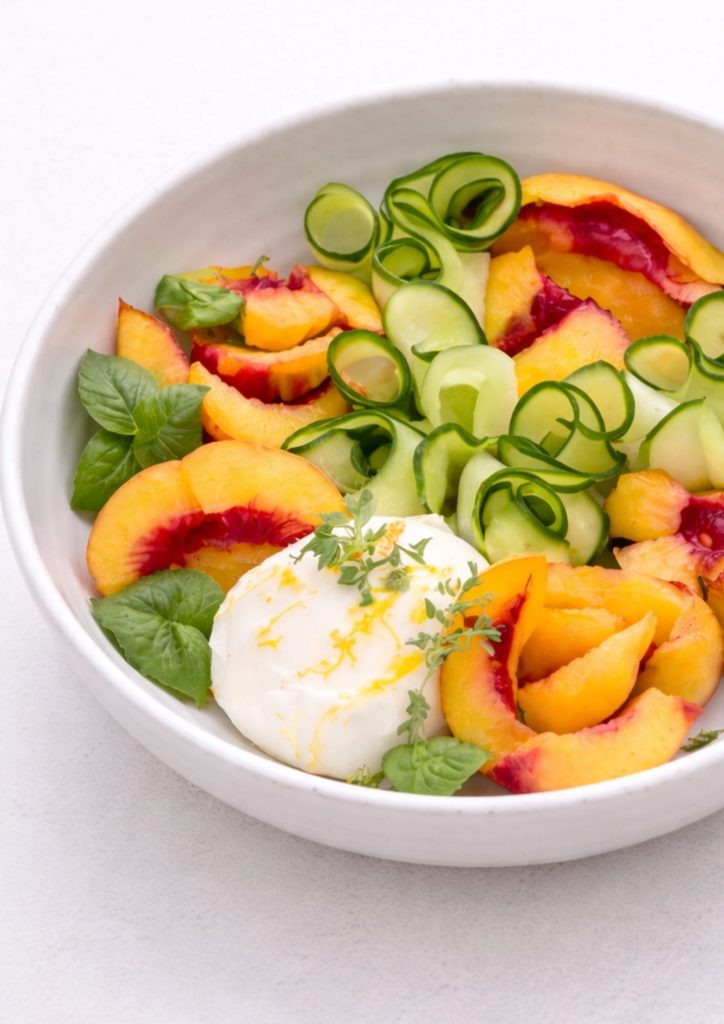
  • Peach & Burrata Salad

    Peach & Burrata Salad

    This peach and burrata salad is a fresh peach, cucumber and burrata salad with lemon, olive oil and soft herbs — light, creamy and perfect for warm days when peaches are sweet and juicy.

    SERVES 4

    TIME: 10 MINS

    ~ 200calories per serve

    ~ 8g protein per serve

    Ingredients

    2 ripe peaches, sliced

    ½ cucumber, shaved into ribbons

    (using a peeler or mandoline)

    1 ball burrata

    A small handful fresh basil or mint leaves

    1 tsp lemon zest

    1–2 tsp lemon juice

    1 tbsp olive oil

    Salt and freshly cracked black pepper

    Method

    Arrange the sliced peaches in a shallow bowl or plate, allowing their juices to settle naturally.

    Layer over the cucumber ribbons, gently twisting and folding them for a light, airy texture.

    Tear the burrata and place it alongside the fruit and cucumber. Scatter over fresh herbs.

    Finish with lemon zest, a squeeze of lemon juice, and a drizzle of olive oil. Season lightly with salt and pepper.

    You Might Also Like

    Tips for the Best Peach and Burrata Salad

    • Choose peaches that are ripe but still firm so they hold their shape when sliced.
    • Tear the burrata just before serving so the creamy centre spills out beautifully over the salad.
    • Use a good extra virgin olive oil and fresh lemon juice for the dressing — the simplicity of this salad means quality ingredients really shine.
    • Season generously with flaky salt and black pepper just before serving to balance the sweetness of the peaches.

    Why This Peach and Burrata Salad Works

    Peach and burrata salad is one of those effortless combinations that tastes far more impressive than the work involved. Ripe peaches bring natural sweetness, while creamy burrata adds richness that pairs beautifully with crisp cucumber and a bright lemon dressing. If you love simple, seasonal salads, our Panzanella Salad is another easy favourite worth trying.

    Storage and Make-Ahead Tips

    This peach and burrata salad is best assembled just before serving, but you can prep the components ahead of time. Slice the peaches and cucumber and store them separately in airtight containers in the fridge for up to a day, keeping the burrata sealed in its liquid until you are ready to use it. Make the lemon-olive oil dressing in advance and store it in a jar in the fridge, then shake well before drizzling. Once assembled with the dressing, the salad is best eaten within a couple of hours, as the peaches will start to release juice and soften the herbs.

    Serving Suggestions

    Serve this peach and burrata salad as a light lunch on its own with crusty bread, or alongside grilled chicken, fish or prosciutto for a more substantial meal. It also makes a beautiful starter for a summer dinner party, plated on a large platter with the burrata torn in the centre and the peaches and herbs scattered around it. A chilled glass of white wine or a sparkling drink pairs perfectly with the sweet and savoury flavours in this dish.

    Ingredient Swaps

    No burrata on hand? Fresh mozzarella or even creamy goat cheese both make great substitutes for this peach and burrata salad. If peaches are out of season, ripe nectarines or even mango work beautifully in their place. Swap the cucumber for thinly sliced fennel for a slightly aniseed crunch, and feel free to use whatever soft herbs you have on hand, such as basil, mint or torn parsley, in place of the ones suggested here. A drizzle of good balsamic glaze is also a lovely finishing touch if you want extra depth of flavour.

    This peach and burrata salad is proof that a handful of good-quality, seasonal ingredients is all you need for a memorable dish. It comes together in minutes, requires no cooking, and looks stunning on the table, making it one of our go-to salads whenever peaches are at their best. Whether you are hosting friends or simply want a fresh, light meal on a warm evening, this salad is guaranteed to impress.
    Give it a try this season.

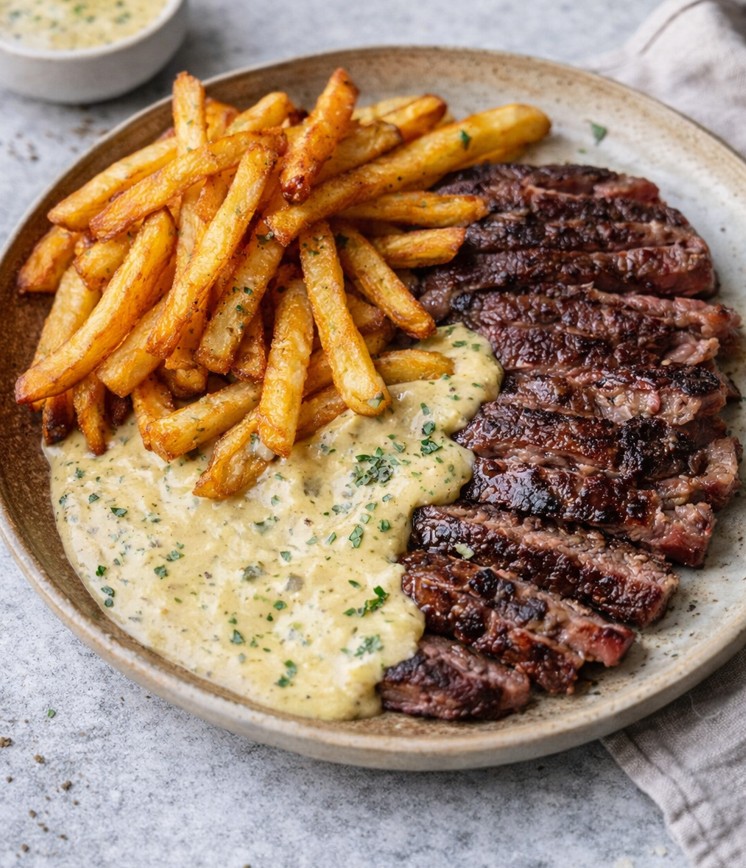
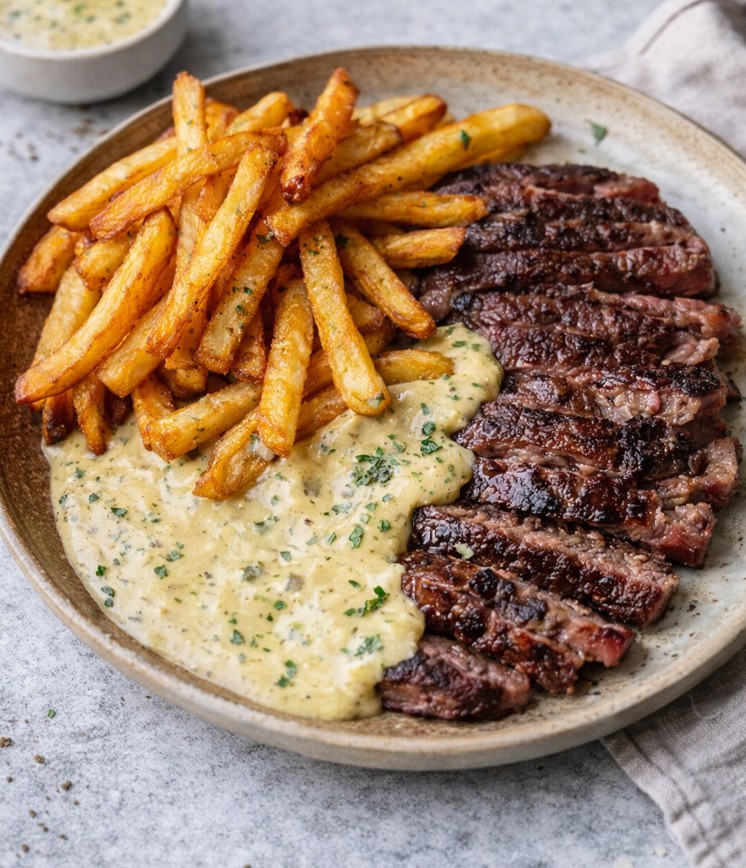
  • Steak Frites with Herbed Sauce

    Steak Frites with Herbed Sauce

    Classic steak frites made with juicy sirloin or ribeye steaks, golden homemade fries and a creamy herbed Dijon sauce with shallot, garlic, Worcestershire and parsley. It is rich, savoury and comforting, with crisp fries and a creamy steakhouse-style finish.

    SERVES 2

    TIME: 40 MINUTES

    ~ 850 calories per serve

    ~ 48g protein per serve

    Ingredients

    For the steak & fries

    2 sirloin or ribeye steaks

    Salt and freshly cracked black pepper

    1–2 tbsp olive oil

    2–3 potatoes, cut into fries

    1 tbsp neutral oil (such as sunflower or canola)

    Salt, to taste

    For the herbed cream sauce

    1 tbsp butter

    1 small shallot, finely chopped

    1 garlic clove, minced

    ½ cup cream

    1 tsp Dijon mustard

    ½ tsp Worcestershire sauce

    2 tsp finely chopped parsley

    Method

    Preheat the oven to 220°C. Toss the cut potatoes with oil and a generous pinch of salt. Spread evenly on a baking tray and roast for 20–25 minutes, turning halfway, until golden and crisp.

    Meanwhile, season the steaks generously with salt and pepper. Heat olive oil in a pan over high heat until very hot. Add the steaks and cook for 2–3 minutes per side for medium-rare, adjusting the time depending on thickness.Remove the steaks from the pan and allow them to rest for at least 5 minutes before slicing.

    In the same pan, reduce the heat to medium and melt the butter. Add the shallot and cook gently until softened. Stir in the garlic and cook for another minute.

    Pour in the cream, Dijon mustard, and Worcestershire sauce. Allow the sauce to simmer gently until slightly thickened. Stir through the chopped parsley and season to taste.

    Slice the rested steak and arrange alongside the fries. Spoon over the warm herbed cream sauce, allowing it to pool naturally on the plate.

    You Might Also Like

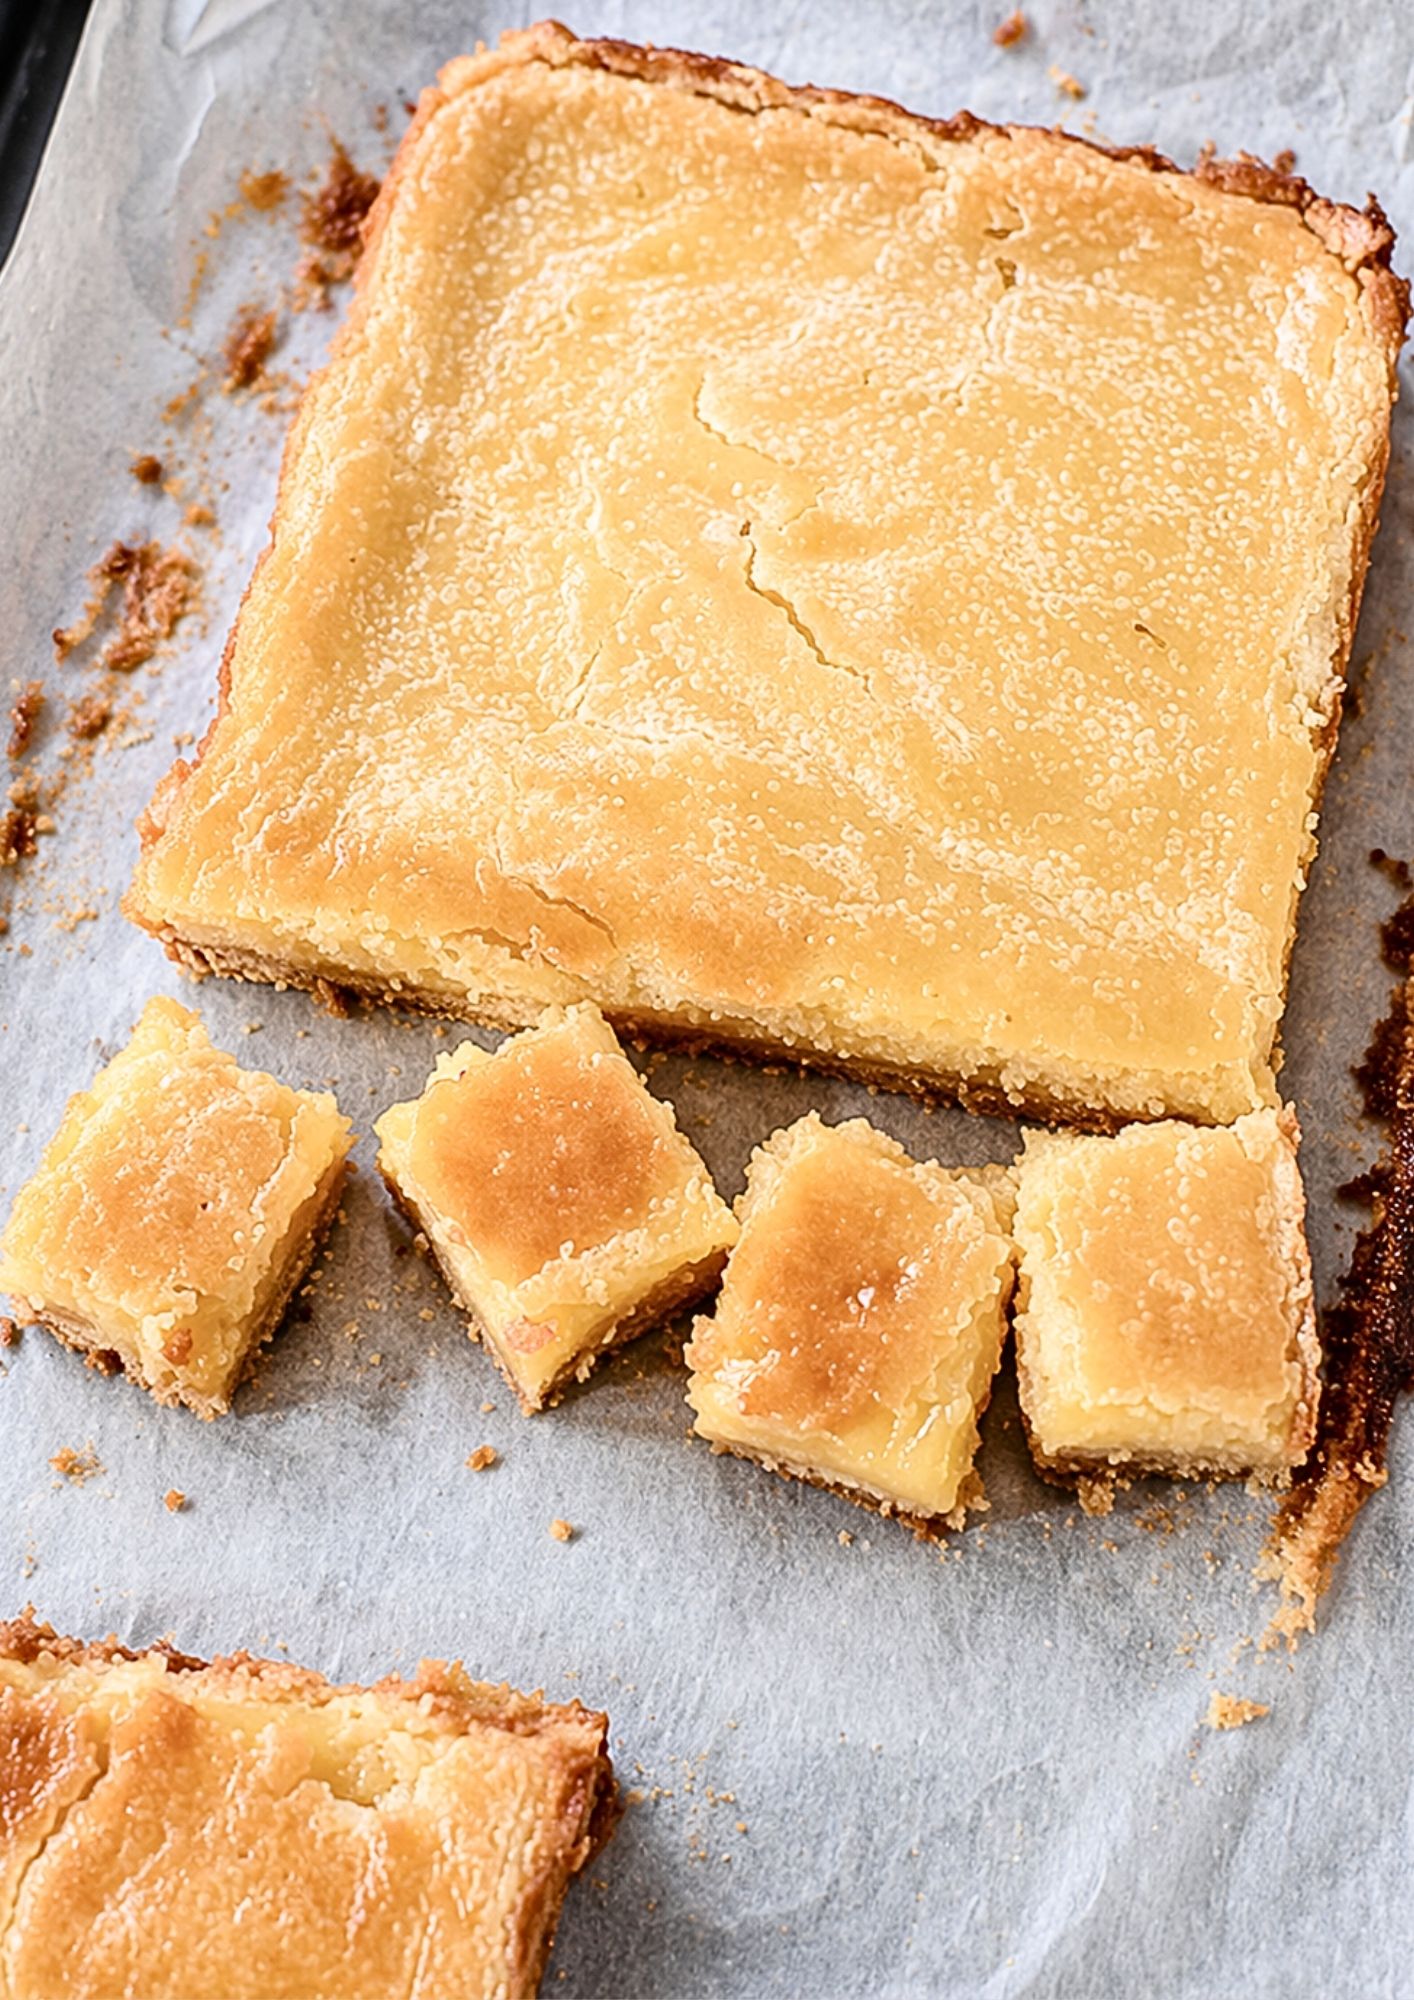
  • Lemon Meringue Slice

    Lemon Meringue Slice

    A sweet lemon meringue slice with a buttery biscuit base, creamy condensed milk lemon filling and fluffy golden meringue topping. It is tangy, sweet and nostalgic, with a soft citrus centre and lightly toasted meringue finish.

    MAKES 16 PIECES

    TIME: 45 MINUTES

    ~ 250 calories per serve

    Ingredients

    250g plain sweet biscuits (like Marie or Digestives),

    125g unsalted butter,

    For the lemon filling:

    4 egg yolks

    1 tbsp lemon zest

    125ml (½ cup) lemon juice

    1 can (395g) sweetened condensed milk

    For the meringue topping:

    4 egg whites

    ½ cup (110g) caster sugar

    ¼ tsp cream of tartar

    Method

    Make the biscuit base: Preheat oven to 160°C (fan-forced) or 180°C. Mix crushed biscuits with melted butter.

    Press the mixture firmly into a lined baking tin. Bake for 10 minutes. Remove and set aside to cool

    Prepare the lemon filling: In a bowl, whisk together egg yolks, lemon zest, lemon juice, and condensed milk until smooth.

    Pour over the pre-baked base and return to the oven for 15–18 minutes or until just set.

    Bake: Bake at 180°C for 8–10 minutes or until the meringue is lightly golden.

    Cool completely in the tin before slicing into bars.

    You Might Also Like

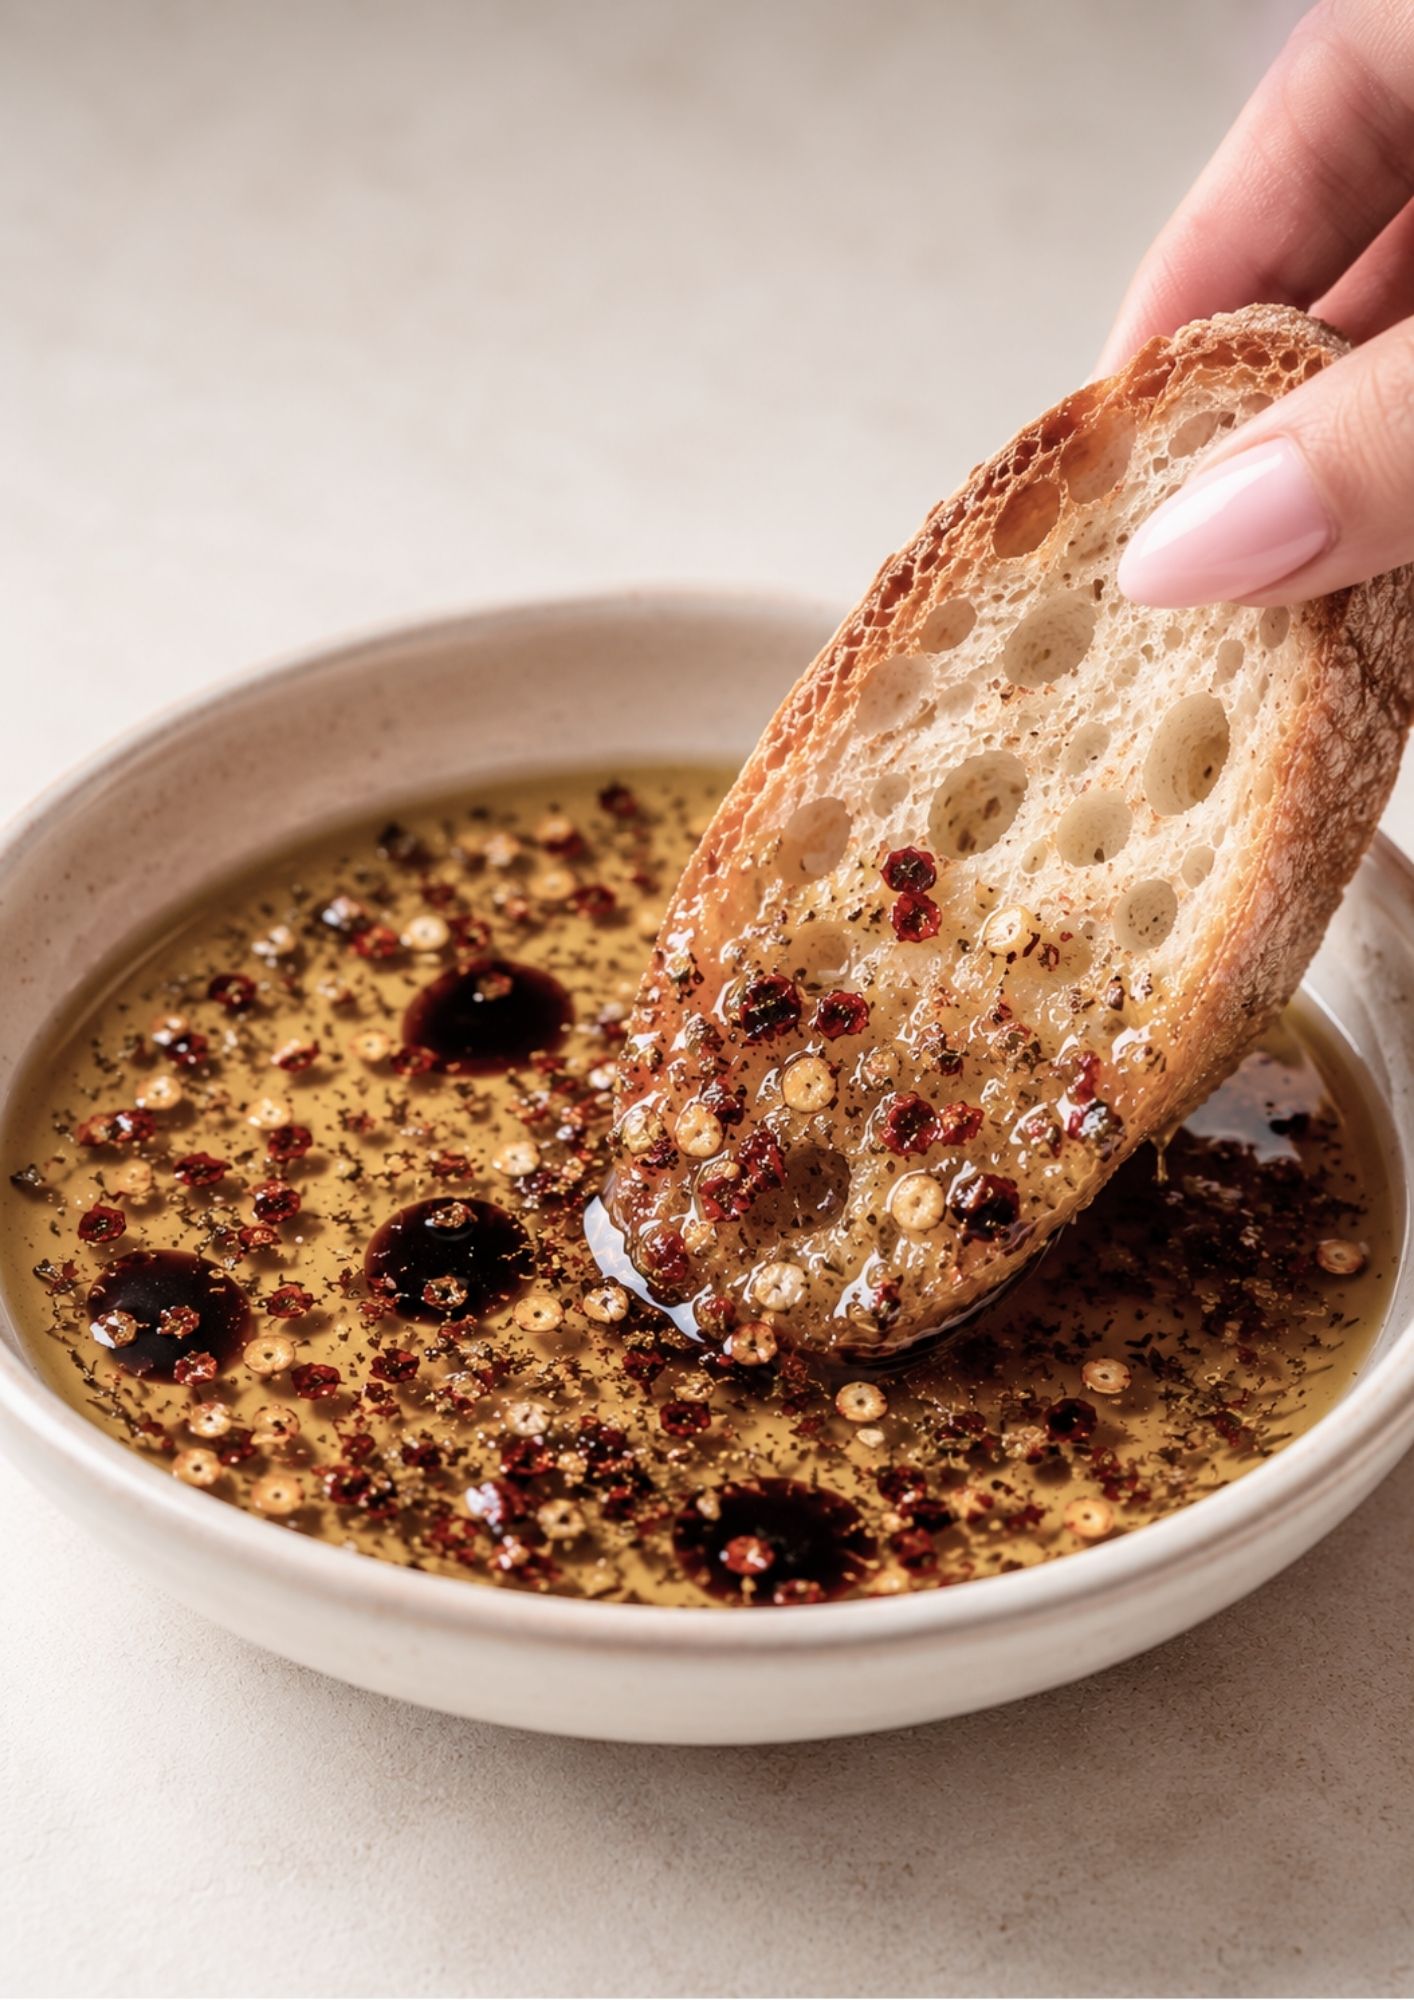
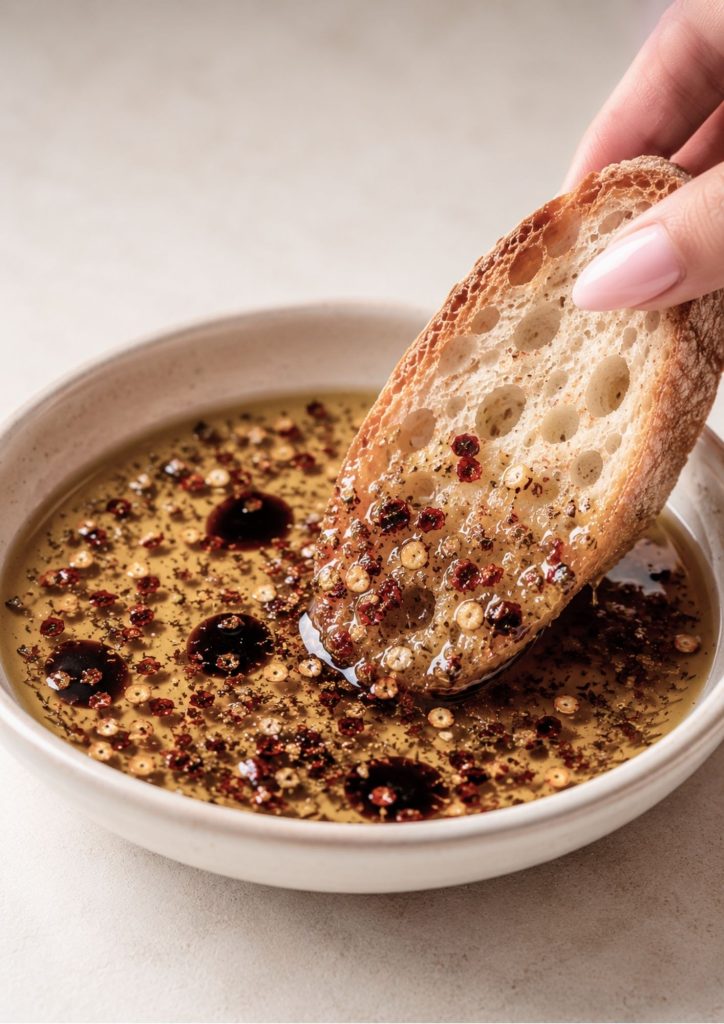
  • Rustic Bread Dip

    Rustic Bread Dip

    A savoury bread dipping oil made with extra virgin olive oil, aged balsamic vinegar, oregano, basil, thyme, garlic, onion, sea salt, cracked pepper and chilli flakes. It is herby, rich and aromatic, perfect for serving with warm crusty bread, focaccia, sourdough or grazing boards.

    Ingredients

    ½ cup (125 ml) extra virgin olive oil

    1 tablespoon aged balsamic vinegar

    ½ teaspoon dried oregano

    ½ teaspoon dried basil

    ¼ teaspoon dried thyme

    ½ teaspoon garlic powder

    ¼ teaspoon onion powder

    ½ teaspoon sea salt flakes

    ½ teaspoon freshly cracked black pepper

    ½ teaspoon red chilli flakes (adjust to taste)

    Optional: 1 teaspoon finely grated Parmesan

    Method

    • Pour the olive oil into a shallow serving dish.
    • Drizzle the balsamic vinegar over the oil.
    • Sprinkle over the oregano, basil, thyme, garlic powder, onion powder, salt, pepper, and chilli flakes.
    • Allow the mixture to sit for 5–10 minutes so the herbs can infuse the oil.
    • Serve with warm crusty sourdough, ciabatta, or focaccia for dipping.

    Tips & Variations

    • Use the best quality extra virgin olive oil you can find—the flavour is the star of the dish.
    • For extra richness, add a small amount of finely grated Parmesan.
    • A pinch of dried rosemary or Italian herb blend also works beautifully.
    • For entertaining, finish with a drizzle of balsamic glaze for a more dramatic presentation.

    You Might Also Like

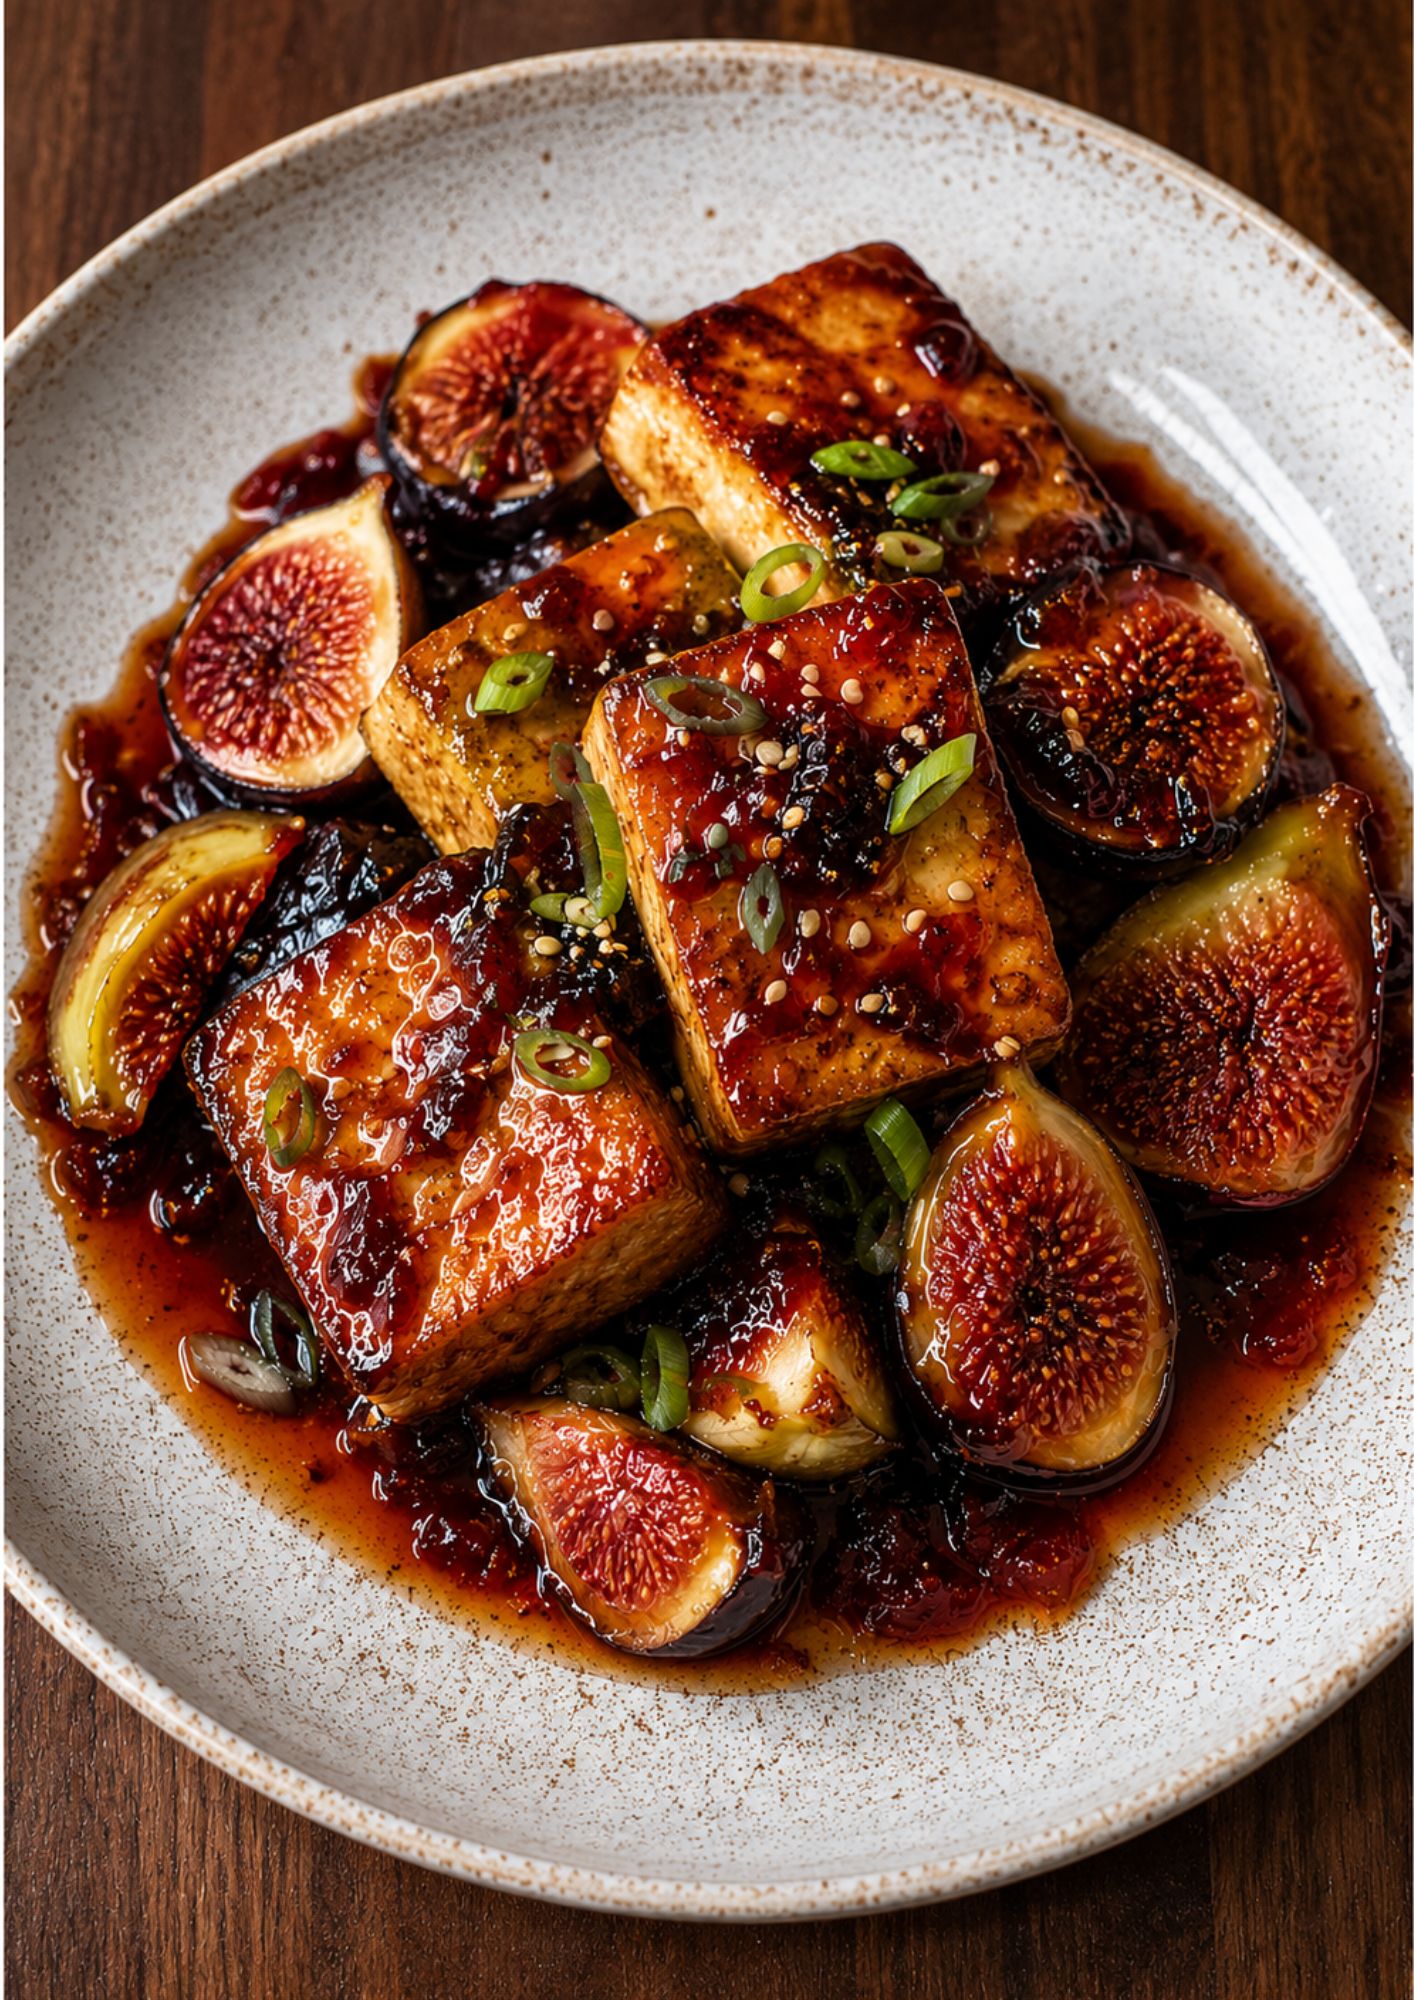
  • Plum & Fig Pan-Fried Tofu

    Plum & Fig Pan-Fried Tofu

    This plum and fig pan-fried tofu is crispy tofu cubes served with roasted figs and a sticky plum, soy, ginger and garlic sauce. Finished with balsamic glaze, spring onion and sesame seeds, it is sweet, savoury and glossy with a rich fruitiness and fresh peppery finish.

    SERVES 4

    TIME: 30 MINS

    ~ 380 calories per serve

    ~ 13g protein per serve

    Ingredients

    Tofu

    400g firm tofu, pressed and cut into large cubes

    1 tbsp cornflour

    1 tbsp olive oil

    Salt and cracked pepper

    Roasted Figs

    6 fresh figs, halved

    1 tbsp olive oil

    1 tsp maple syrup or honey

    Pinch sea salt

    Sticky Plum Sauce

    ½ cup plum jam or plum preserves

    2 tbsp soy sauce

    1 tbsp rice wine vinegar

    1 tbsp maple syrup

    1 tsp grated ginger

    1 garlic clove, minced

    2 tbsp water

    To Finish

    1 tbsp balsamic glaze

    2 spring onions, finely sliced

    1 tsp sesame seeds

    Cracked black pepper

    Method

    Toss tofu with cornflour, salt and pepper. Pan-fry in olive oil until golden and crisp on all sides.

    Place figs on a lined tray, drizzle with olive oil and maple syrup, then roast at 200°C for 12–15 minutes until softened and lightly caramelised.

    Combine plum jam, soy sauce, vinegar, maple syrup, ginger, garlic and water in a small saucepan. Simmer for 3–4 minutes until glossy and slightly thickened.

    Toss the crispy tofu through the sticky plum sauce until well coated.

    Arrange tofu and roasted figs on a serving plate, spooning over any remaining sauce.

    Finish with balsamic glaze, spring onion, sesame seeds and cracked pepper.

    Why This Plum and Fig Pan-Fried Tofu Works

    Plum and fig pan-fried tofu is a fast way to turn everyday pantry staples into something that tastes far more special than the effort required. Crisping the tofu in a hot pan gives it a satisfying bite, while the plum sauce and roasted figs bring natural sweetness that balances the savoury soy and garlic. If you’re after more cosy, weeknight-friendly dinners, our Creamy Chicken and Vegetable Pie is another comforting option worth trying.

    You Might Also Like

    Tips for the Best Plum and Fig Pan-Fried Tofu

    • Press the tofu well before cooking to remove excess moisture, which helps it crisp up properly in the pan instead of steaming.
    • Use a hot pan and don’t overcrowd the tofu, or it will release moisture and struggle to brown.
    • Choose figs that are ripe but still hold their shape so they roast without turning to mush.
    • Taste the plum sauce before serving and adjust with a touch more soy or a squeeze of lemon if it needs balancing.

    Storage and Reheating

    Leftover plum and fig pan-fried tofu is best eaten fresh while the tofu is still crisp, but it will keep in the fridge for up to 2 days in an airtight container. Reheat gently in a hot pan to bring back some crispness, as microwaving will soften the tofu. The sticky plum sauce can be made a day ahead and stored separately in the fridge, then warmed through and tossed with freshly cooked tofu when you’re ready to serve.

    Serving Suggestions

    This plum and fig pan-fried tofu is filling enough to serve on its own with steamed rice, or alongside stir-fried greens for a heartier plate. It also works well as part of a larger spread, paired with other Asian-inspired dishes for a shared, family-style dinner. A scattering of extra sesame seeds and spring onion just before serving adds a little extra crunch and colour. Either way, it’s a quick, satisfying dinner you’ll want to make again and again.

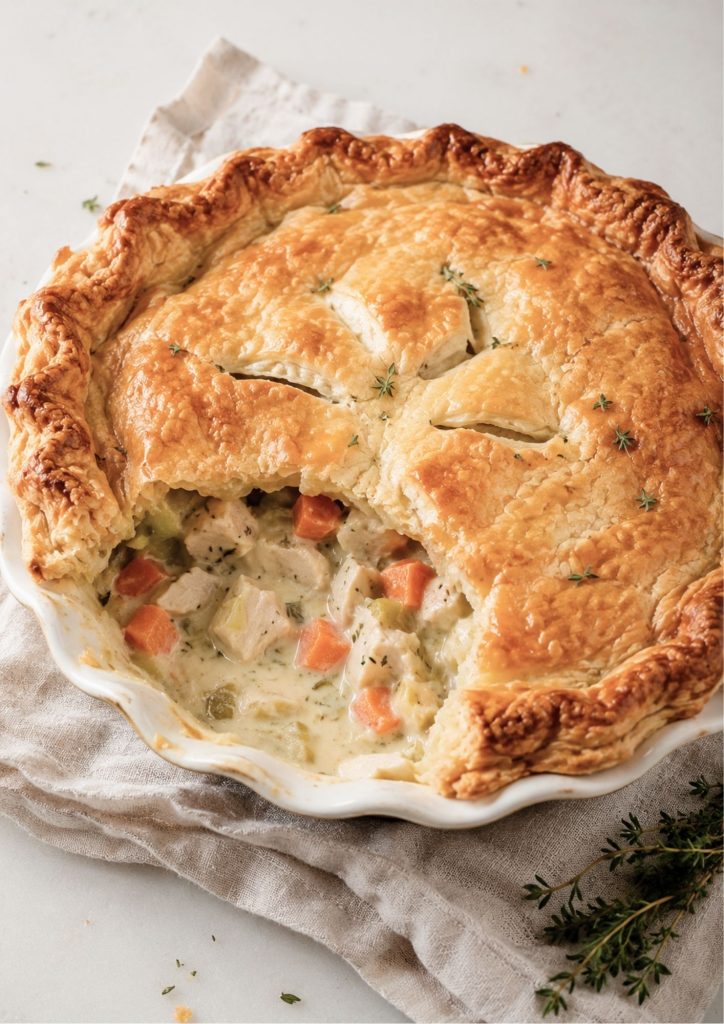
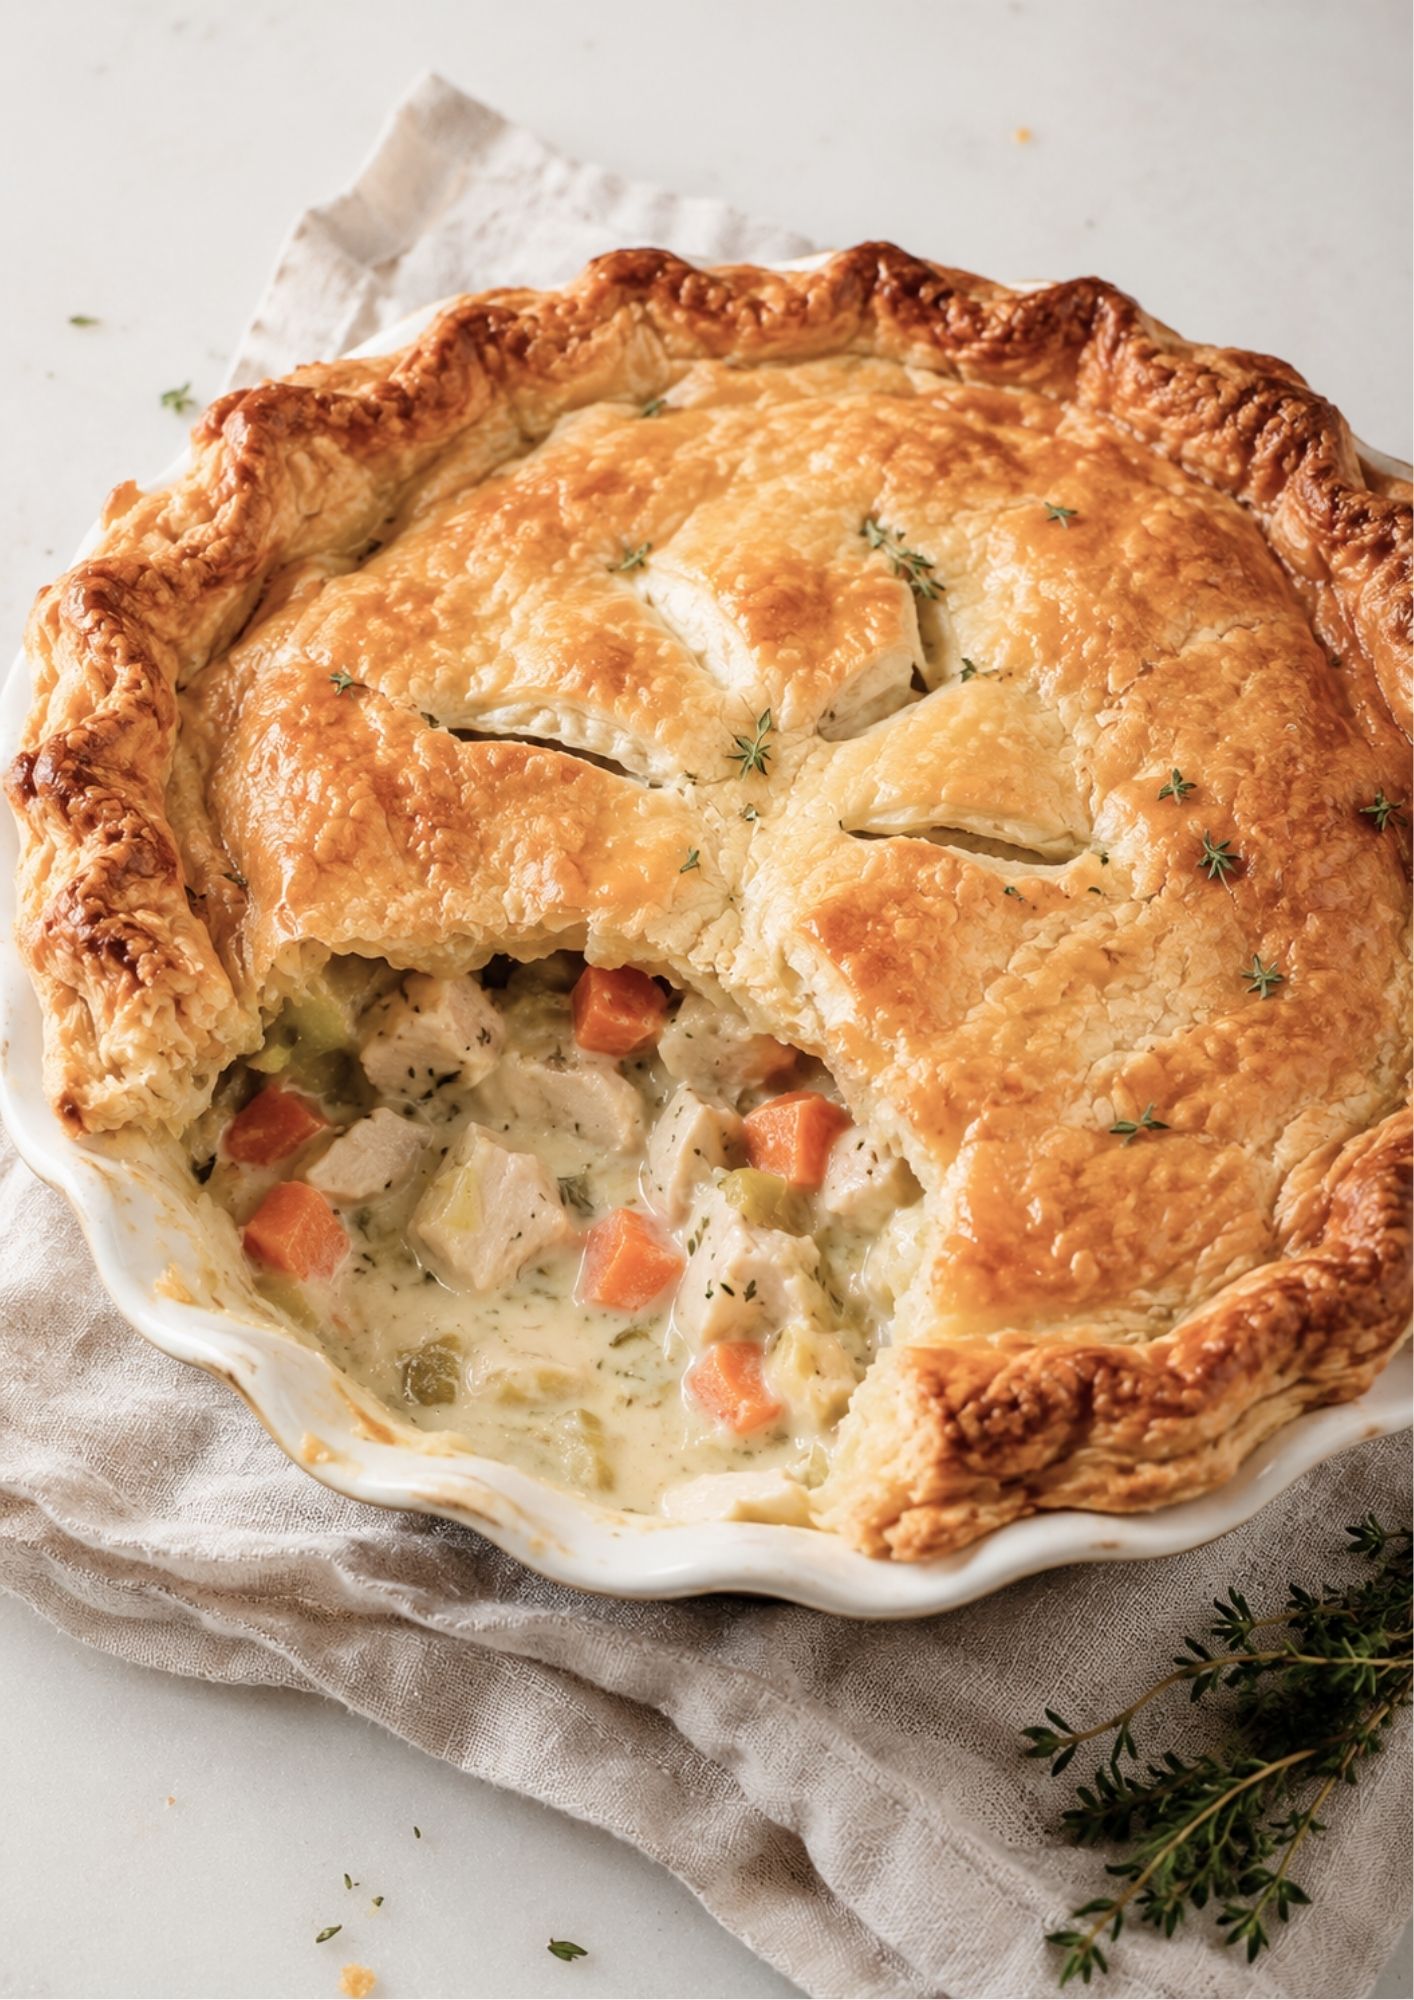
  • Creamy Chicken & Vegetable Pie

    Creamy Chicken & Vegetable Pie

    This creamy chicken and vegetable pie is the ultimate comfort food — tender chicken, carrot, celery, onion, garlic, peas and thyme simmered in a creamy Dijon gravy, all topped with golden, flaky puff pastry. It is hearty, savoury and cosy, with a crisp buttery topping and rich homemade-style filling.

    RVES 6

    TIME: 1 HOUR

    ~ 375 calories per serve

    ~ 25g protein per serve

    Ingredients

    For the filling

    1 tbsp olive oil

    1 tbsp butter

    1 small brown onion, finely diced

    2 carrots, diced

    2 celery stalks, diced

    2 garlic cloves, minced

    500 g chicken breast or thigh, diced

    1 tsp fresh thyme leaves, plus extra to serve

    1 tsp Dijon mustard

    2 tbsp plain flour

    1 ½ cups chicken stock

    ½ cup cream or milk

    ½ cup frozen peas, optional

    Salt and cracked pepper

    For the pastry

    1–2 sheets puff pastry, thawed

    1 egg, beaten

    Extra thyme, to garnish

    Method

    Pre-heat the oven to 200°C. Heat the olive oil and butter in a large pan over medium heat. Add the onion, carrot and celery, then cook for 5–6 minutes, until softened. Add the garlic and cook for another minute.

    Add the chicken, thyme, Dijon mustard, salt and pepper. Cook for 5–7 minutes, stirring often, until the chicken is lightly golden on the outside.

    Sprinkle over the flour and stir until everything is coated. Slowly pour in the chicken stock, stirring as you go to create a creamy sauce. Add the cream or milk and simmer for 8–10 minutes, until thickened and the chicken is cooked through. Stir through the peas, if using.

    Spoon the filling into a pie dish and let it cool slightly for 5–10 minutes. This helps the pastry stay crisp.

    Lay the puff pastry over the top of the pie dish, pressing the edges gently to seal. Trim any excess pastry, then crimp the edges if you like. Cut a few small slits in the centre to let steam escape.

    Brush with beaten egg, then bake for 25–30 minutes, or until the pastry is puffed, flaky and golden.

    Let the pie sit for 5 minutes before serving.

    Why This Creamy Chicken and Vegetable Pie Works

    This creamy chicken and vegetable pie is proof that comfort food doesn’t need to be complicated. The filling comes together in one pot, and the golden puff pastry topping turns a simple stew into something special enough for a Sunday dinner. If you love cosy, feed-a-crowd meals like this one, our Homemade Baked Beans are another easy way to warm up the table.

    You Might Also Like

    Tips for the Best Creamy Chicken and Vegetable Pie

    • Let the filling cool for a few minutes before topping with pastry — this stops the base from going soggy and helps the pastry rise properly.
    • Cut a few slits in the pastry so steam can escape while baking, giving you a crisp, flaky top.
    • Use a mix of vegetables you have on hand — mushrooms, leek or corn all work well alongside the classic carrot and celery.
    • Brushing the pastry with beaten egg gives the best deep golden colour once baked.

    Storage and Reheating

    Leftover creamy chicken and vegetable pie keeps well in the fridge for up to 3 days in an airtight container. Reheat individual portions in the oven or air fryer until the pastry is crisp again and the filling is piping hot — a microwave will heat it through but the pastry will lose its crunch. To freeze, wrap cooled portions tightly and freeze for up to 2 months; thaw overnight in the fridge before reheating. This pie also makes a great make-ahead dinner: assemble it up to a day in advance, keep it covered in the fridge, then bake straight from cold, adding a few extra minutes to the cooking time.

    Serving Suggestions

    This creamy chicken and vegetable pie is filling enough to serve on its own, but a simple side salad or steamed greens balance out the richness nicely. Mashed potato is a lovely addition if you want to stretch the meal further for a hungry crowd, and a spoonful of tangy chutney or relish on the side adds a welcome contrast to the creamy filling.

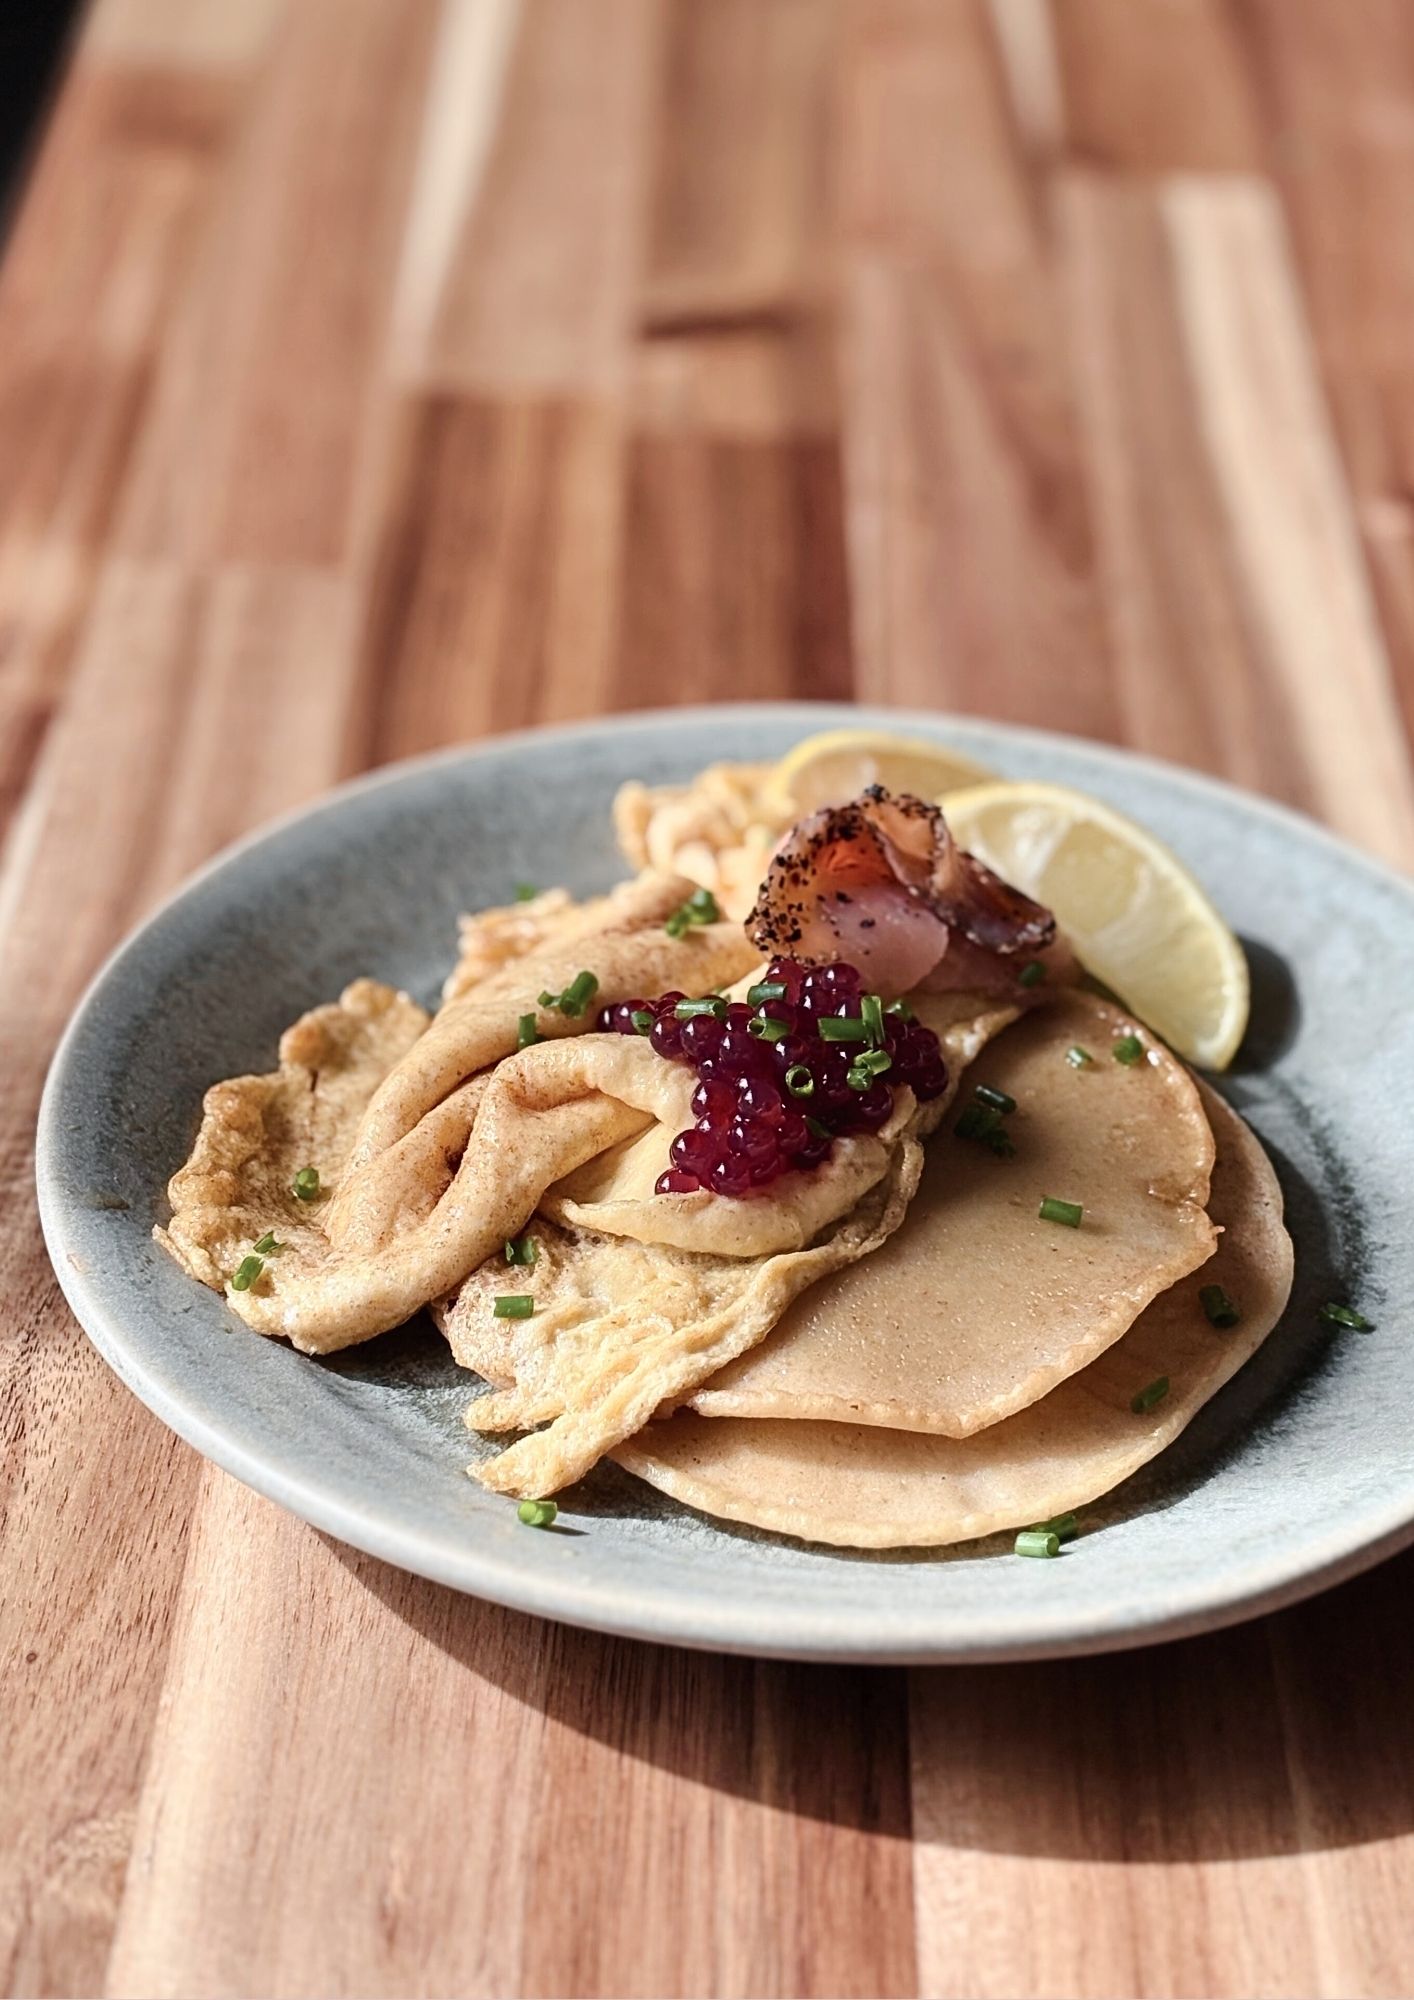
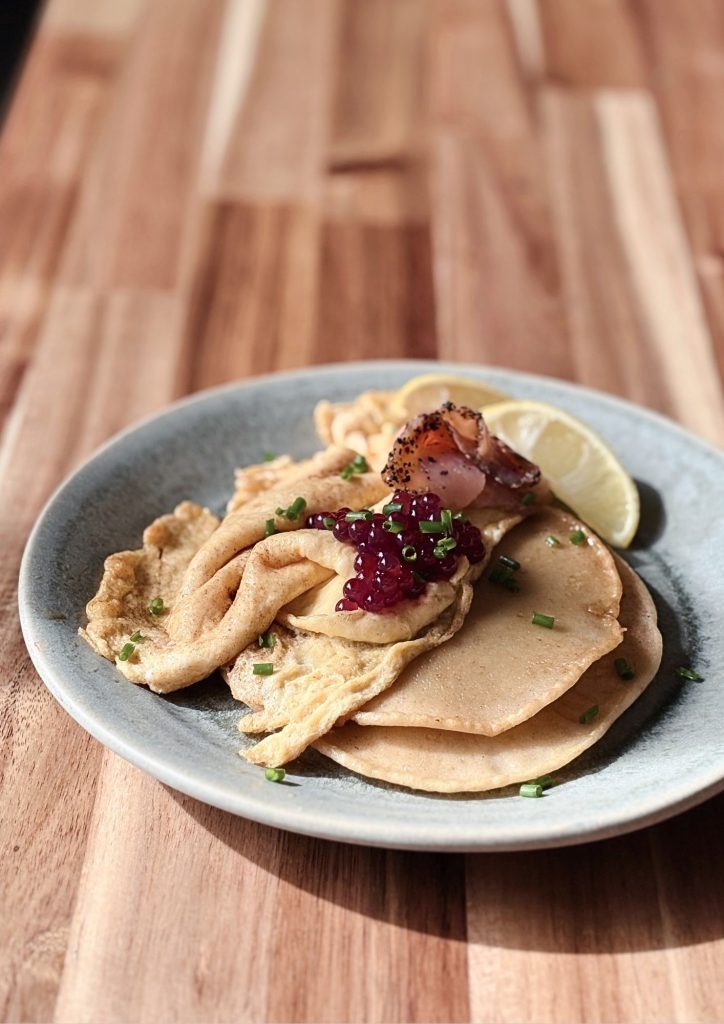
  • Buckwheat Salmon Pancakes

    Buckwheat Salmon Pancakes

    A savoury pancake that leans more brunch than breakfast. The combination of soft eggs, smoked salmon, and warm pancakes makes this one of those dishes that feels quietly luxurious.
    Why This Buckwheat Salmon Pancakes Recipe Works

    These buckwheat salmon pancakes work because the nutty, slightly earthy buckwheat batter is the perfect savoury base for silky smoked salmon and soft, just-set eggs. It’s a more interesting alternative to standard brunch options, and it comes together in about 20 minutes, making it just as easy for a lazy weekend as it is impressive enough for guests.

    SERVES 4

    TIME: 20 MINS

    ~ 350 calories per serve

    ~ 20g protein per serve

    Ingredients

    For the buckwheat pancakes:

    • ½ cup buckwheat flour
    • ½ cup plain flour
    • 1 tsp baking powder
    • Pinch of salt
    • 1 egg
    • ¾ cup milk (dairy or oat)
    • 1 tbsp melted butter

    For the toppings:

    • 100g smoked salmon slices
    • 4 eggs
    • 2 tbsp cream or milk
    • 1 tbsp butter
    • Salmon caviar
    • ½ lemon, cut into wedges
    • Fresh chives, to garnish

    Method

    buckwheat pancakes

    In a bowl, whisk together the flours, baking powder, and salt. In a separate jug, whisk the egg, milk, and melted butter. Combine wet and dry ingredients and mix until smooth. Rest 5–10 minutes. Heat a non-stick pan over medium heat. Lightly butter the pan, then pour in ¼ cup batter per pancake. Cook until bubbles appear on the surface.
    Soft scrambled eggs

    Crack eggs into a cold saucepan. Add cream and butter. Place over low heat and stir continuously with a spatula, scraping the bottom as it cooks slowly. Remove from heat just before fully set — they should be soft, glossy, and custard-like.

    Assemble the dish

    Stack 2–3 pancakes per plate. Top with folds of smoked salmon. Spoon over the soft scrambled eggs. Garnish with a generous spoonful of caviar pearls, wedges of lemon and a sprinkle of chives.

    You Might Also Like

    Tips for the Best Buckwheat Salmon Pancakes

    • Let the batter rest for a few minutes before cooking so the buckwheat flour hydrates fully.
    • Cook the pancakes over medium heat so they set through without burning the outside.
    • Scramble or poach the eggs so they’re just barely set for the creamiest texture against the salmon.
    • Keep cooked pancakes warm in a low oven while you finish the rest so everyone eats together.

    Storage and Reheating

    Cooked pancakes (without the eggs and salmon) will keep in an airtight container in the fridge for up to 2 days. Reheat them in a dry pan or toaster to bring back some crispness, then top with freshly cooked eggs and salmon just before serving, since these don’t reheat well.

    Serving Suggestions

    These buckwheat salmon pancakes are a complete brunch on their own, but a simple green salad or some sliced avocado on the side rounds things out nicely. If you’re planning a bigger spread, our Homemade Baked Beans is another café-style favourite that works well alongside. A scattering of fresh dill and a wedge of lemon finish the plate perfectly. This dish also travels well for a weekend brunch spread if you’re feeding a crowd, since the pancakes can be made ahead and kept warm while you finish plating the eggs and salmon. Pair it with a chilled glass of orange juice or a light sparkling wine for a relaxed, special-occasion feel, and set out extra lemon wedges so everyone can adjust the acidity to taste. However you serve it, this recipe strikes a lovely balance between comforting and elegant, making it one of our most requested brunch dishes whenever family or friends come to stay for the weekend.

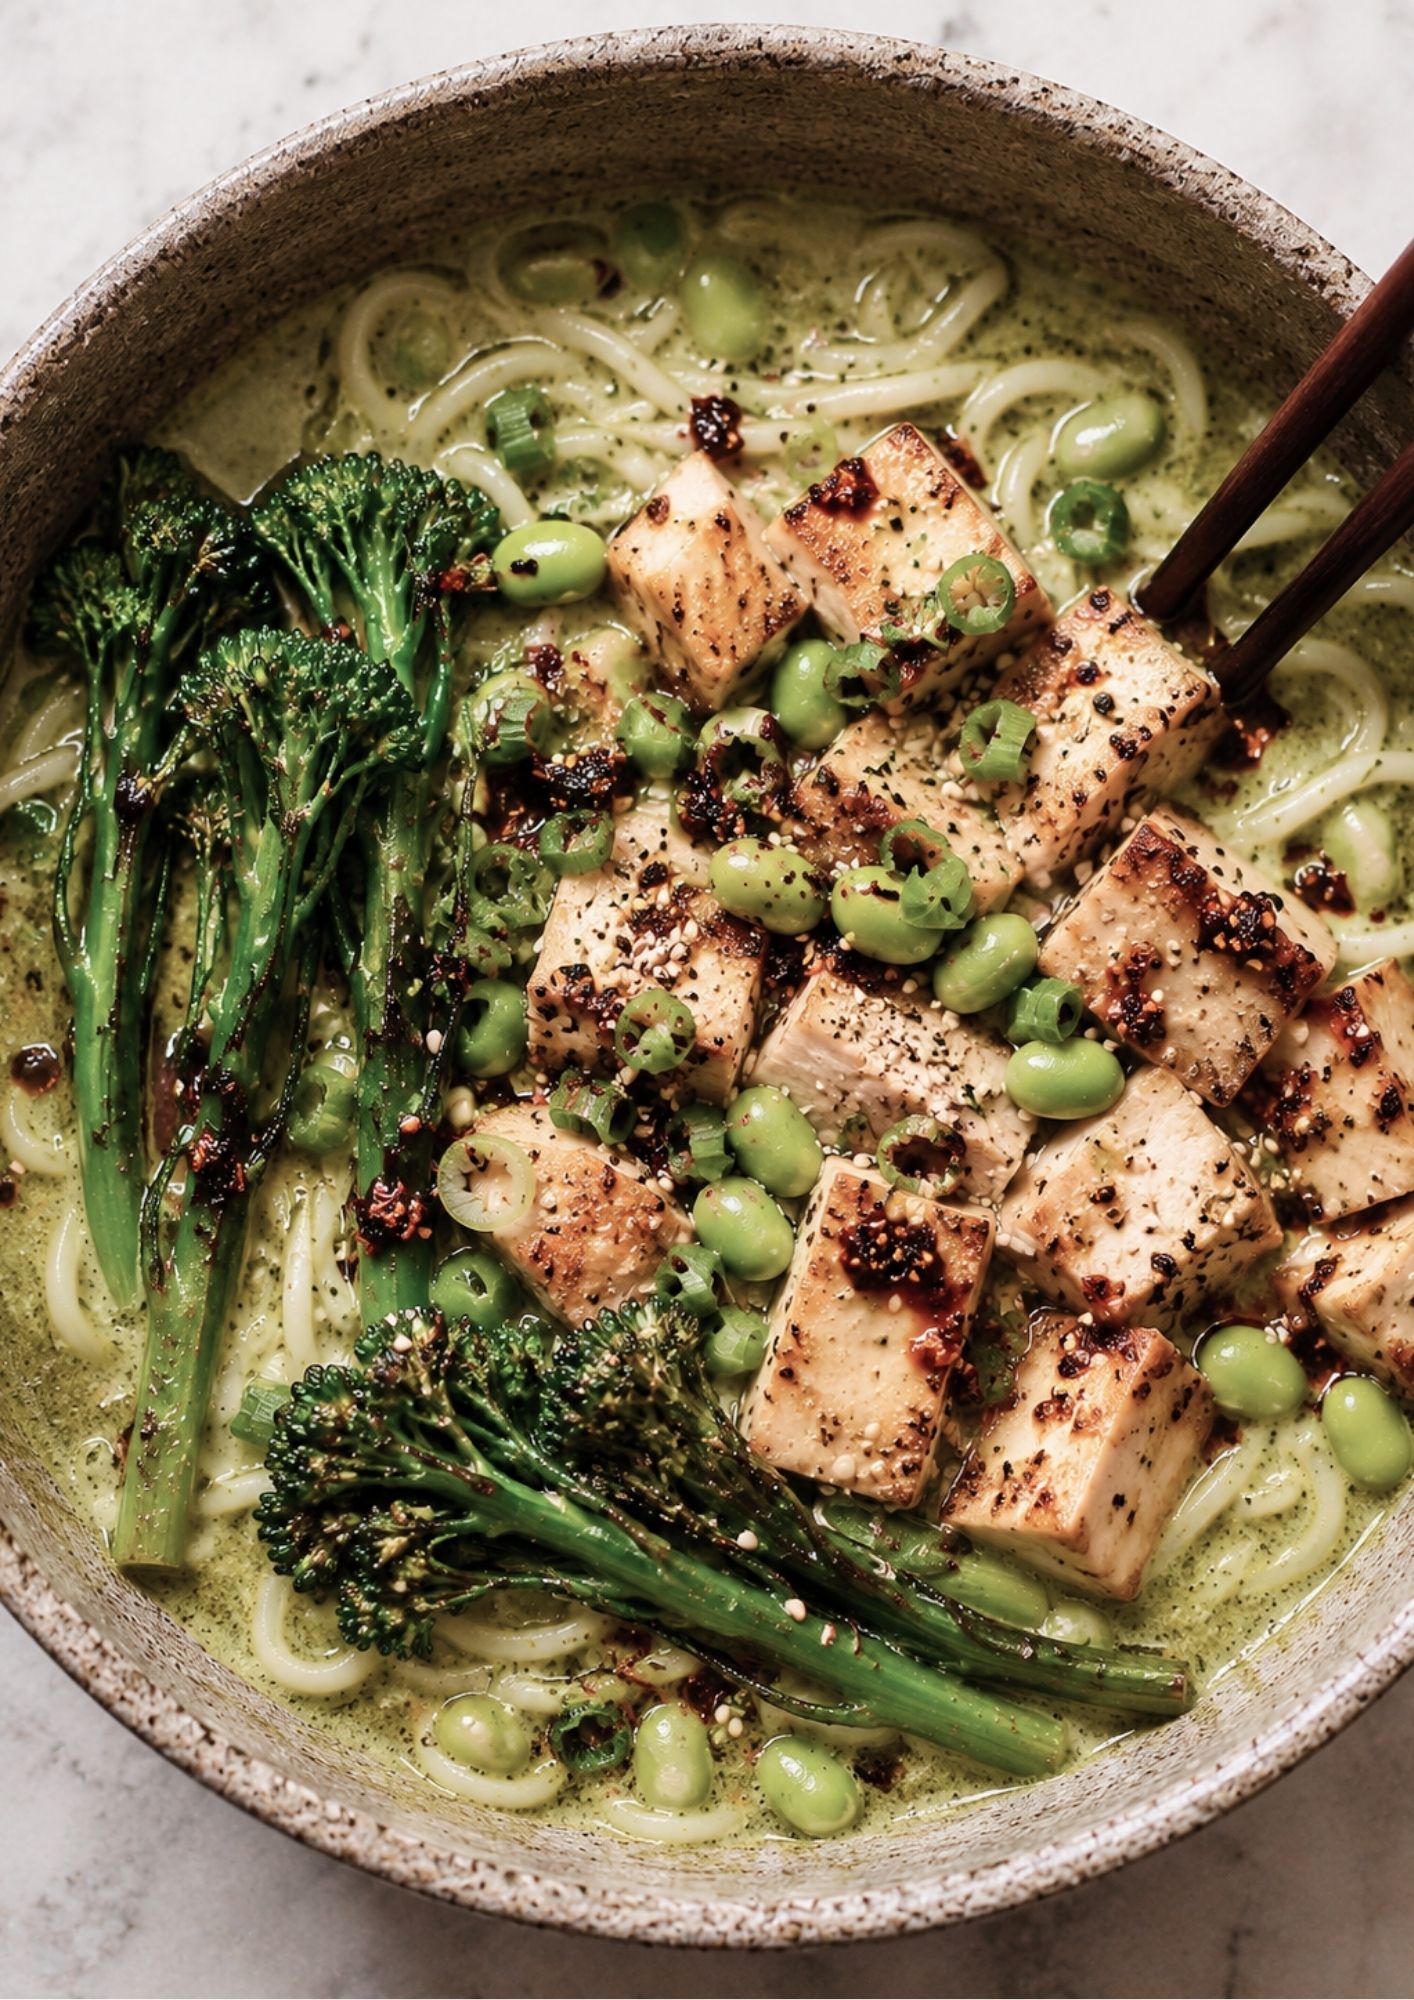
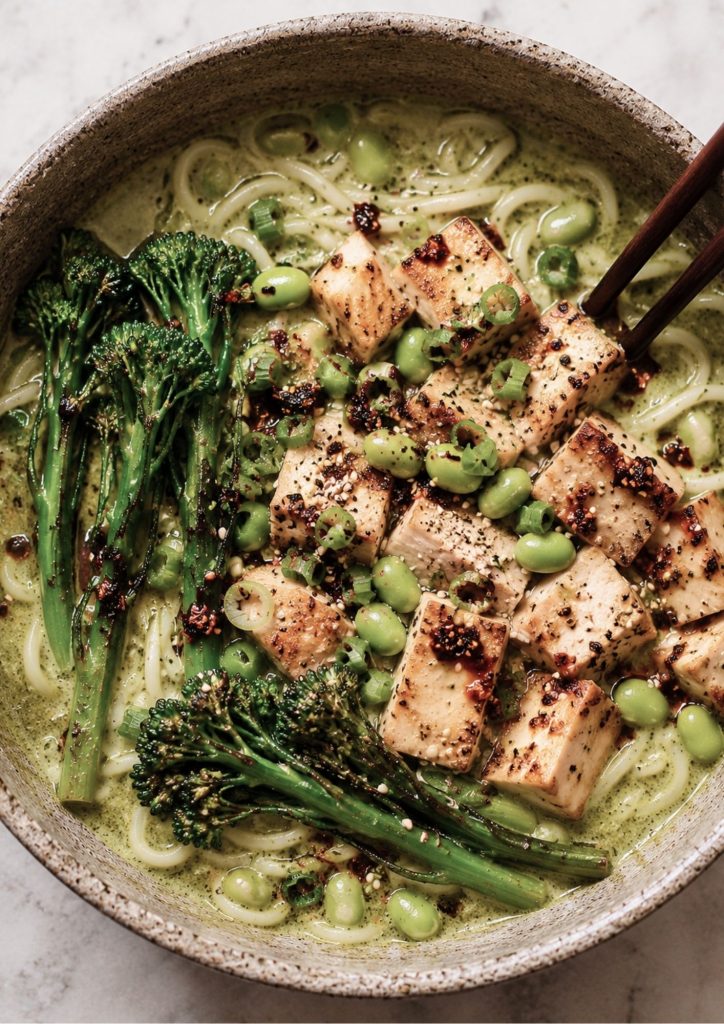
  • Green Noodle Soup with Crispy Tofu, Broccolini & Edamame

    Green Noodle Soup with Crispy Tofu, Broccolini & Edamame

    This green noodle soup with crispy tofu, broccolini and edamame is a vibrant, creamy green coconut broth loaded with udon noodles, charred broccolini, edamame and golden crispy tofu. It’s fresh, comforting and nourishing, with lime and chilli crisp bringing everything to life.

    Serves: 4
    Time: 50 minutes

    Why This Green Noodle Soup with Crispy Tofu, Broccolini and Edamame Works

    This green noodle soup with crispy tofu, broccolini and edamame is naturally vegan and packed with plant protein. Edamame are young soybeans, and they add a lovely pop of texture alongside the chewy udon noodles. If you love crispy tofu, our Salt & Pepper Tofu is another great way to use it.

    Ingredients

    For the green broth

    • 1 tbsp olive oil
    • 1 brown onion, roughly chopped
    • 3 garlic cloves, chopped
    • 1 zucchini, chopped
    • 2 cups baby spinach
    • 1 cup fresh basil leaves
    • 750ml vegetable stock
    • 400ml coconut milk
    • Juice of 1 lime
    • Salt and freshly cracked black pepper

    For the soup

    • 250g udon noodles
    • 2 bunches broccolini
    • 1 cup frozen edamame beans, thawed

    For the crispy tofu

    • 400g firm tofu, pressed and cut into cubes
    • 1 tbsp soy sauce or tamari
    • 1 tbsp sesame oil
    • 1 tsp garlic powder

    To serve

    • 2 spring onions, finely sliced
    • 1 tbsp sesame seeds
    • Chilli crisp or chilli oil
    • Lime wedges

    Method

    1. Cook the tofu. Toss the tofu with soy sauce, sesame oil and garlic powder until well coated. Air fry at 200°C for 12–15 minutes, turning once, or pan-fry until golden and crisp on all sides.
    2. Start the broth. Heat the olive oil in a large saucepan over medium heat. Add the onion and garlic and cook for 3–4 minutes until softened.
    3. Add the vegetables. Stir in the zucchini and cook for another 5 minutes. Pour in the vegetable stock and simmer for around 10 minutes, until the zucchini is tender.
    4. Make it green. Add the spinach, basil and coconut milk. Blend with a stick blender until completely smooth and vibrant green. Stir through the lime juice and season generously with salt and pepper.
    5. Cook the noodles. Prepare the udon according to packet instructions, then drain and divide between four bowls.
    6. Char the broccolini. Heat a frying pan over high heat and cook the broccolini for 3–4 minutes until lightly charred but still tender-crisp.
    7. Assemble. Ladle the hot green broth over the noodles. Top with crispy tofu, broccolini and edamame.
    8. Finish. Scatter over spring onion and sesame seeds, then add a generous spoonful of chilli crisp and a squeeze of fresh lime.

    Tip: Add the spinach and basil right at the end and avoid boiling them for long — that’s what keeps the broth beautifully bright green.

    You Might Also Like

    Tips for the Best Green Noodle Soup

    • Press the tofu well before cooking so it crisps up properly instead of steaming in the pan.
    • Add the broccolini and edamame toward the end of cooking so they stay bright green and keep some bite.
    • Cook the udon noodles separately and add them to the bowls just before serving, rather than letting them sit in the broth, so they don’t go too soft.
    • Taste the broth before serving and adjust with extra lime juice, chilli crisp or fish sauce to balance the flavours.

    Storage Tips

    Store the broth separately from the noodles and toppings in airtight containers in the fridge for up to 3 days. This green noodle soup with crispy tofu, broccolini and edamame doesn’t freeze especially well, as the vegetables and tofu texture suffers once thawed, so it’s best enjoyed fresh or as fridge leftovers within a few days. When reheating, warm the broth gently on the stove and add freshly cooked or reheated noodles and toppings just before serving, so everything keeps its texture.

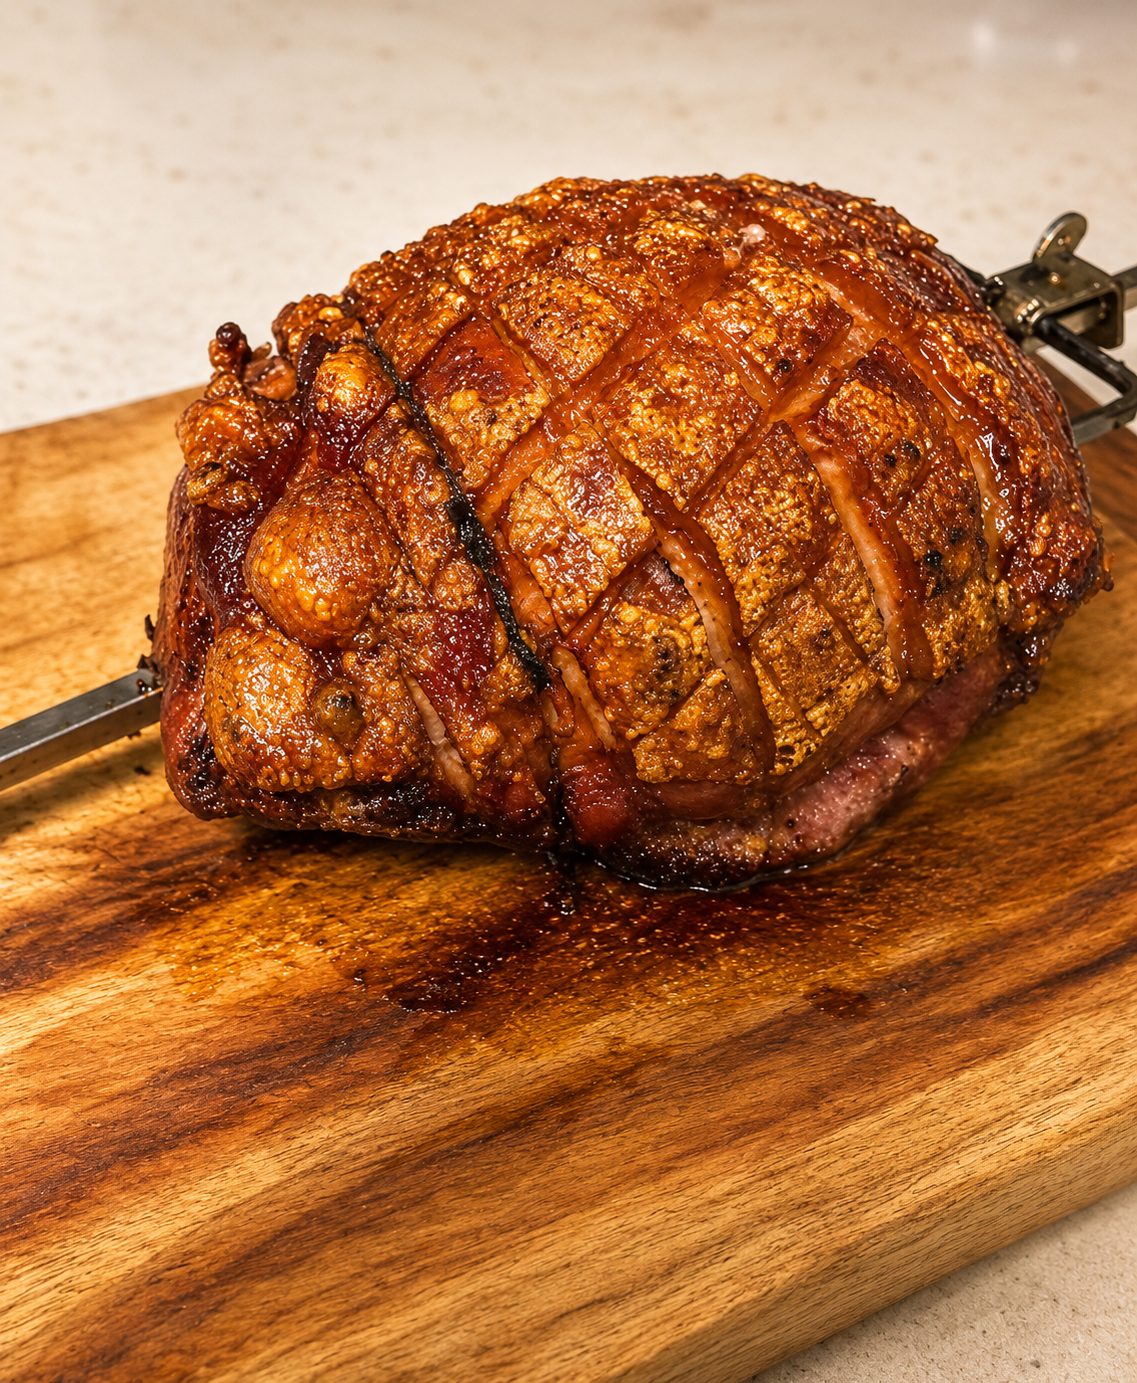
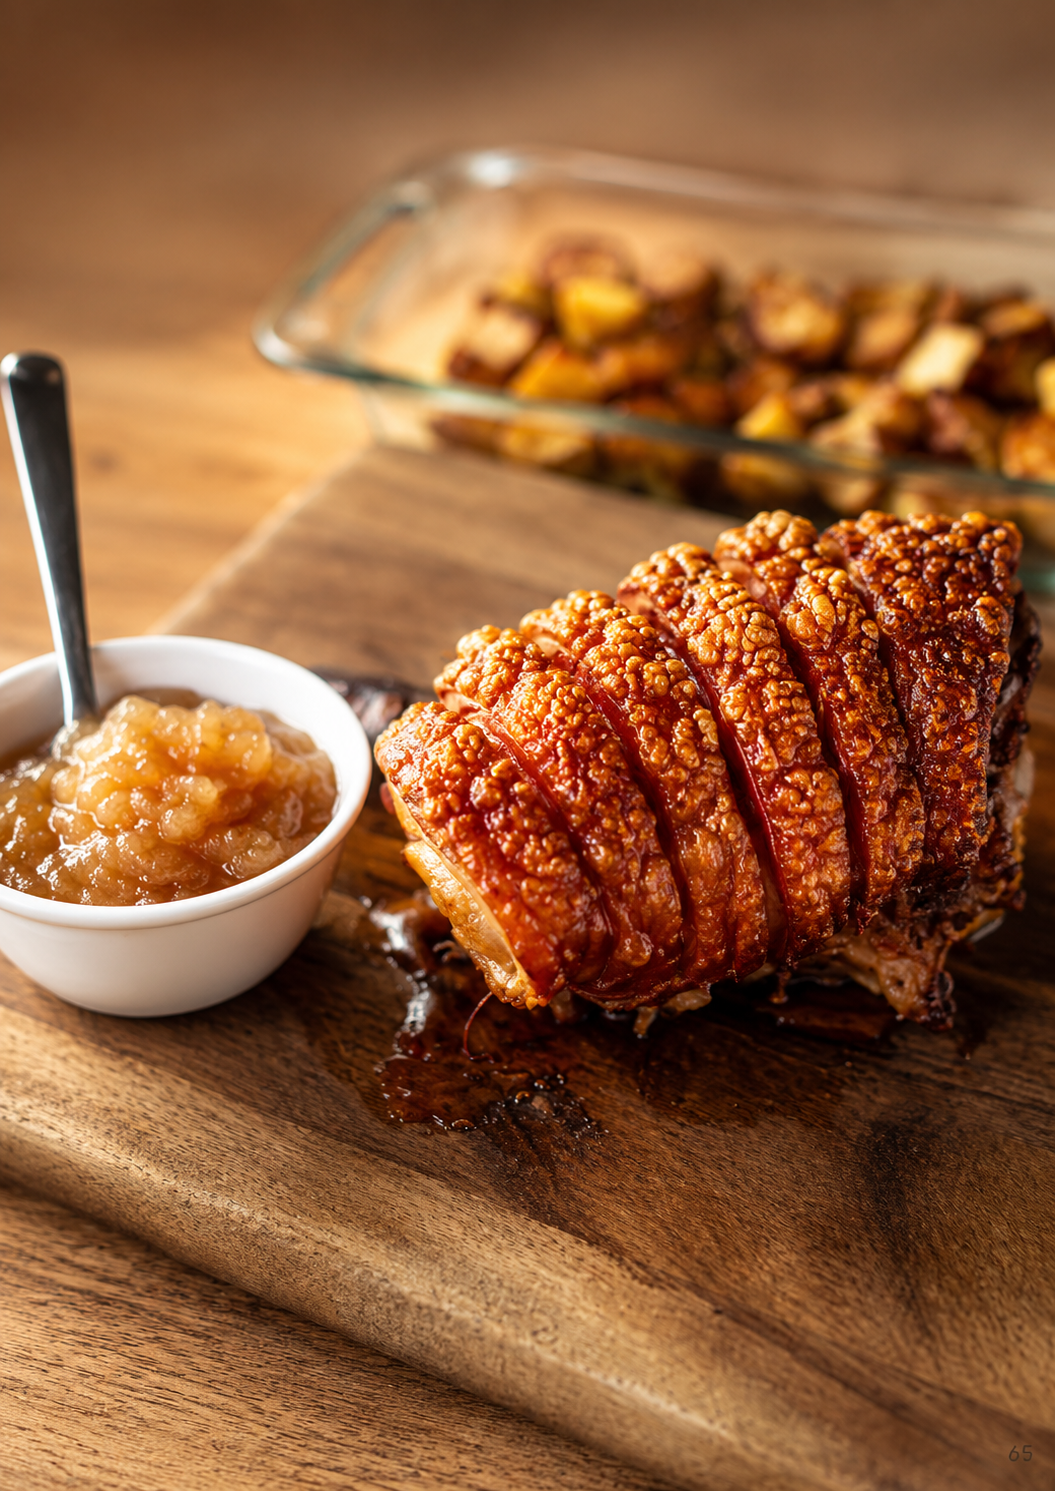
  • Crispy Roast Pork

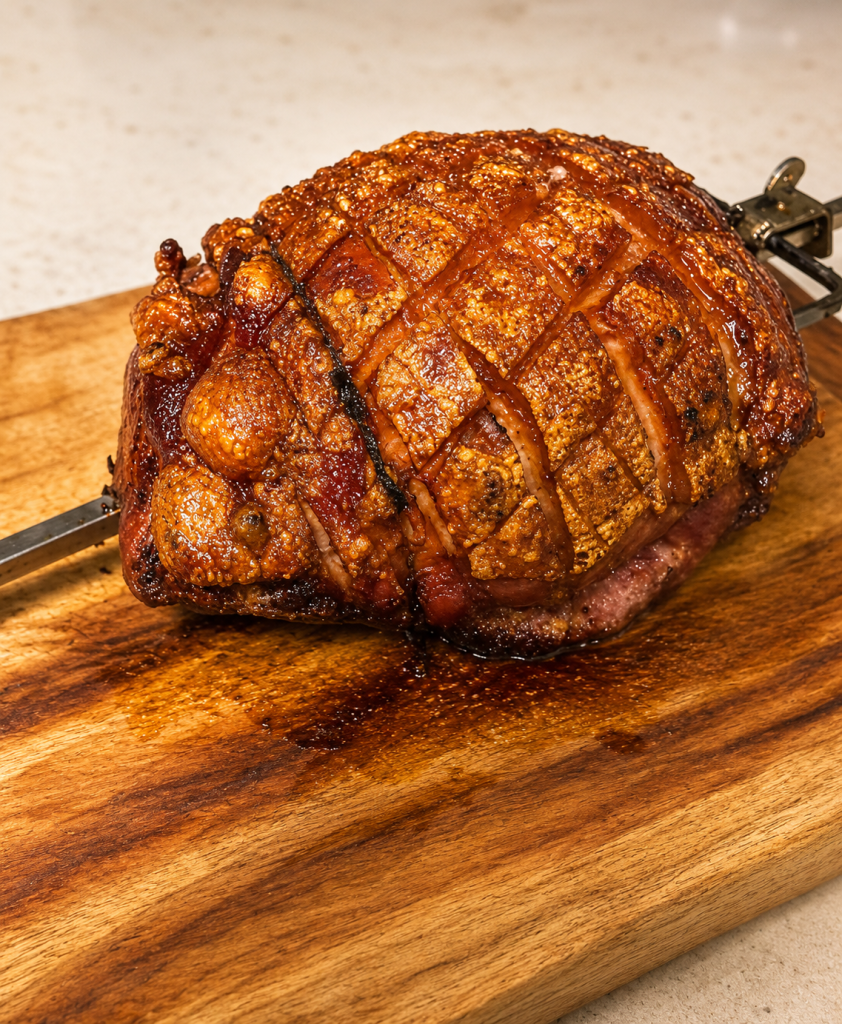
    Crispy Roast Pork

    Tender roast pork with deeply golden, salty crackling and a simple homemade apple sauce on the side. A classic that feels impressive on the table, but most of the work is simply letting the oven do its thing.

    Why This Crispy Roast Pork Works

    This crispy roast pork works because it relies on a few simple techniques rather than a long list of ingredients. Drying the skin well and scoring it before a hot initial blast in the oven is what gives the crackling its signature crunch, while a slower finish keeps the meat itself tender and juicy. It’s an impressive centrepiece that’s genuinely simple to pull off.

    Serves: 6
    Time: 3–3½ hours + resting

    Ingredients

    For the pork

    • 2–2.5kg boneless pork leg or shoulder, skin on
    • 1 tbsp olive oil
    • 1½ tbsp sea salt flakes
    • 1 tsp freshly cracked black pepper
    • 1 tsp fennel seeds, lightly crushed
    • 2 garlic cloves, finely grated
    • 1 tbsp Dijon mustard
    • 2 tbsp honey or maple syrup
    • 1 tbsp apple cider vinegar

    For the homemade apple sauce

    • 4 Granny Smith apples, peeled, cored and chopped
    • ¼ cup water
    • 1 tbsp lemon juice
    • 1–2 tsp brown sugar or honey, to taste
    • Pinch of cinnamon, optional
    • Pinch of sea salt

    Method

    1. Prepare the pork. Pat the pork skin very dry with paper towel. Using a sharp knife, score the skin at roughly 1cm intervals, being careful not to cut deeply into the meat.
    2. Dry the skin. Rub the skin with olive oil and sea salt, working the salt into the scored lines. For the crispiest crackling, place the pork uncovered in the fridge overnight. If you’re short on time, leave it uncovered for at least 1 hour.
    3. Start the crackling. Remove the pork from the fridge about 30 minutes before cooking. Preheat the oven to 240°C. Place the pork skin-side up on a rack over a roasting tray and roast for 30 minutes, or until the skin begins to blister and crisp.
    4. Slow roast. Reduce the oven to 170°C and continue roasting for around 2–2½ hours, depending on the size and cut.
    5. Add the glaze. Mix the garlic, Dijon mustard, honey, apple cider vinegar, pepper and fennel seeds. Brush over the exposed meat and sides of the pork during the final 20–30 minutes, keeping it away from the crackling so the skin stays crisp.
    6. Finish the crackling. If needed, increase the oven to 220°C for another 5–10 minutes until the crackling is deeply golden and crisp. Watch closely.
    7. Make the apple sauce. Add the apples, water and lemon juice to a saucepan. Cover and simmer over low-medium heat for 15–20 minutes, stirring occasionally, until the apples are completely soft.
    8. Finish the sauce. Mash for a rustic texture or blend until smooth. Stir through the sugar or honey, cinnamon if using and a tiny pinch of salt. Adjust the sweetness to taste.
    9. Rest and serve. Rest the pork for 15–20 minutes before carving. Serve thick slices with plenty of crisp crackling and warm homemade apple sauce.

    Tip: The secret to really good crackling is dry skin + plenty of salt + that initial blast of high heat.

    You Might Also Like

    Tips for the Best Crispy Roast Pork

    • Pat the pork skin completely dry, then leave it uncovered in the fridge for a few hours or overnight for the crispiest crackling.
    • Score the skin in a tight crosshatch pattern, cutting through the fat but not into the meat.
    • Rub the skin generously with salt right before roasting to help draw out moisture.
    • Let the pork rest for at least 15-20 minutes after roasting so the juices redistribute before carving.

    Storage and Reheating

    Store leftover crispy roast pork in an airtight container in the fridge for up to 4 days. The crackling will soften as it sits, so reheat slices in a hot oven for a few minutes rather than the microwave to bring some crunch back, and slice the meat thinly for sandwiches or salads.

    Serving Suggestions

    This crispy roast pork is a classic Sunday centrepiece, best served with roasted potatoes, greens and a generous spoonful of homemade apple sauce. If you’re planning a bigger spread and love other crispy, golden dishes, our Salt & Pepper Tofu is another crowd-pleaser worth adding to the table. Leftover slices also make an excellent sandwich the next day.

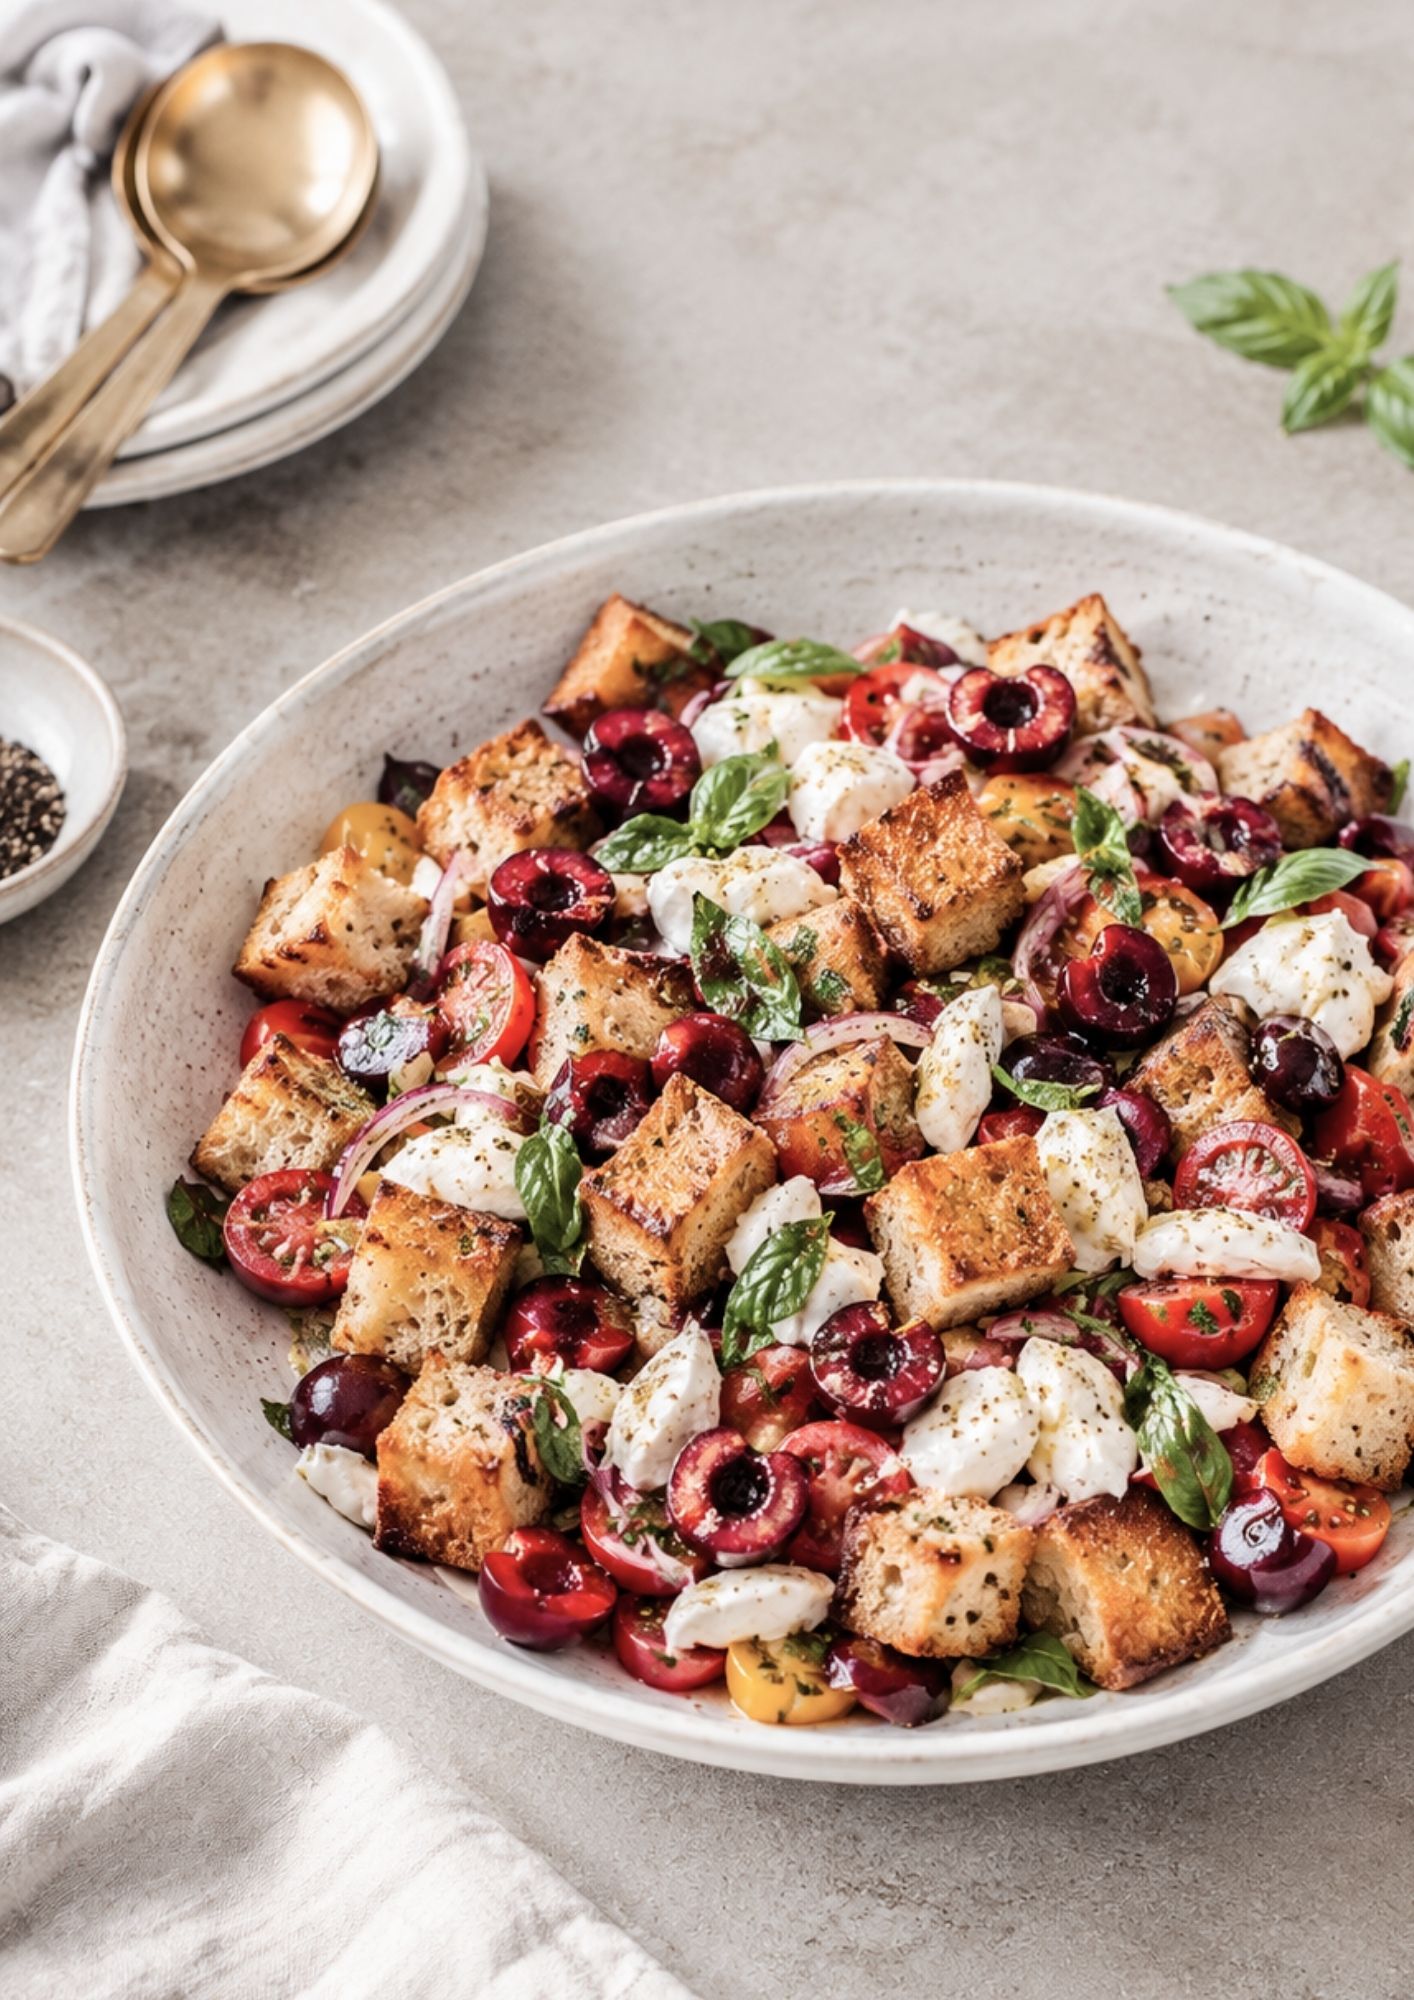
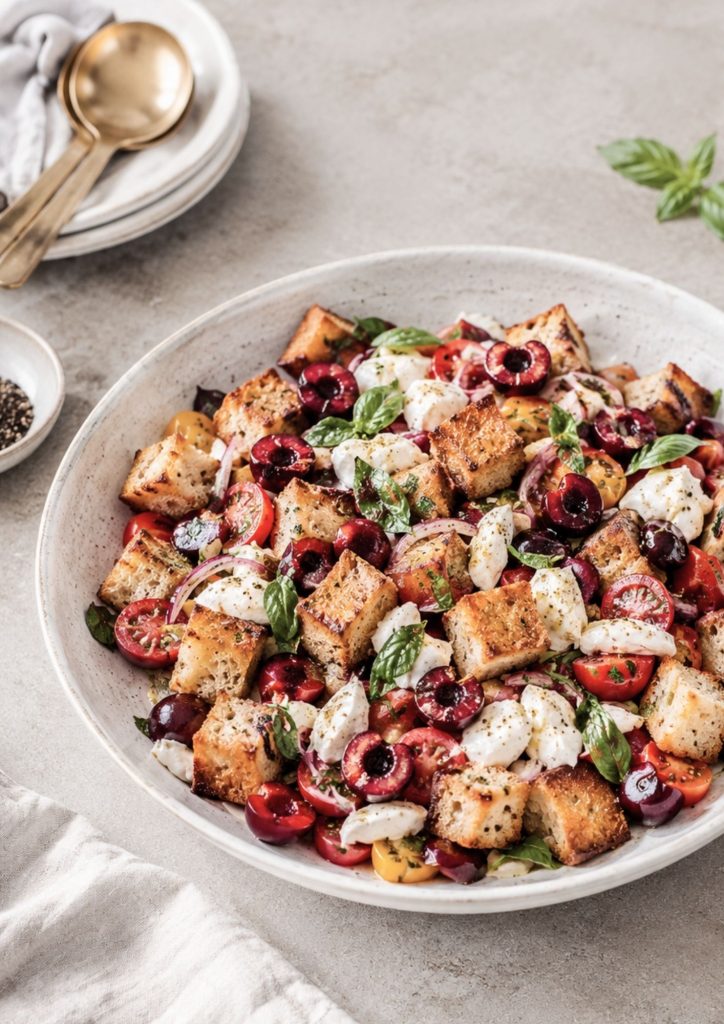
  • Panzanella Salad

    Panzanella Salad


    A bright, summery Italian-style bread salad with juicy tomatoes, sweet cherries, creamy mozzarella, crisp golden sourdough and plenty of fresh basil. Finished with a simple red wine vinaigrette, it’s fresh, colourful and full of contrasting textures.

    Serves: 4
    Time: 25 minutes

    Ingredients

    For the salad

    • 4 cups day-old sourdough or ciabatta, cut into cubes
    • 2 tbsp extra virgin olive oil
    • 2 cups mixed cherry tomatoes, halved
    • 1 cup fresh cherries, pitted and halved
    • 200g fresh mozzarella or bocconcini, torn
    • ½ small red onion, very thinly sliced
    • ½ cup fresh basil leaves, torn
    • Salt and freshly cracked black pepper

    For the dressing

    • ¼ cup extra virgin olive oil
    • 2 tbsp red wine vinegar
    • 1 small garlic clove, finely grated
    • ½ tsp dried oregano
    • 1 tsp honey
    • Pinch of sea salt
    • Freshly cracked black pepper

    Method

    1. Toast the bread. Heat the olive oil in a large frying pan over medium heat. Add the bread cubes, season with salt and pepper and cook for 5–7 minutes, tossing regularly, until golden and crisp. Set aside to cool slightly.
    2. Make the dressing. Whisk the olive oil, red wine vinegar, garlic, oregano and honey together in a small bowl. Season with salt and pepper.
    3. Build the salad. Add the tomatoes, cherries, red onion, mozzarella and toasted bread to a large serving bowl.
    4. Dress and toss. Pour over the dressing and gently toss until everything is lightly coated.
    5. Finish. Fold through the fresh basil and leave the salad to sit for 5–10 minutes before serving. This gives the bread just enough time to absorb the dressing while still keeping some crunch.

    Optional finish: a drizzle of balsamic glaze or a little extra virgin olive oil just before serving works beautifully.

    You Might Also Like

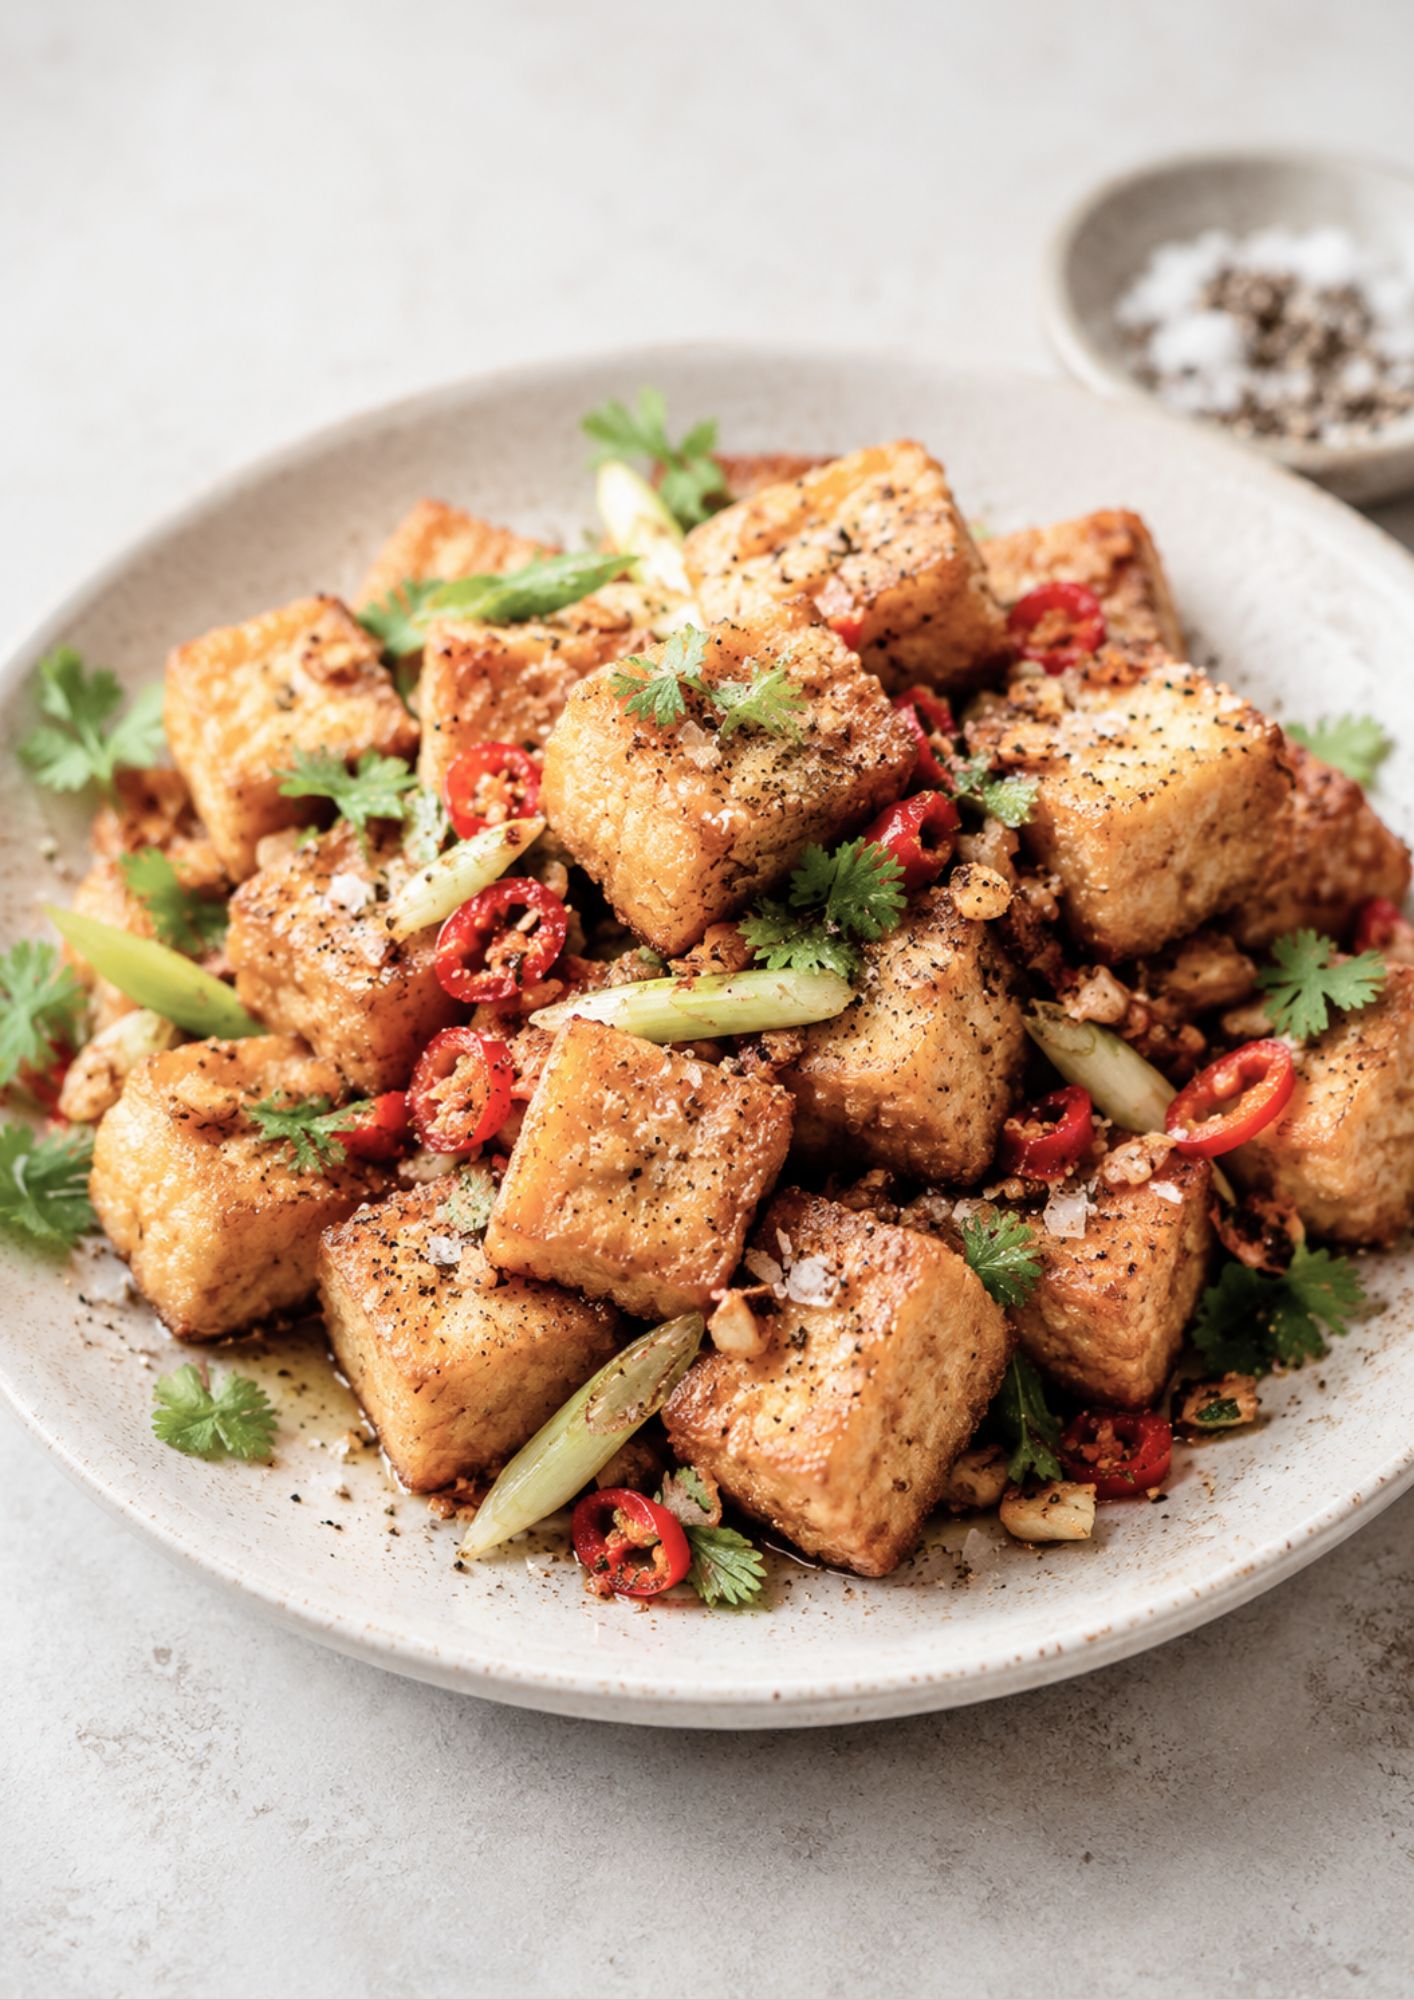
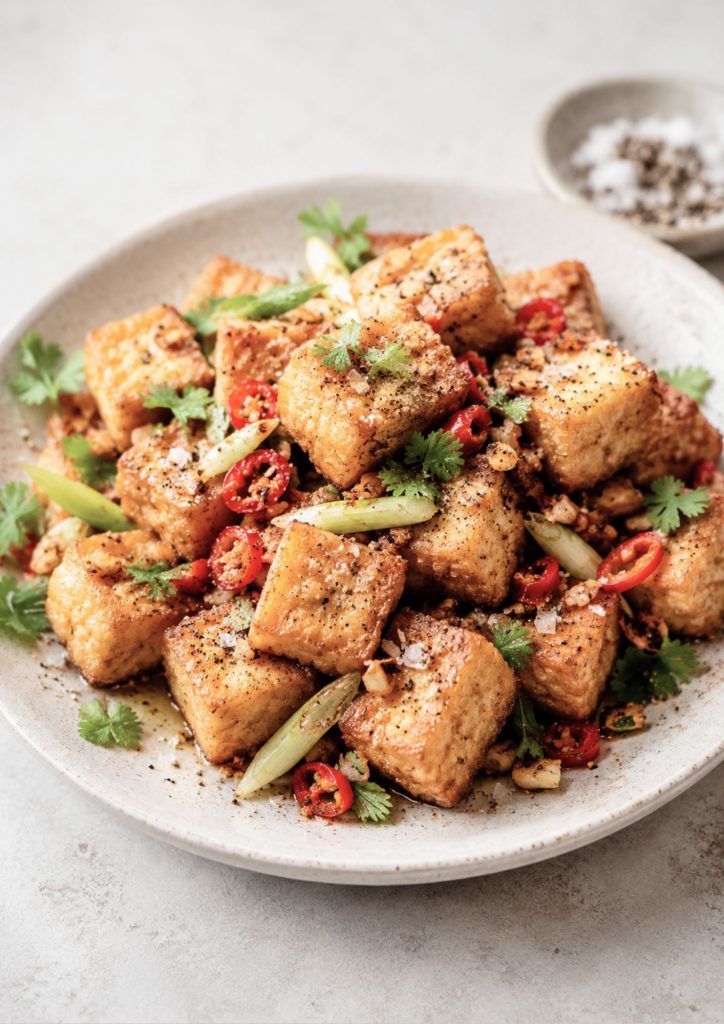
  • Salt & Pepper Tofu

    Salt & Pepper Tofu

    Crispy salt and pepper tofu coated in cornflour, garlic, black pepper and sea salt, then pan-fried until golden. Finished with chilli, spring onion, sesame seeds and fresh coriander, it is crunchy, savoury and lightly spicy.

    Ingredients

    For the tofu

    450 g firm tofu, pressed and cut into cubes

    3 tbsp cornflour

    1 tbsp rice flour or plain flour, optional for extra crunch

    1 tsp sea salt flakes

    1 tsp cracked black pepper

    ½ tsp white pepper, optional

    ½ tsp garlic powder

    2–3 tbsp neutral oil

    For the s&P topping

    2 garlic cloves, finely chopped

    1 long red chilli, finely sliced

    2 spring onions, sliced

    ½ tsp sea salt flakes

    ½ tsp cracked black pepper

    ½ tsp chilli flakes, optional

    1 tsp sesame seeds, optional

    Fresh coriander, to serve

    Method

    Press the tofu for 10–15 minutes, then pat dry and cut into bite-sized cubes.

    In a bowl, mix the cornflour, rice flour if using, sea salt, black pepper, white pepper and garlic powder. Add the tofu and gently toss until each piece is lightly coated.

    Heat the oil in a large non-stick pan over medium-high heat. Add the tofu in a single layer and cook for 8–10 minutes, turning every few minutes, until crisp and golden on all sides. Remove from the pan.

    In the same pan, add the garlic, chilli and spring onion. Cook for 1–2 minutes, stirring often, until fragrant and lightly golden.

    Return the tofu to the pan. Sprinkle over the extra salt, pepper, chilli flakes and sesame seeds. Toss everything together for another minute until the tofu is coated in the garlicky salt and pepper mixture.

    Serve warm with coriander, extra spring onion and your favourite dipping sauce.

    You Might Also Like

    Why This Salt and Pepper Tofu Works

    This salt and pepper tofu gets its signature crunch from a light cornflour coating that fries up golden and crispy, while the tofu stays soft and pillowy inside. Tossed through a fragrant mix of garlic, chilli and spring onion, it delivers big flavour in every bite without needing a deep fryer. If you love bold, veggie-friendly dinners, our Fish and Chips is another lighter twist on a takeaway favourite worth trying.

    Tips for the Best Salt and Pepper Tofu

    • Cut the tofu into even cubes so every piece cooks and crisps at the same rate.
    • Pat the tofu very dry with paper towel before coating, so the cornflour sticks and crisps rather than turning gluey.
    • Don’t crowd the pan when frying, work in batches so the tofu browns instead of steaming.
    • Toss the aromatics through while the tofu is still hot, so the garlic, chilli and spring onion cling to every piece.

    Storage and Reheating

    Leftover salt and pepper tofu is best eaten fresh while it’s crispy, but it will keep in an airtight container in the fridge for up to 2 days. Reheat in a hot pan or air fryer for a few minutes to bring back the crunch, as microwaving will make the coating go soft. This dish doesn’t freeze well, since the cornflour crust loses its texture once thawed.

    Serving Suggestions

    This salt and pepper tofu is a great match for steamed jasmine rice or noodles, which soak up the garlicky, chilli-flecked pan juices. For a lighter dinner, pile it onto a crunchy Asian slaw or alongside stir-fried greens. It also makes a fantastic starter or party snack served with toothpicks and a squeeze of lime. However you serve it, this crispy salt and pepper tofu is bound to disappear fast. Give it a try at your next dinner.

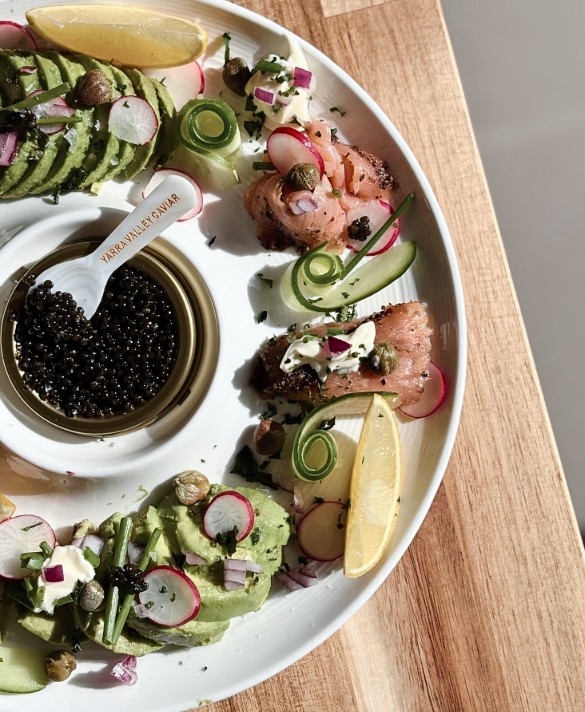
  • Smoked Salmon Starter

    Smoked Salmon Starter

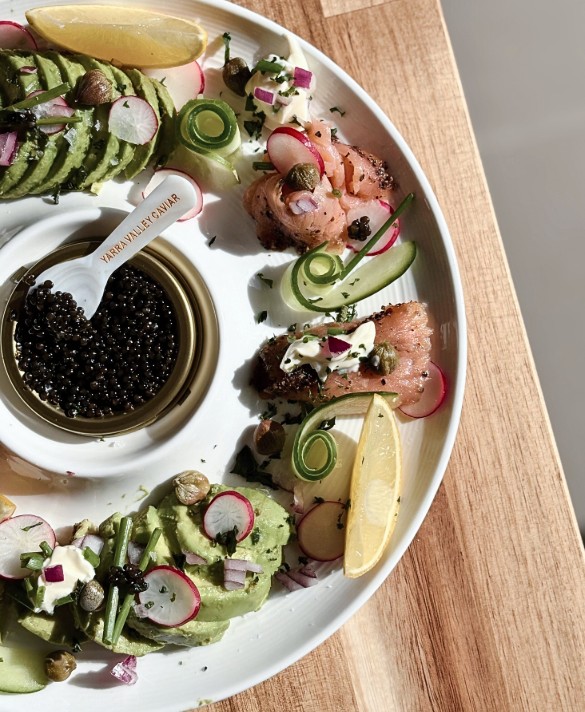
    An elegant caviar wreath starter layered with black pepper smoked salmon, avocado, cucumber ribbons, radish, crème fraîche, capers and fresh chives, served with lemon wedges and crisp water crackers.

    SERVES 4

    TIME: 20 mins

    ~ 300 calories per serve

    ~ 15g protein per serve

    Ingredients

    200 g black pepper–crusted smoked salmon

    1 ripe avocado, sliced

    3 radishes, thinly sliced

    1 Lebanese cucumber, spirals

    1 small red onion, diced

    ½ cup crème fraîche

    2 tbsp capers, drained

    1 lemon, cut into wedges

    30–50 g high-quality caviar

    Fresh chive sprigs

    Water crackers, to serve.

    Method

    Form the salmon wreath

    Arrange folds or curls of black pepper-crusted smoked salmon in a loose circle around the caviar dish, forming the wreath base.

    Layer in the extras

    Tuck avocado slices, spirals of fresh cucumber, radish rounds, and lemon wedges into the salmon ring, evenly spacing for balance.

    Add texture and contrast

    Spoon small dollops of crème fraîche around the wreath. Scatter red onion slices and capers throughout. Season with a little extra cracked black pepper.

    Garnish with fresh chive sprigs and serve with crackers.

    You Might Also Like

  • Stuffed Eggplants

    Stuffed Eggplants

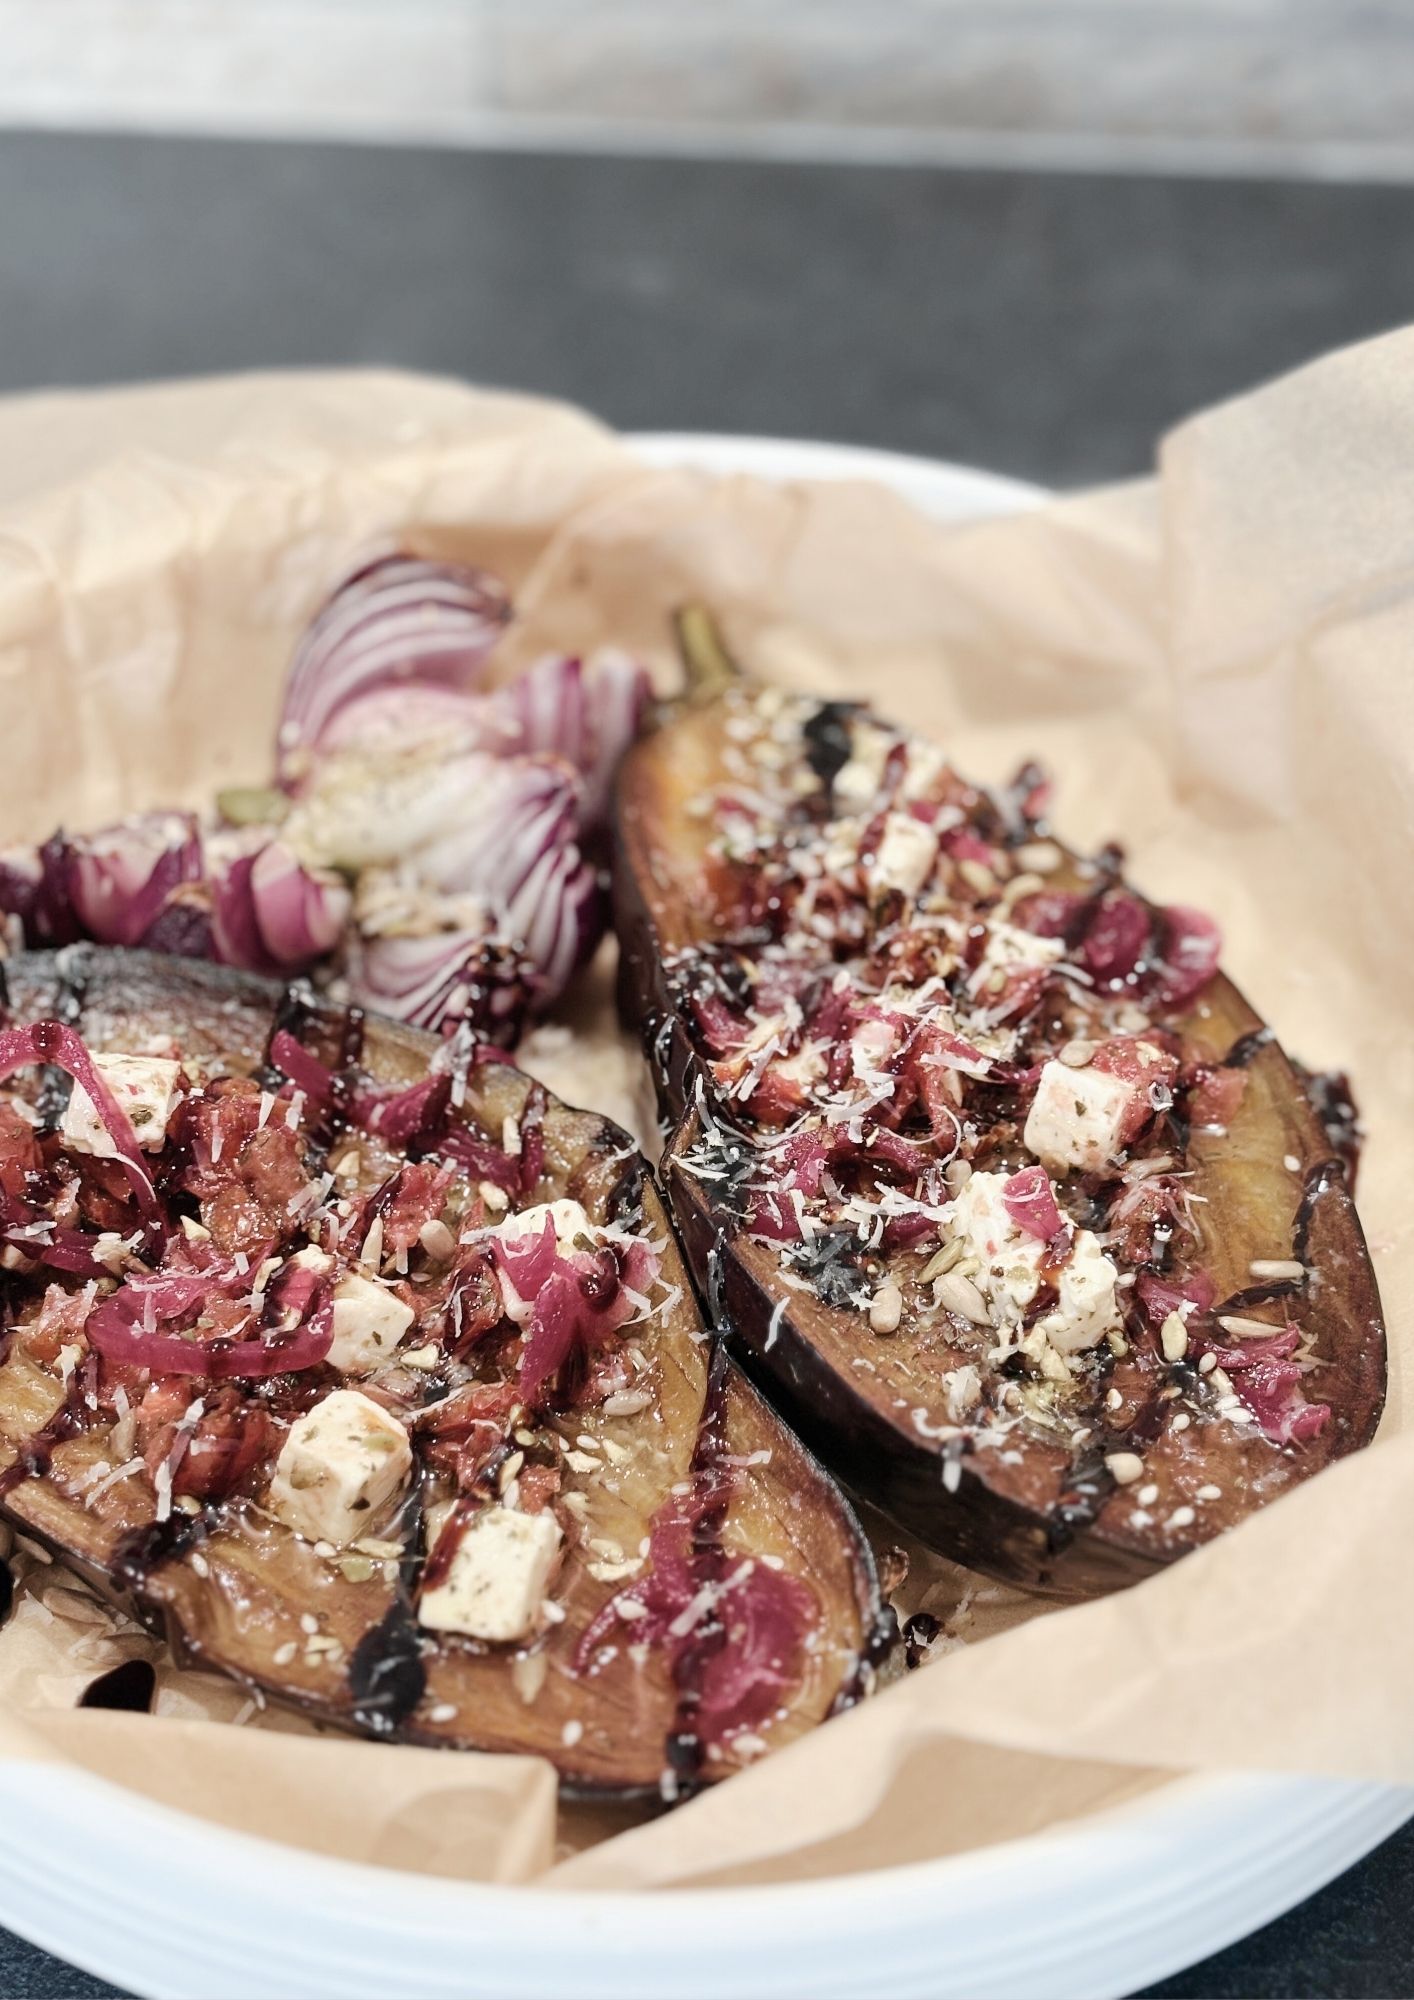
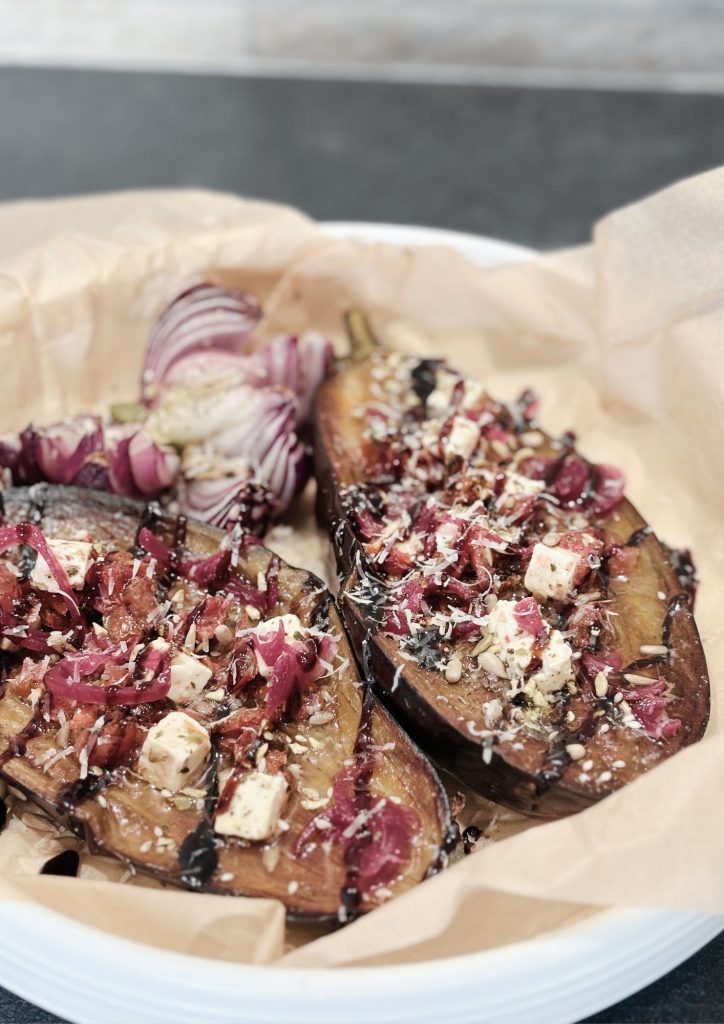
    Roasted eggplant topped with crumbled feta, sun-dried tomatoes, pickled red onion, fresh herbs, seeds, dukkah and balsamic glaze. They are savoury, tangy and colourful, with creamy feta, smoky eggplant and a crunchy seed topping.

    SERVES 4

    TIME: 30 MINUTES

    ~ 210 calories per serve

    ~ 7g protein per serve

    Ingredients

    1 large eggplant, sliced into 1–1.5cm thick rounds

    Olive oil

    Salt & pepper

    2 tbsp balsamic glaze

    Toppings:

    100g feta, crumbled

    4–5 sun-dried tomatoes

    ¼ cup pickled red onion

    Handful fresh herbs

    1 tbsp sunflower seeds

    1 tbsp pumpkin seeds

    1–2 tbsp dukkah

    Method

    Roast the eggplant:

    Preheat oven to 200°C (fan).

    Brush eggplant slices with olive oil on both sides.

    Season with salt and pepper. Roast on a lined tray for 25–30 minutes, flipping halfway, until soft and golden.

    Assemble toppings:

    While eggplant is roasting, prep toppings:

    Crumble feta. Chop sun-dried tomatoes. Drain pickled onions. Toast seeds lightly in a dry pan.

    Plate it up:

    Arrange roasted eggplant on a serving plate. Drizzle with balsamic glaze. Scatter over feta, sun-dried tomato, pickled onion, herbs, seeds, and a generous sprinkle of dukkah. Salt & pepper to taste.

    You Might Also Like

  • Hot Honey Cheese Toastie

    Hot Honey Cheese Toastie

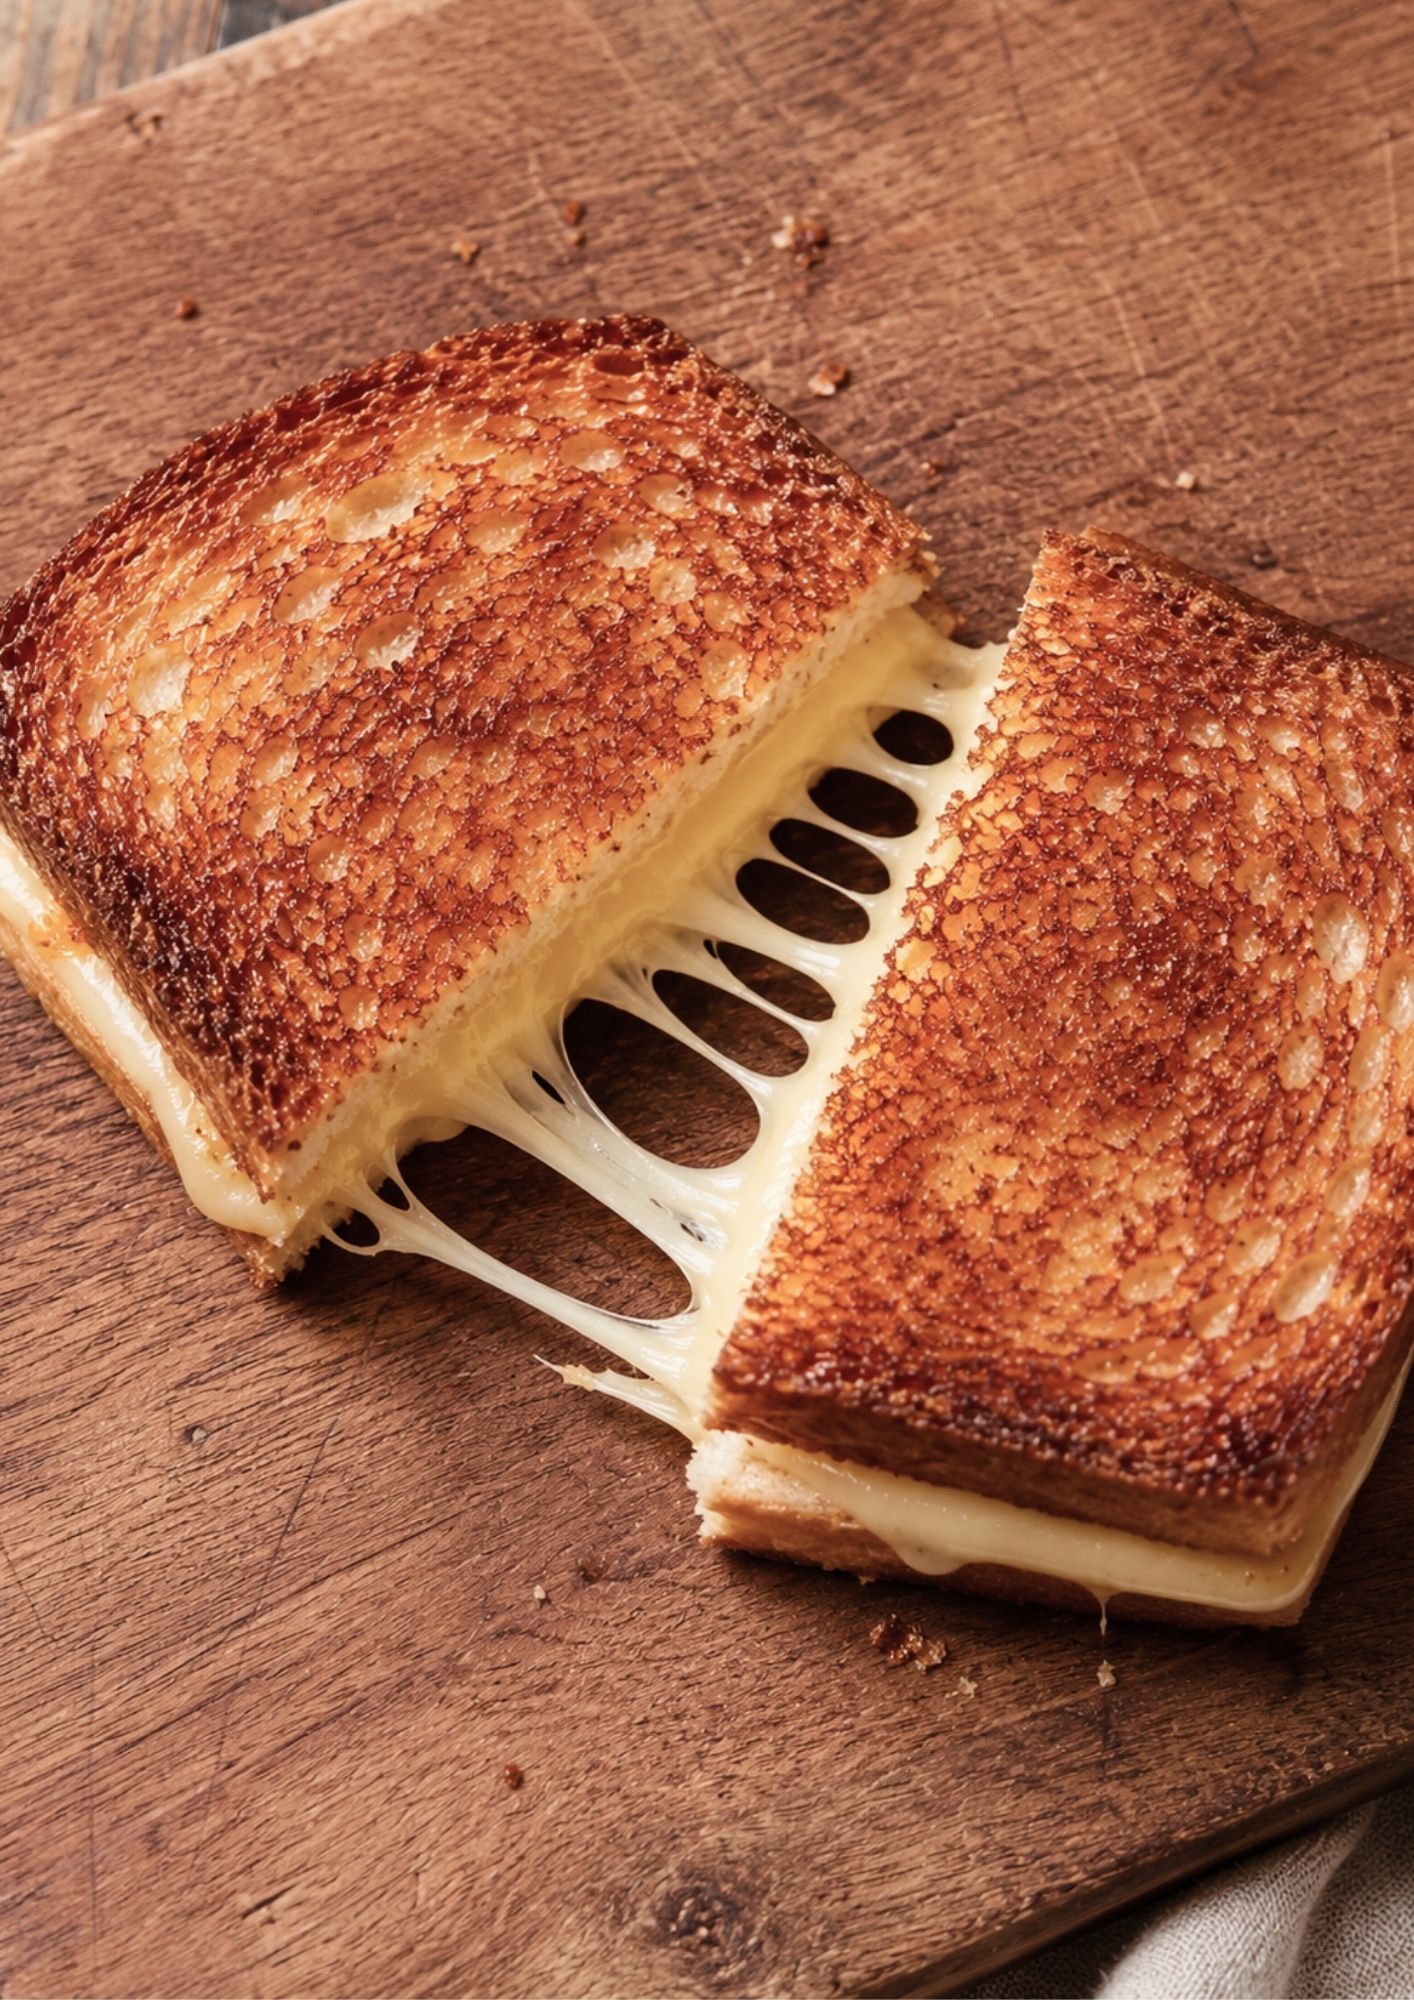
    A golden hot honey grilled cheese with melty mozzarella or cheddar, parmesan, chilli flakes and buttery crisp bread – sweet, salty, spicy and very hard to stop at one bite.

    SERVES 2

    TIME: 15 MINUTES

    ~ 825 calories per serve

    ~ 35g protein per serve

    Ingredients

    Thick slices sourdough or white bread

    1½ cups grated mozzarella or cheddar

    ¼ cup grated parmesan

    2 tbsp butter, softened

    1–2 tbsp hot honey

    ½ tsp chilli flakes

    Pinch of salt

    Method

    Butter one side of each slice of bread.

    Place cheese between two slices of bread, buttered sides facing out.

    Heat a pan over medium-low heat. Cook the toasties for 3–4 minutes each side, pressing gently, until deeply golden and crisp.

    Drizzle hot honey over the top while warm, then sprinkle with chilli flakes, parmesan and a pinch of salt.

    Slice and serve while the cheese is melted and stretchy.

    Hot Honey Cheese Toastie — Everyday Nourished recipe

    You Might Also Like

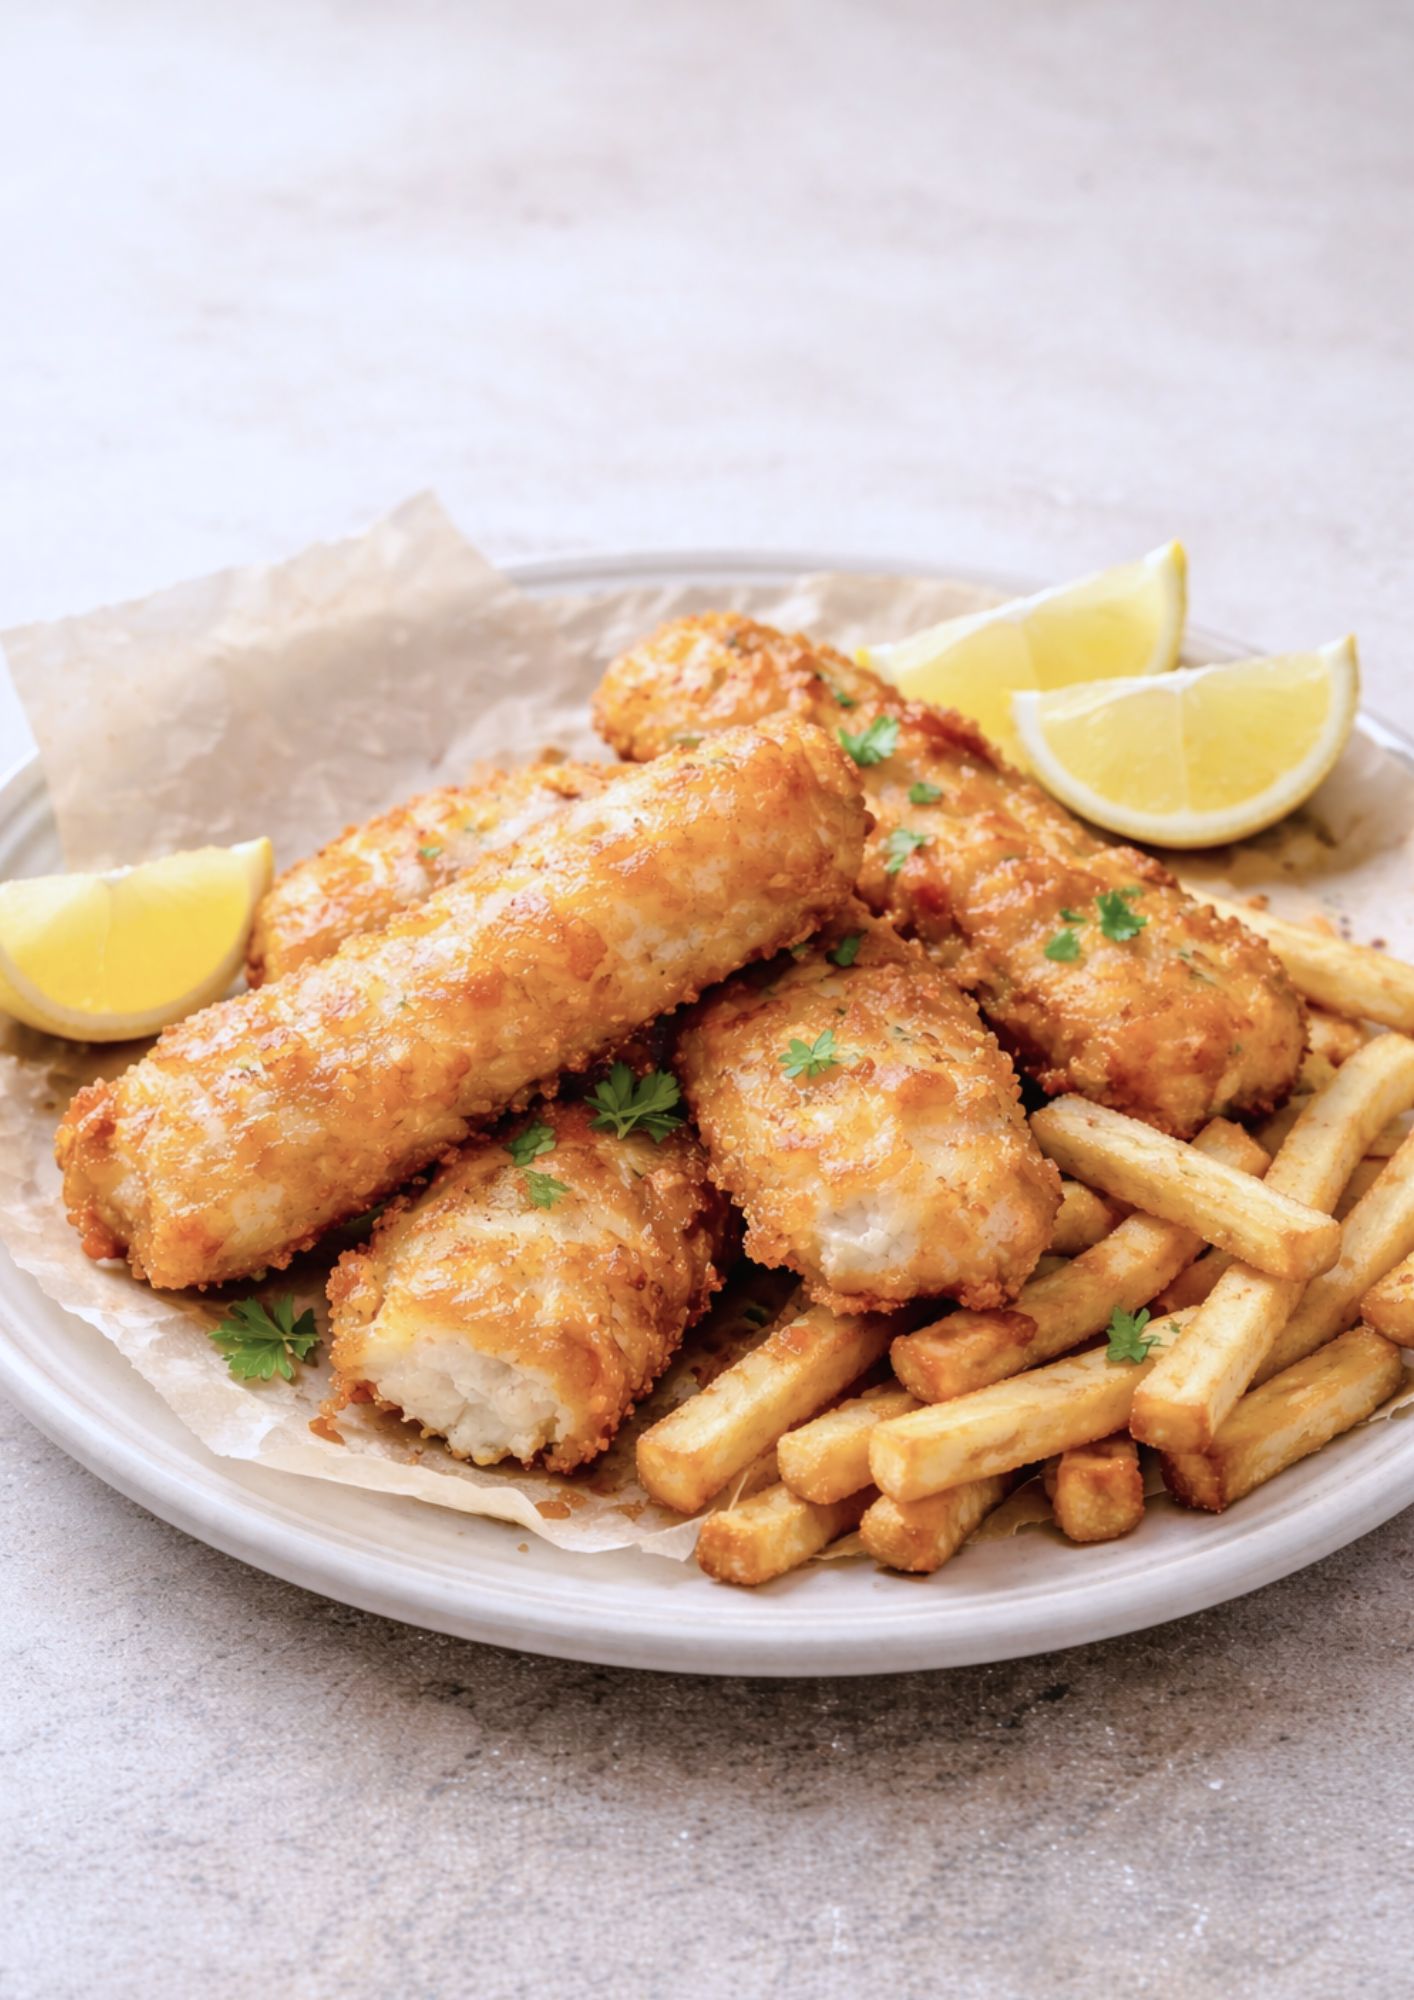
  • Fish & Chips

    Fish & Chips

    Homemade fish and chips made with crispy seasoned potato chips and golden panko-crusted white fish. Lightly baked or air-fried with olive oil, lemon zest, paprika, garlic and herbs, it is fresh, crunchy and comforting without feeling too heavy.

    SERVES 4

    TIME: 30 MINS

    ~ 560 calories per serve

    ~ 38g protein per serve

    Ingredients

    For the Chips:

    4 medium potatoes

    1 ½ tbsp olive oil

    1 tsp sea salt

    ½ tsp cracked black pepper

    ½ tsp paprika

    ½ tsp garlic powder

    1 tbsp fresh rosemary or parsley, finely chopped

    For the Fish:

    4 firm white fish fillets, such as snapper, barramundi, cod, hoki or flathead

    1 egg, whisked

    ½ cup wholemeal flour, plain flour or almond meal

    1 cup panko breadcrumbs

    1 tsp lemon zest

    ½ tsp garlic powder

    ½ tsp paprika

    Salt and pepper, to taste

    Olive oil spray or a light drizzle of olive oil

    Method

    Preheat the oven to 220°C. Line two baking trays with baking paper.

    Place the potato wedges on one tray. Drizzle with olive oil, then sprinkle over the salt, pepper, paprika, garlic powder and herbs. Toss well, spread into a single layer and bake for 35–40 minutes, turning halfway, until golden and crisp at the edges.

    Meanwhile, prepare the fish. Pat the fillets dry with paper towel. Place the flour or almond meal in one shallow bowl, the whisked egg in another, and the panko breadcrumbs in a third. Stir the lemon zest, garlic powder, paprika, salt and pepper through the breadcrumbs.

    Coat each fish fillet lightly in flour, dip into the egg, then press into the seasoned breadcrumbs until evenly coated. Place on the second tray and lightly spray or drizzle with olive oil.

    Bake the fish for 12–16 minutes, depending on thickness, until golden and cooked through. The fish should flake easily with a fork.

    To make the tartare, mix the Greek yoghurt, pickles, capers, Dijon, lemon juice and herbs in a small bowl. Season to taste.

    Serve the fish with the golden chips, yoghurt tartare, lemon wedges and a fresh green salad.

    You Might Also Like

    Why This Fish and Chips Recipe Works

    This fish and chips recipe swaps deep-frying for a lighter, oven-baked or air-fried method, without losing any of the crunch. The potatoes turn golden and crispy on the outside while staying fluffy inside, and the panko-crusted fish fillets bake up crunchy and flaky in the same amount of time. If you love comforting, crowd-pleasing dinners, our Salt and Pepper Tofu is another easy weeknight favourite worth trying.

    Tips for the Best Fish and Chips

    • Cut the potatoes into even-sized chips so they cook at the same rate and crisp up evenly in the oven or air fryer.
    • Pat the fish fillets dry before crumbing so the panko coating sticks properly and turns golden and crunchy.
    • Use a wire rack on your baking tray so hot air circulates underneath the chips and fish, giving you an extra-crispy finish.
    • Season the chips with salt as soon as they come out of the oven, while they are still hot, so it sticks better.

    Storage and Reheating

    Leftover fish and chips can be stored in an airtight container in the fridge for up to two days. To reheat, spread the chips and fish out on a baking tray and warm in a hot oven or air fryer for a few minutes until crisp again, rather than using the microwave, which will make everything soft and soggy. This fish and chips recipe is best enjoyed fresh, but reheated leftovers still make a great lunch the next day.

    Serving Suggestions

    Serve this fish and chips with a wedge of lemon, a spoonful of tartare sauce and a simple side salad or mushy peas for a classic pub-style dinner at home. It also pairs well with a light coleslaw if you want to add some crunch and freshness to the plate. However you serve it, this recipe is a lighter take on a takeaway favourite that the whole family will enjoy.

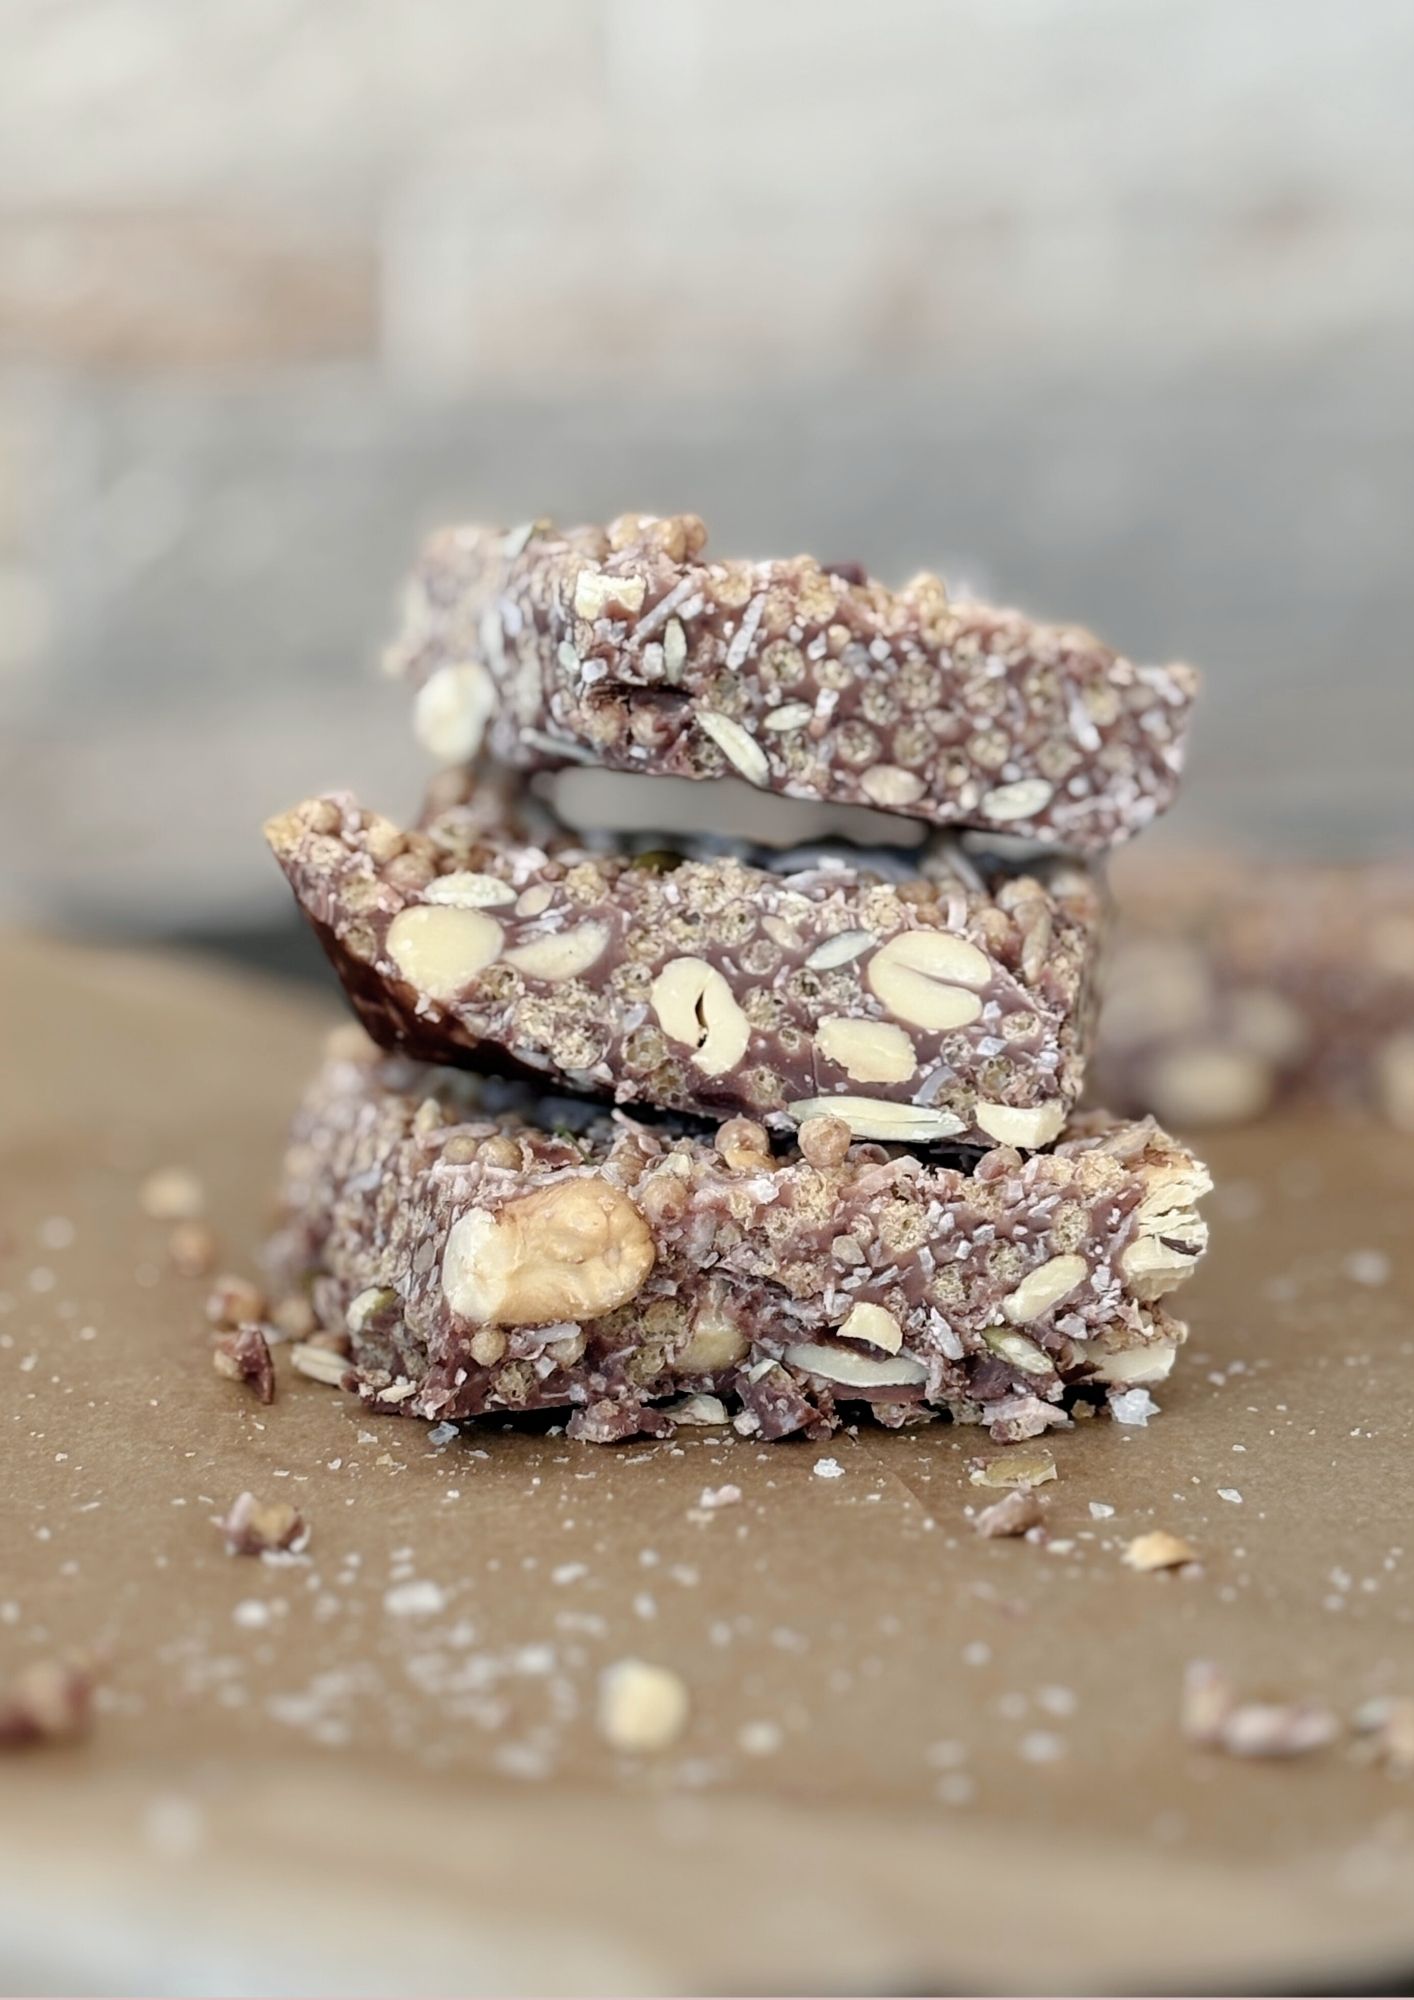
  • Protein Puff Slice

    Protein Puff Slice

    A crunchy protein puff slice made with protein puffs, sunflower seeds, cashews, coconut, nut butter, honey and vanilla. It is chewy, nutty and lightly sweet, with a satisfying crunch perfect for snacks, lunchboxes or an easy make-ahead treat.

    MAKES 12 PIECES

    TIME: 20 MINUTES

    ~ 200 calories per serve

    ~ 5g protein per serve

    Ingredients

    2 cups protein puffs (like rice or quinoa puffs)

    ½ cup sunflower seeds

    ½ cup cashews, roughly chopped

    ½ cup unsweetened coconut shreds

    ¼ cup coconut oil, melted

    ¼ cup natural nut butter (almond or peanut)

    ¼ cup honey or maple syrup

    1 tsp vanilla extract

    Pinch of salt

    Method

    Prepare base: In a large bowl, combine protein puffs, sunflower seeds, cashews, and coconut shreds.

    Make binder: In a small saucepan over low heat, gently melt coconut oil, nut butter, honey/maple syrup, vanilla, and salt until smooth and combined.

    Mix: Pour the melted mixture over dry ingredients and stir well to coat everything evenly.

    Set slice: Press mixture firmly into a lined 20×20 cm (8×8 inch) square tin. Use the back of a spoon or spatula to compress firmly.

    Chill: Refrigerate for at least 1 hour until set and firm.

    Serve: Cut into bars and store in an airtight container in the fridge.

    You Might Also Like

  • Pecan Maple Brownies

    Pecan Maple Brownies

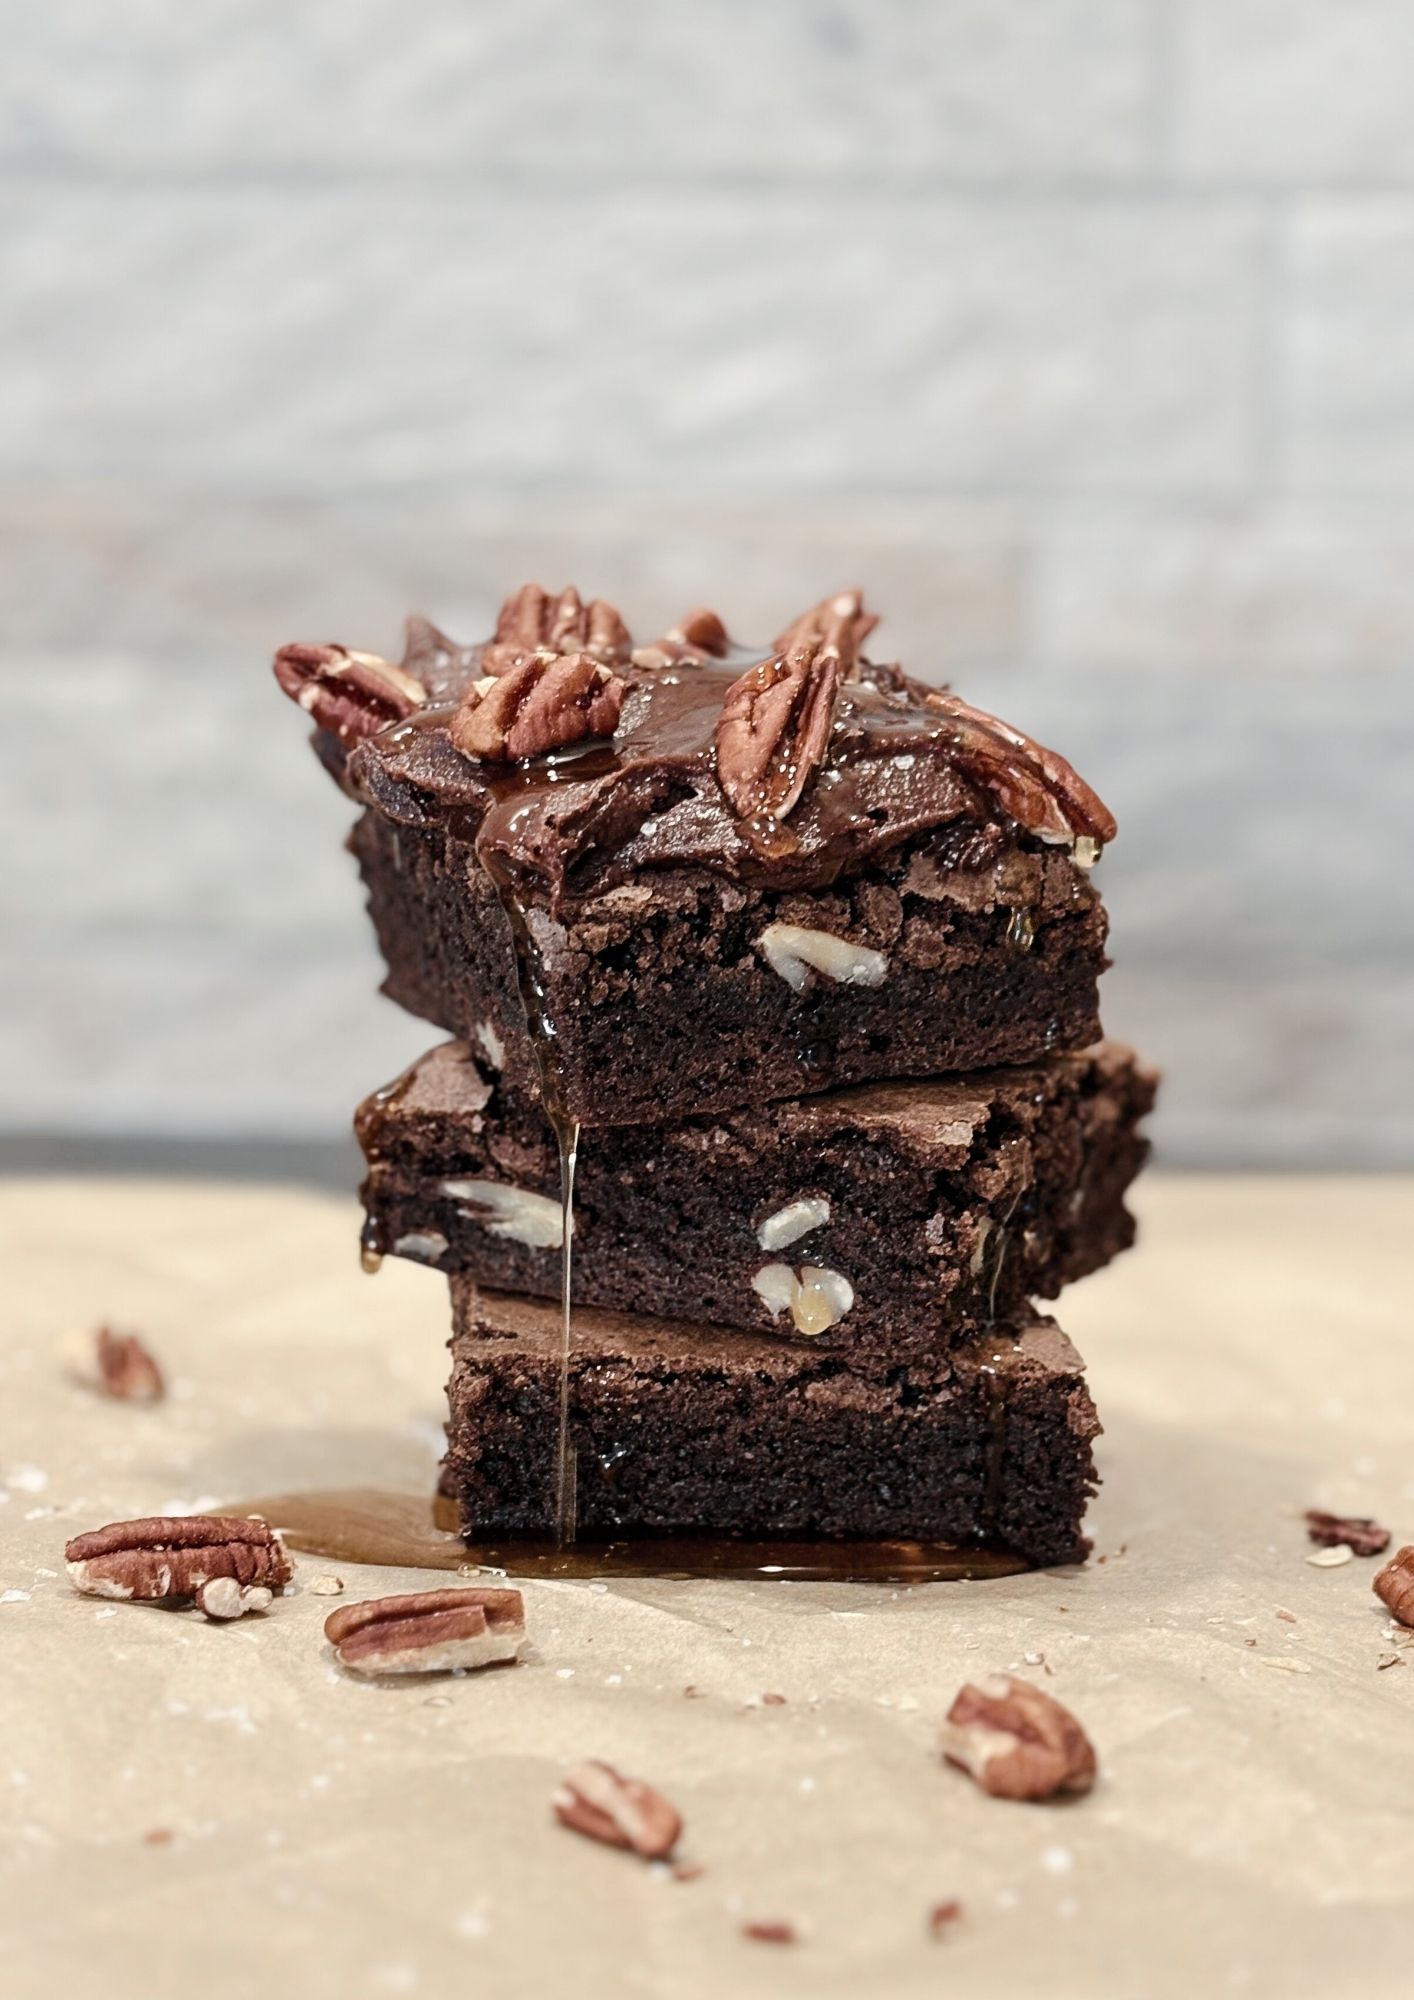
    Rich maple pecan brownies made with dark chocolate, butter, maple syrup, brown sugar and toasted pecans. They are fudgy, glossy and indulgent, with a deep chocolate flavour, crunchy pecans and a sweet maple finish.

    MAKES 16 BROWNIES
    TIME: 45 MINUTES
    ~ 300 calories per serve
    ~ 4g protein per serve

    Ingredients

    180g dark chocolate (70%)

    150g unsalted butter

    ¾ cup maple syrup

    ½ cup brown sugar (lightly packed)

    3 large eggs

    1 tsp vanilla extract

    ¾ cup plain flour

    ¼ cup cocoa powder

    ½ tsp salt

    ¾ cup pecans, chopped

    Extra pecans for topping

    Flaky salt (optional)

    Method

    Preheat oven: 170°C (fan). Line a 20cm square tin with baking paper.

    Melt chocolate & butter: In a saucepan or heatproof bowl over simmering water, melt together chocolate and butter until glossy.

    Mix wet ingredients: Stir in maple syrup, brown sugar, eggs (one at a time), and vanilla.

    Add dry ingredients: Sift in flour, cocoa, and salt. Fold gently until just combined. Stir in pecans.

    Bake: Pour into the tin, smooth the top, and sprinkle extra pecans if using. Bake for 25–30 minutes — edges should be set, middle slightly soft. Wait to cool before slicing.

    You Might Also Like